How to Read a Tape Measure (Without Guessing at the Little Lines)
Licensed GC Jake Morrison explains how to read a tape measure the way trades actually do — the fraction ladder, a full 16ths chart with decimals and millimeters, the hidden stud marks and black diamonds, and why the hook is supposed to wiggle.
Updated
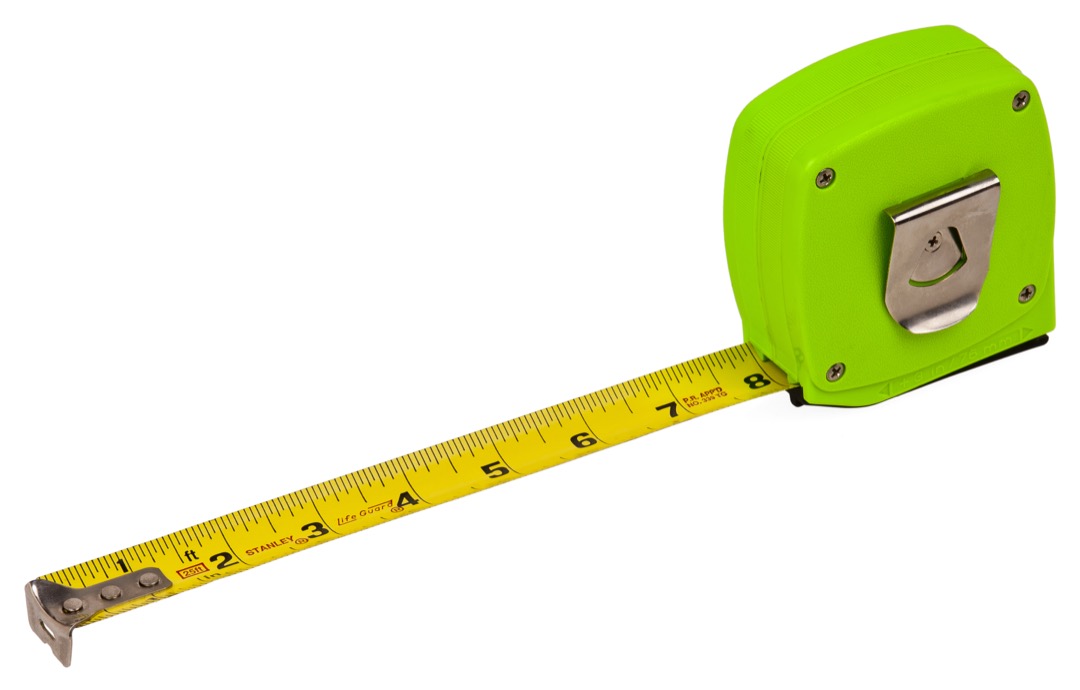
I have watched more expensive mistakes come from misreading a tape measure than from any power tool on a jobsite. Not dramatic mistakes — nobody gets hurt — just a cabinet stile cut an eighth short, a stair riser that throws off the whole run, a countertop template that ends up unusable. The saw did its job perfectly. The problem happened three minutes earlier, when someone looked at a blur of little lines and guessed.
The good news is that reading a tape is not a talent. It is a system, and it takes about ten minutes to learn properly. In this guide I will walk you through what every mark on the blade means, give you a complete chart of all sixteen positions in an inch with their decimal and millimeter equivalents, and then cover the parts almost nobody explains: why the hook is supposed to wiggle, what the black diamonds are for, how to measure an opening without bending the tape into the corner, and what accuracy standard your tape is actually built to. By the end you will read any tape faster than the person you are working with.
What the Marks on a Tape Measure Actually Mean
Every standard American tape uses the same visual system, and once you see it as a system the blade stops looking like noise. The height of a line tells you its value. Longer means bigger fraction.
At the top of the hierarchy are the whole inches — the longest lines, each with a number printed beside it. Halfway between any two inch marks sits the next-longest line: the half inch. Split each half again and you get the quarters, marked by lines one step shorter. Split the quarters and you get the eighths, shorter again. Split the eighths one final time and you have the sixteenths, the shortest lines on the blade.
Count the spaces and every standard inch contains sixteen of them, which means fifteen lines between one whole inch and the next. That is the whole design. Some premium tapes divide the first foot — or occasionally the entire blade — into thirty-seconds, adding one more level of even shorter lines. Some tapes aimed at beginners print the fractions right on the blade. The underlying ladder never changes.
The Fraction Ladder
Here is the same idea stated as a sequence, because seeing it written out is what makes it click for most people:
- One line halfway across the inch: 1/2
- Add the lines a quarter of the way across: 1/4 and 3/4
- Add the next level down: 1/8, 3/8, 5/8, 7/8
- Add the shortest lines: 1/16, 3/16, 5/16, 7/16, 9/16, 11/16, 13/16, 15/16
Notice that each new level only introduces odd numerators. That is not a coincidence — it is the reason the system works. Any even numerator reduces down to a level you already have. Four sixteenths is a quarter. Eight sixteenths is a half. That observation is the foundation of the counting trick in a moment, and it is why an experienced carpenter can call out “eleven sixteenths” without hesitating: eleven is odd, so it cannot reduce, so that is the final answer.
The Complete Tape Measure Fraction Chart
This is the reference table I wish someone had taped inside my first toolbox. It lists all sixteen positions in an inch, the reduced fraction you would actually say out loud, the decimal equivalent for anyone entering numbers into a calculator or a CNC, and the millimeter equivalent for working with metric specs.
| Marks past the inch | Fraction | Reduced | Decimal | Millimeters |
|---|---|---|---|---|
| 1 | 1/16 | 1/16 | 0.0625 | 1.59 |
| 2 | 2/16 | 1/8 | 0.125 | 3.18 |
| 3 | 3/16 | 3/16 | 0.1875 | 4.76 |
| 4 | 4/16 | 1/4 | 0.25 | 6.35 |
| 5 | 5/16 | 5/16 | 0.3125 | 7.94 |
| 6 | 6/16 | 3/8 | 0.375 | 9.53 |
| 7 | 7/16 | 7/16 | 0.4375 | 11.11 |
| 8 | 8/16 | 1/2 | 0.5 | 12.70 |
| 9 | 9/16 | 9/16 | 0.5625 | 14.29 |
| 10 | 10/16 | 5/8 | 0.625 | 15.88 |
| 11 | 11/16 | 11/16 | 0.6875 | 17.46 |
| 12 | 12/16 | 3/4 | 0.75 | 19.05 |
| 13 | 13/16 | 13/16 | 0.8125 | 20.64 |
| 14 | 14/16 | 7/8 | 0.875 | 22.23 |
| 15 | 15/16 | 15/16 | 0.9375 | 23.81 |
| 16 | 16/16 | 1 inch | 1.0 | 25.40 |
The bolded rows are the ones with taller lines on the blade. Everything in between is a sixteenth, and reads as a sixteenth.
Going the Other Way: Decimals to Tape Marks
The chart above answers “what is 3/8 as a decimal,” but the question that actually stalls people on a jobsite is the reverse. A drawing calls for 0.4375. A digital caliper reads 0.8125. A cut list generated in a spreadsheet gives you 2.625 inches. None of those numbers appear anywhere on your blade, and you need to find the right line.
The conversion is one step: multiply the decimal part by 16, and that is how many small lines past the whole inch you count.
- 2.625 → 0.625 × 16 = 10 → ten lines past the 2, which is 2 and 5/8
- 0.4375 → 0.4375 × 16 = 7 → seven lines past zero, which is 7/16
- 0.8125 → 0.8125 × 16 = 13 → thirteen lines, which is 13/16
If the multiplication does not land on a whole number, your decimal is finer than a sixteenth and you have to decide which side to round to. Multiply by 32 instead and see if that comes out whole — plenty of tapes divide the first foot into thirty-seconds. If it still does not, the drawing was probably produced in metric and converted, and you are better off reading the millimeter edge of the blade directly than chasing a fraction that does not exist.
The Counting Trick That Makes Fractions Click
Here is the method I teach every apprentice, and it replaces recognition with arithmetic so simple you can do it while holding a circular saw.
Count the small lines, then put the count over 16.
Do not try to identify whether a mark is a quarter or a three-eighths by its height. Just find the last numbered inch you passed and count the little lines from there. Then put that number over sixteen and reduce if you can.
Say your board edge lands six lines past the 9. That is 9 and 6/16. Six is even, so halve both numbers: 3/8. Your measurement is 9 and 3/8 inches. Say it lands eleven lines past the 9. That is 9 and 11/16, eleven is odd, nothing reduces, and you are done: 9 and 11/16 inches.
The reason this works better than pattern recognition is that it never fails you. Bad light, a dusty blade, an awkward angle, a worn spot in the printing — none of it matters, because you are counting identical small lines rather than judging subtle differences in height. Recognition will come on its own after a few weeks of this, and you will find yourself reading the common marks instantly. The counting method just stays in your back pocket for the measurements that land somewhere unfamiliar.
Reducing Fractions Without Thinking About It
Reducing sounds like a math step but it is really just four rules you will memorize by using them:
- Even over 16? Halve both. 6/16 becomes 3/8.
- Still even? Halve again. 4/16 becomes 2/8 becomes 1/4.
- Odd numerator? You are already done. 5/16, 7/16, 9/16, 11/16, 13/16, 15/16 never reduce.
- 8/16 is always 1/2, and that is the one you will use most.
Reading Feet and Inches on a 25-Foot Tape
Most American tapes number every inch continuously from the hook — 1 through 12, then 13, 14, and onward — while also marking the feet. So the mark you would call one foot two inches also carries the number 14. The foot marks are typically printed in a different color or inside a box, often with a small notation like “1F” or “2F.”
The confusion this creates is real and it goes both directions. Someone reads 38 on the blade and writes down 38 inches, which is correct. Someone else glances at the same spot, sees the nearby 3F mark, and writes down 3 feet 8 inches — which is 44 inches, six inches off. When you are calling measurements to someone cutting, state the unit every time. “Thirty-eight inches” and “three foot two” are unambiguous. “Thirty-eight” alone is not.
For anything you are going to write on a cut list, I recommend converting to inches and staying there. Inches add and subtract without borrowing across a base-12 boundary, which is where mental arithmetic errors creep in. If you are figuring board footage or a cut list for a project, our lumber calculator handles the conversion and the math for you, and the 2x4 actual size chart covers the other classic measuring trap: nominal lumber dimensions are not the real ones.
Reading Millimeters and Centimeters
If your tape has a metric edge, it is genuinely simpler, because there are no fractions anywhere. Each numbered mark is a centimeter, and each centimeter is divided into ten equal millimeters. The slightly longer line in the middle of each centimeter marks five millimeters and exists only to help your eye find the halfway point quickly.
To read it, note the last centimeter you passed and count millimeter lines past it. Three lines past the 47 is 473 millimeters, which you can also state as 47.3 centimeters. Larger numbers along the blade usually show total millimeters or meters-and-centimeters depending on the manufacturer.
Dual-scale tapes carry imperial on the top edge and metric on the bottom. They are worth owning if you assemble imported furniture, work from appliance spec sheets, or use European hardware — all of which are dimensioned in millimeters. Just never mix scales inside a single measurement, which is easier to do than it sounds when you are reading fast.
The Features on Your Tape You Have Never Used
This is the section that separates a guide written by someone who owns a tape from one written by someone who has used one for twenty years. Almost every one of these features is on the tape in your drawer right now.
The Hook Is Supposed to Move
Pull on the metal hook at the end of your blade. It slides back and forth a little. That is not wear and it is not a defect — it is the most elegant piece of engineering on the tool.
The hook slides by exactly its own thickness, about a sixteenth of an inch. Hook it over the end of a board and pull, and the hook slides outward that sixteenth, so the blade reads from the board’s true outside edge. Push the hook against a wall instead, and it slides inward that same sixteenth, so the blade reads from the wall’s face. The design is called true zero, and it means a single tape gives correct readings whether you pull or push, with no mental correction from you.
The practical warning: never crimp that hook to stop the rattle. People do it constantly because the play feels like sloppiness. Crimp it and every inside measurement you take from then on will be a sixteenth of an inch short, silently, forever. If your hook is bent from a drop, replace the tape — it is a cheap tool and a bent hook costs more in wasted material than a new one costs to buy.
The Hook Does Three More Jobs
Look closely at the hook itself. The bottom edge is usually serrated — those teeth are a scribe. Press and drag and you can scratch a mark into wood or drywall without reaching for a pencil, which matters when your pencil is on the other side of the room.
There is normally a slot or a hole through the hook too. That catches a nail head or a screw, so you can anchor the tape and measure solo across a long span, or swing an arc to strike a curve. And the hook’s own thickness makes a serviceable depth gauge in a pinch.
The Black Diamonds Every 19.2 Inches
The little black diamonds start at 19.2 inches and repeat at 38.4, 57.6, 76.8, and 96. Almost nobody knows what they are for.
Sheet goods are 96 inches long. Divide 96 by five and you get 19.2. So five equally spaced members land exactly on the seams of every sheet. Engineered I-joists and roof trusses are frequently specified at 19.2 inches on center for precisely that reason: it uses fewer joists than 16-inch spacing while still landing under every sheet edge. If your house is framed at 16 or 24 inches on center, you will never touch those diamonds. If you are laying out an engineered floor system, they save you from doing decimal math on a ladder.
The Red Numbers Every 16 Inches
Numbers printed in red, or set inside a red box, appear at 16, 32, 48, 64, 80, and 96 inches and keep repeating. Sixteen inches on center is the dominant stud and joist spacing in American residential construction.
The value is not that the tape does math for you — you know 16, 32, 48. The value is that you pull the tape once and mark every red number in a single pass. Measuring 16 inches, marking, moving the tape, measuring 16 more, marking again is how cumulative error gets into a wall. One pull, six marks, no drift. When you are laying out on a workbench or across a floor, that one-pull discipline is the difference between framing that goes together and framing that fights you.
The Number Printed on the Case
Turn your tape over. Somewhere on the housing there is a number — usually 3” or 3-1/8”. That is the length of the case itself, and it exists for one job: inside measurements.
To measure a window opening, a door rough opening, or the inside of a cabinet, butt the back of the case against one side, pull the tape to the opposite face, read the blade there, and add the case length. If the blade reads 30-1/2 and the case says 3, the opening is 33-1/2 inches.
Compare that to the alternatives. Bending the tape into the corner and eyeballing where the bend lands is a guess dressed up as a measurement. Measuring in two halves and adding them introduces error twice. Openings need to be right to a sixteenth or your trim reveals will be visibly uneven, and this is exactly where an approximate answer costs you a piece of casing. If your case has no number printed on it, measure it once with a second tape and write it on the housing with a paint pen.
How Accurate Is Your Tape, Really?
Here is a fact that surprises most people: tape measures have a published accuracy standard, and two perfectly good tapes are allowed to disagree with each other.
Under OIML R 35-1, the international standard for material measures of length, tapes are graded into accuracy classes with defined maximum permissible error:
| Accuracy class | Maximum error | Error over 5 meters |
|---|---|---|
| Class I | ±(0.1 + 0.1L) mm | about ±0.6 mm |
| Class II | ±(0.3 + 0.2L) mm | about ±1.3 mm |
In those formulas, L is the measured length in meters, rounded up to the next whole meter. Class II covers most trade-grade pocket tapes. Tapes sold in the US often carry no class marking at all, which is not an accusation of inaccuracy — it means the manufacturer has not certified to that scheme, since the marking is driven by European market requirements.
The jobsite lesson is straightforward and it costs nothing to apply: use one tape for the whole project. If you measure the opening with your tape and your partner cuts from theirs, you are stacking two independent tolerances, and over a long run that shows up as a gap you can see. This is the same reason a shop keeps one tape at the miter saw station rather than whichever one is closest to hand. Consistency beats certified accuracy for the work most of us do.
The Mistakes I See Most Often
Reading the wrong side of the pencil line. A pencil line is a sixteenth wide. On finish work, decide once whether you cut to the left of the line, the right, or split it, and be consistent all day. “Leave the line” and “take the line” are different cuts.
Trusting a sagging blade. Long horizontal measurements let the blade bow, and a bowed blade is following a curve, not a straight line, so it reads long. Support the middle, or measure along the floor instead of through the air.
Forgetting you burned an inch. Starting at the 1-inch mark and subtracting an inch is a legitimate technique when the hook cannot sit reliably. Forgetting the subtraction produces a part exactly one inch long, which somehow never looks wrong until it is installed. Say it out loud when you do it.
Reading upside down. Measuring overhead or from the far side of a board puts the numbers inverted, and a 6 and a 9 are easy to swap. Move your body rather than trusting your brain to flip it.
Reading the blade from an angle. The printed marks sit on top of the steel, and your workpiece edge sits below it. Look at the blade from off to one side and the mark you think lines up with the edge is not the one that actually does — the same parallax that makes a car’s speedometer read differently from the passenger seat. Get your eye directly over the mark before you commit, especially on the sixteenths where one line of error is the whole error.
Not accounting for the blade end after a drop. Tapes get dropped hook-first constantly. Every few months, hook two tapes over the same board edge and compare at 12 inches. Thirty seconds, and it catches a bent hook before it costs you material. That check belongs in the same routine as sharpening chisels and cleaning saw blades — the basic tool maintenance that keeps everything else honest.
Measuring once. The old rule is real. Two measurements taken a few seconds apart catch nearly every reading error, and the second one costs nothing compared to a recut.
Keeping the Blade Readable
A tape you cannot read is a tape you will misread. Let the blade retract under control rather than letting it snap back — the impact bends hooks and eventually cracks the return spring. Wipe the blade with a dry rag when it comes out of a dusty cut, because drywall dust in the case wears the printing off faster than anything else. Keep it out of standing water, and if it does get wet, pull the blade all the way out and let it dry before retracting or the inside of the case will rust.
Store it where the hook cannot get bent — a pouch or a drawer in a tool chest rather than loose in the bottom of a bucket with hammers and pry bars. Tapes are inexpensive enough that most people treat them as disposable, but a tape whose print is still crisp is a tape you read correctly at a glance, and that is worth far more than what a replacement costs.
The Bottom Line
Reading a tape measure comes down to one habit and a handful of facts. The habit is counting sixteenths and putting the count over 16, because it works in any light, at any angle, on any blade. The facts are that the line height tells you the fraction, that the hook is supposed to slide, that red numbers mark studs at 16 inches and black diamonds mark engineered spacing at 19.2, and that the number on the case is there so you can measure an opening properly instead of bending the blade into the corner.
Spend ten minutes with a tape in your hand and the chart above, and the guessing stops. If you are still building out a kit, a solid 25-foot tape comes standard in most quality hand tool sets, and it will be the tool you reach for more than any other — including the ones that cost twenty times as much.
Frequently Asked Questions
What is the easiest way to read a tape measure?
What do the little lines on a tape measure mean?
Why does the hook on the end of a tape measure move?
What are the black diamonds on a tape measure?
What do the red numbers on a tape measure mean?
How do you measure the inside of a doorway or window opening?
How accurate is a tape measure supposed to be?
Why do my measurements not match my partner's on the same board?
How do you read a tape measure in millimeters?
What does it mean to burn an inch on a tape measure?
Related Articles
About the Reviewer

Jake Morrison, Licensed General Contractor
B.S. Construction Management, Purdue University
Jake Morrison has spent 14 years in residential construction and home renovation before founding DIYRated in 2026. After helping hundreds of homeowners choose the right tools and materials for their projects, he started writing the product guides he wished existed when he was starting out. Jake tests every major product recommendation in his workshop in Indianapolis and focuses on real-world performance over spec-sheet marketing.