How to Caulk a Bathtub: A Contractor's Guide to a Bead That Lasts
By Jake Morrison, Licensed General Contractor Updated
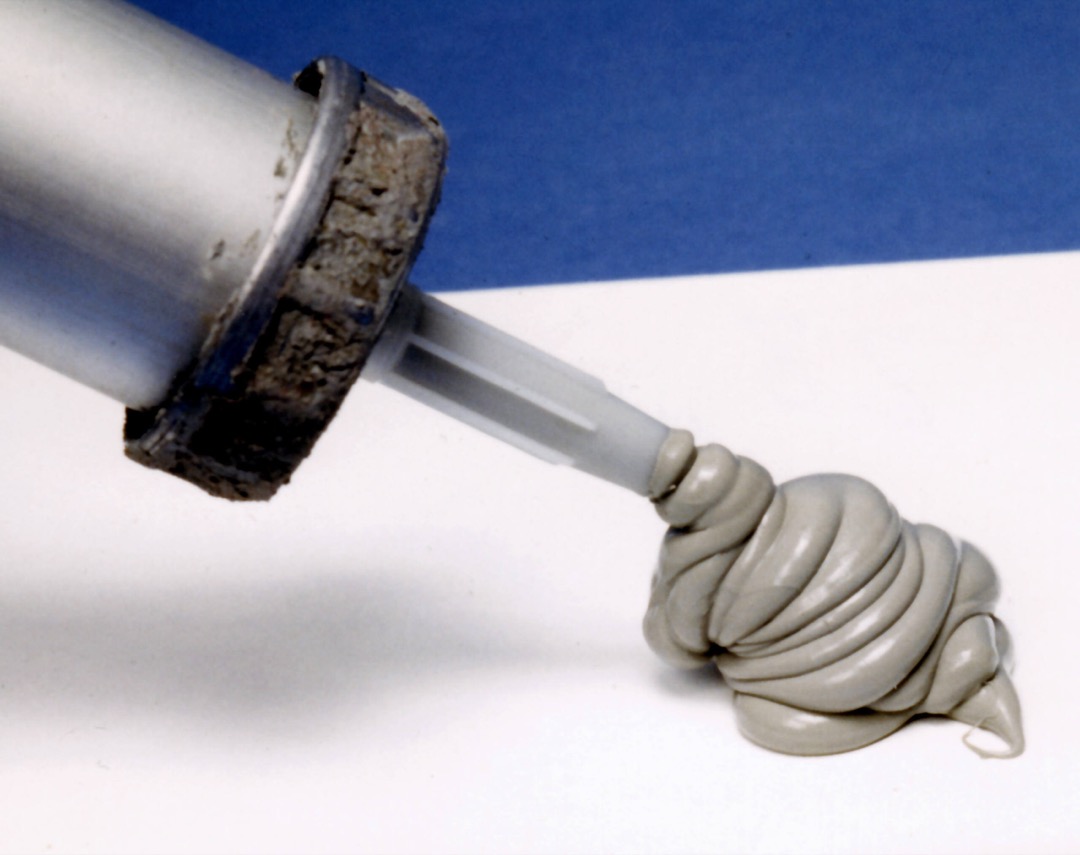
The caulk around a bathtub almost never fails because it got old. I have cut out beads four months into their life that were already lifting off the tub in a continuous strip, and beads on twelve-year-old tubs still tight enough to fight the knife. Time had nothing to do with it.
Most failures I take out share one of three causes. The bead was bonded on three sides instead of two, so it had no way to stretch when the tub moved and it tore itself apart. The wrong product went in, meaning an acrylic latex film in a joint that needed inert silicone rubber. Or the joint was still damp, so the bond line never formed and the bead was only ever sitting there.
That last one is worth understanding before you start. Caulking is a bonding operation, not a filling operation. What holds a bead in place is adhesion to two clean, dry substrates, and everything the sealant does afterward depends on that bond surviving. Water, soap film, mildew residue, or a skim of old silicone left on the tub lip all destroy adhesion just as effectively as skipping the caulk entirely.
This is a one-afternoon job. The difference between a bead that lasts one season and one that lasts a decade comes down to four decisions you make before the gun ever comes out.
Why Bathtub Caulk Actually Fails
A caulk joint is a structural connection between two materials that move independently. The tub goes up and down. The tile does not. The sealant absorbs that difference for thousands of cycles, while wet.
To do that it has to stretch. A bead bonded to the tub on one face and the tile on the other can neck down in the middle and elongate like a rubber band. A bead that has also bonded to a third surface at the back of the joint cannot. It is locked at three points, so instead of stretching it concentrates all the strain at its thinnest section and tears. That is three-sided adhesion, the most common structural cause of premature sealant failure in the trades, and it is almost never mentioned in homeowner guides. It is why people recaulk the same tub every spring and blame the brand.
The second driver is profile. A bead too thick relative to its width cannot deform, because there is too much material in the joint to flex. A bead too thin tears under normal movement. There is a correct ratio and it is published in an ASTM standard.
The third is contamination, from soap scum to a wet substrate to a smear of old silicone you cannot see. Silicone will not bond to silicone, and nothing bonds to water.
Silicone vs. Acrylic Latex: Which One Belongs in a Bathtub
These two cure by completely different mechanisms, and once you understand the chemistry the choice stops being a matter of preference.
Acrylic latex is a water-based emulsion. It cures by evaporation: the water leaves, the acrylic particles coalesce, and you are left with a flexible organic film. That film is a polymer, and polymers of that type are food for mold in the right conditions. This is why every kitchen and bath acrylic carries an added fungicide, and why the mildew protection is warranted for a fixed term. The fungicide is a consumable that leaches out in a wet environment.
One hundred percent silicone cross-links instead, reacting with moisture in the air to form a genuinely new material: an inert, non-organic rubber. There is nothing in that cured material for mold to metabolize. Its mold resistance is a property of what it is, not an additive that runs out.
Silicone has one real disadvantage here: it cannot be painted. Nothing sticks to it. If the joint has to take paint, use a siliconized acrylic, which is acrylic latex with silicone polymers blended in for better flexibility and adhesion. It is a legitimate product and simply not as durable in standing water as the real thing.
My rule at a tub: 100 percent silicone, kitchen and bath rated, unless the joint has to be painted.
Tools and Materials
Nothing here is specialized and most of it is inexpensive.
- A caulk gun. A dripless or smooth-rod gun with a decent thrust ratio improves bead consistency, because a ratcheting gun releases pressure in steps and your bead follows.
- A utility knife with a fresh blade, plus a plastic putty knife and a plastic razor scraper. A good hand tool set usually covers the knife, scraper, and tape in one purchase.
- Caulk softener, if the old bead is well-bonded silicone.
- Denatured or isopropyl alcohol and lint-free rags.
- A bleach-based bathroom cleaner for the mold step.
- A caulk finishing tool, the small profile set with several radius options.
- Work gloves for the solvent and removal work, plus eye protection.
- A hair dryer for drying the joint, and backer rod for wide gaps.
Cleanup goes faster with a vacuum than a rag. Dried silicone crumbs get everywhere and are miserable to chase around a wet tub. Anything in our shop vac roundup with a crevice tool handles it in two minutes.
When You Need Backer Rod
Backer rod is closed-cell foam rope, sold from about a quarter inch up. Pressed into the gap before caulking it does three jobs. It sets the depth of the sealant so you are not filling a cavity. It stops the caulk bonding to the back of the joint, which eliminates three-sided adhesion. And it forces the bead into an hourglass profile, thin in the middle and thick at the two bond faces, which is the shape that stretches best.
Use it any time the gap is wider than roughly a quarter inch, or deeper than it is wide. If your tub-to-wall gap is a hairline, skip it. If you can drop a pencil into it, you need it.
Step 1: Remove Every Trace of the Old Caulk
Do not caulk over old caulk. Fresh silicone will not bond to cured silicone, so a new bead over an old one is a wedge rather than a seal and it peels off as a strip. Worse, whatever mold is living behind the old bead gets sealed in with a fresh supply of moisture.
Run the utility knife down the tub side of the bead first, held flat against the tub, cutting the bond rather than the caulk. Then do the same on the tile side. You are severing both bond lines so the bead lifts out as a rope. Keep the blade nearly parallel to the surface, because a blade held at an angle gouges an acrylic tub instantly and scratches tile glaze.
With both sides cut, get the plastic scraper under one end and pull. A well-cut bead often comes out in one continuous piece, which is the sign you did the cutting right. What remains is a thin residual film on both substrates. That film is the part people leave, and it is the part that ruins the next bead. Work it off with a plastic razor scraper. On tile you can use a metal blade carefully. On acrylic or fiberglass, plastic only, always.
Caulk Removers and Why They Work
If the old bead is well-bonded silicone and the knife is fighting you, use a chemical softener rather than more force. Most consumer caulk removers are d-limonene or another citrus-terpene solvent. They do not dissolve cured silicone, which is essentially immune to dissolution. They penetrate and swell the polymer matrix, which softens the rubber so it cuts easily and, more importantly, breaks its adhesive bond to the substrate from the inside as it expands.
That mechanism explains the instructions on the bottle. These products need dwell time, typically two to four hours and sometimes overnight on a heavy bead. Scraping ten minutes after application does nothing, because the solvent has not penetrated far enough to swell anything. Lay it on thick, cover the bead with plastic wrap so the solvent does not flash off, and go do something else. Ventilate while you work.
Step 2: Clean and Dry the Joint
This step decides the outcome and it takes fifteen minutes.
Scrub the joint with a bleach-based cleaner and let it dwell long enough to kill what is growing in there. Mold left behind is a live culture, and it will colonize the back of your new bead and show through as black staining within a couple of months. Rinse thoroughly.
Then degrease. Soap scum is a fatty film and a superb release agent. Wipe both faces with denatured or isopropyl alcohol on a lint-free rag, which also strips solvent residue from the removal step and flashes off clean.
Then dry it properly. Silicone cures by reacting with atmospheric moisture, so humidity in the air is fine and even helpful. Liquid water in the joint is not. It occupies the bond line and the caulk cannot reach the substrate through it. Run a hair dryer on low along the seam for several minutes, paying attention to the deepest part of the gap where water hides.
Persistent bathroom humidity is the underlying reason many people recaulk every year, and it is worth treating as its own problem. If the exhaust fan is undersized or the room has no exterior wall, a small unit from our dehumidifier guide does more for the life of your caulk than any brand upgrade.
Do You Really Need to Fill the Tub With Water?
This is the step everyone argues about and almost nobody explains. The answer depends on your tub material, and the reason is structural.
A filled tub plus an occupant can exceed 400 pounds. A lightweight tub shell and the subfloor beneath it both deflect under that load, so the tub drops slightly relative to the tile wall, which is anchored to framing and does not move.
Now consider when you caulked. Caulk with the tub empty and the joint is at its narrowest, so every fill opens the gap and pulls the bead in tension. Sealants tear in tension. Caulk with the tub already full and deflected down and the joint is at its widest when the bead cures. From then on, filling does nothing because it is already there, and draining slightly compresses the bead. Compression is the load direction sealants handle best. You have inverted the failure mode.
Fill to just below the overflow, apply and tool the bead, then leave the water in until the caulk has skinned over or reached its tack-free time per the label. Then drain.
Cast Iron vs. Acrylic, Fiberglass, and Steel
Acrylic, fiberglass, and thin-gauge steel tubs are lightweight shells that flex measurably under load. These are the tubs where filling first makes a real difference.
Cast iron tubs weigh several hundred pounds empty and spread their load across the floor structure. Deflection under a full load is negligible, so the fill step is usually skipped.
If you are not sure what you have, tap the side. Cast iron gives a dull, dense thud and is cold to the touch. Acrylic and fiberglass sound hollow and feel warmer. If you still cannot tell, fill it. The step costs nothing but the water and a wait.
Step 3: Tape the Seam (or Don’t)
Two strips of painter’s tape, one on the tub and one on the wall, spaced to leave the joint plus a small margin exposed, give a mechanically perfect edge. Lay the bead, tool it, then pull both strips immediately while the caulk is still wet, at a shallow angle away from the bead. Pulling tape after the caulk skins tears the edge.
Tape has real costs, which is why so many people go looking for how to caulk without it. It takes longer than the caulking itself. On textured tile it does not seal at the edge, so caulk creeps underneath and you get a worse line than freehand. And it leaves a bead with two hard shoulders where the tape was.
Caulking without tape is what I do on most jobs. The technique is about control rather than steadiness:
- Cut the nozzle small, smaller than you think, at a 45-degree angle. You can always make a bead bigger with a second pass. You cannot make it smaller.
- Cut a starter bead onto scrap cardboard until the flow is even, so your first inch on the tub is not a blob.
- Rest the nozzle tip in the joint with both edges of the cut opening touching both substrates. The nozzle becomes your guide, the way a router fence works.
- Move in one continuous pull along the full run, breaking only at corners. Stopping and restarting mid-run is what creates lumps.
- Do one wall at a time and tool it before it skins.
If your hand is not steady, tape. There is no shame in it. If you caulk more than once a year, learn to go freehand and you will not go back.
Step 4: Lay the Bead, and Get the Size Right
Push the gun, do not pull it. Driving the nozzle ahead of the tube forces sealant into the gap and packs it against both faces. Pulling drags the tip behind the bead and lays material on top of the joint, producing a good-looking line with a void behind it. That void is where water collects and where the bead eventually tears from.
Hold the gun at roughly 45 degrees to the seam, keep the tip in contact with both surfaces, and match hand speed to trigger pressure. A lumpy bead is a hand-speed problem, not a gun problem. Release the trigger just before the end of the run, because stored pressure in the tube keeps extruding after you stop squeezing.
The Joint-Geometry Rule Nobody Follows
ASTM C1193, the standard guide for sealant joint design, gives the depth-to-width ratios professional installers work to:
- Joints up to 1/2 inch wide: sealant depth should equal the width, a 1:1 ratio.
- Joints from 1/2 to 1 inch wide: depth should be half the width, but never less than 1/4 inch.
- Joints over 1 inch wide: depth is capped at 1/2 inch regardless of how wide the gap gets.
As joints get wider you want proportionally less depth, because a deep bead cannot flex. Material in the middle of an over-deep bead does nothing except resist movement. Backer rod is what sets that depth, which is why wide joints need it rather than just more caulk.
Manufacturers publish ceilings that line up with this. DAP states a maximum joint size of 3/8 inch wide by 3/8 inch deep for Kwik Seal Ultra in its technical data sheet. Past that, the product is out of its qualified range and the maker is telling you so.
Step 5: Smooth the Bead. Finger, Tool, or Neither?
Every DIY guide says wet your finger. Loctite’s own instructions say specifically not to, because a wet finger produces a concave bead that holds water longer. Both statements are true, and the way to resolve them is to understand what tooling accomplishes.
Tooling does two things. It forces the sealant into full contact with both substrates, which is the part that matters structurally, and it shapes the exposed surface. The first is non-negotiable: an untooled bead sits in the joint with air pockets along the bond line and it will fail.
The shaping is where the trade-off lives. A wet finger drags a deep concave radius. It looks great, it is fast, and that hollow holds a film of shower water against the bead every time somebody showers. It also drags water into a bead that is trying to bond. A dedicated finishing tool gives a shallower, flatter fillet that sheds water faster and needs no lubricant at all.
My recommendation: use a finishing tool with the shallowest profile that still fills the joint, and keep it dry. If you use a finger, keep it barely damp, run one continuous pass per section, and wipe it clean between passes. Tool immediately, before any skin forms, which on a fast-skinning silicone can be under ten minutes. Work in sections rather than beading the whole bathroom and then tooling.
Cure Times: What the Manufacturer Data Sheets Actually Say
The spread between products is larger than most people expect, and the label conditions matter as much as the number. Every figure below is from the maker’s own published data.
| Product | Type | Tack-free | Water-ready | Mold claim | Note |
|---|---|---|---|---|---|
| GE Supreme Silicone Kitchen & Bath | 100% silicone, neutral cure | per TDS | 30 min at 65F+ and 50%+ RH with a bead 3/16 in or smaller, otherwise 8 hours | ”lifetime mold-free product protection” (stain resistance, not immunity) | ASTM C-920 Class 50. Not paintable |
| DAP Silicone Max | 100% silicone | 30 min water-resistant at 73F / 50% RH | 30 minutes | 20-year mold and mildew resistance | 24-hour full cure |
| DAP Kwik Seal Ultra | Siliconized acrylic latex | About 4 hours (clear takes 7 days) | 4 hours | 1-year mildew, crack and peel warranty | Max joint 3/8 x 3/8 in |
| Loctite Polyseamseal Tub & Tile | Adhesive caulk | 10 to 20 minutes | Practical use 24 to 48 hours | Mold and mildew resistant | Full cure 1 to 14 days at 78F / 50% RH. Paintable after 40 min |
| Gorilla 100% Silicone (Clear) | 100% silicone, acetoxy | Skins over 10 to 25 min | 30 minutes | Mold and mildew resistant | ASTM C920 Class 50. Over 170 psi tensile, over 350% elongation per ASTM D412 |
| Red Devil Kitchen & Bath | Siliconized acrylic | 10 to 20 minutes | 24 hours white, 72 hours clear | Mildew resistant | Clear takes three times longer than white |
Two things there are worth pulling out.
The GE water-ready figure has conditions most people never read. Thirty minutes applies at 65F or warmer, at 50 percent or higher relative humidity, with a bead no thicker than three sixteenths of an inch. Miss any of those and the same product wants eight hours. Silicone cures by reacting with atmospheric moisture, so a cold dry bathroom in February is genuinely slower, not marginally slower.
The clear-versus-white difference in acrylics catches people constantly. Red Devil’s clear formula needs 72 hours to be water-ready against 24 for the white, because a clear acrylic starts out milky and has to lose considerably more water to clarify. DAP’s clear Kwik Seal Ultra takes seven days to fully clear. If you picked clear because it looked more forgiving, budget the extra days.
One note for unheated spaces: Red Devil’s 100 percent silicone line has an application temperature range of 10F to 100F and a service range of minus 60F to 400F, and it cleans up with mineral spirits rather than soap and water. Application range and service range are different specifications, and confusing them is how people end up gunning caulk in a freezing bathroom.
Acetoxy vs. Neutral Cure, and Your Chrome Fixtures
There are two chemistries inside the 100 percent silicone category and the label rarely says which one you are holding. Your nose will tell you.
Acetoxy silicones, also called acid-cure, release acetic acid as they cure. That is the sharp vinegar smell. They are usually cheaper, they bond aggressively to glass and glazed tile, and they cure fast. Gorilla’s own technical data confirms its 100 percent silicone is acid-cure. The problem is that acetic acid attacks certain metals over repeated exposure: galvanized and zinc-coated steel, brass, and copper are all vulnerable.
Neutral-cure silicones, sometimes labeled oxime or alkoxy, give off ethanol or ketoxime byproducts instead. No vinegar smell, no acid, and they are the standard choice anywhere the sealant sits against metal.
At a tub line this matters more than it sounds. The bead often runs right up to a tub spout escutcheon, a shower door track, or the base of a mixer valve, and those are chrome-plated brass. Repeated acid exposure at that contact point can pit the plating from underneath. If you are recaulking as part of a bigger refresh and swapping fixtures anyway, our bathroom faucet roundup covers what the plating and base metals actually are on current models.
My default at a tub is neutral cure. It costs slightly more, skins marginally slower, and removes an entire class of problem.
How to Caulk a Bathtub With a Large Gap
A wide gap between the tub flange and the wall is common in older houses, in tub replacements where the new unit is slightly narrower, and anywhere the wall was built out of plumb. Filling it with a fat rope of silicone is wrong twice over: the bead ends up over-deep and cannot flex, and it bonds to the back of the cavity, which is three-sided adhesion and a guaranteed tear.
Backer rod is the correct fix and it is inexpensive.
- Measure the gap at its widest point.
- Buy closed-cell backer rod about 25 percent larger than the gap width, so it compresses in and stays put by friction.
- Press it in with a blunt plastic tool, not a screwdriver. Puncturing closed-cell rod lets it absorb water, which defeats the point.
- Set the depth by the ASTM ratio. For a 3/4-inch gap you want about 3/8 inch of sealant depth, so push the rod down until you have that much room above it. Over an inch wide, cap the depth at 1/2 inch.
- Caulk over it normally. The rod gives the bead a curved back face, creating the hourglass profile that stretches instead of tearing.
If the gap is more than about an inch, caulk is the wrong tool and you have a construction problem. Options are a tile trim piece, a strip of matching material, or furring the wall out. That is renovation work rather than maintenance, and our bathroom renovation checklist walks through the trade sequence for doing it properly, including where the waterproofing has to land relative to the tile.
Peel-and-Stick Caulk Strips: Do They Work?
Caulk tape gets searched a lot, so here is an honest verdict from someone who has removed a fair amount of it.
Peel-and-stick strips are a flexible vinyl or PVC profile with pressure-sensitive adhesive on the back. They install in minutes with no gun, no tooling, no cure time, and no mess. On a clean, flat, dry, straight tub line they look surprisingly decent for a while.
They fail at the edges and the corners. The adhesive holds by surface contact rather than by chemically bonding to the substrate, and constant wet-dry cycling at 100-plus degrees works it loose from the outside in. Once an edge lifts even slightly, water gets under the strip and sits there, and a strip with water trapped behind it grows mold faster than an exposed bead ever would. Inside corners are the other weak point, because a flat strip does not want to fold into a three-way corner and any wrinkle there is an open channel.
Two situations make them a reasonable call: a rental where you cannot do proper work, and a genuine emergency where the caulk failed and you need something in that joint tonight. For anything else, a real bead takes an afternoon and lasts years instead of months, and removing failed strip adhesive is its own miserable job on top of the caulking you were going to have to do anyway.
Caulk or Grout? Where the Line Falls
This confuses a lot of people and the rule is simple once you frame it by movement.
Grout belongs in flat, plane-to-plane joints between field tiles. Those are rigid joints between two coplanar surfaces that do not move relative to each other, and cement grout is engineered for exactly that.
Caulk belongs in every change-of-plane joint: tub to tile, floor to wall, inside corners, and any perimeter where tile meets a different material. Those joints move.
Grouting a change-of-plane joint is the version of this mistake that does real damage. A rigid cement product across a moving seam cracks, and then it wicks water into the wall through the crack. If your tub line is grouted and cracked, that is not a grout repair. Rake it out and caulk it.
The Mistakes That Bring the Mold Back
Caulking over the old bead. Silicone does not bond to silicone, and you have sealed live mold inside a damp cavity. This is the number one cause of a bead that blackens from behind within weeks.
Not drying the joint. Liquid water in the bond line means no bond. Ten minutes with a hair dryer is the cheapest insurance in the job.
Over-deep beads in wide gaps. Without backer rod, a wide joint gets a slab of sealant that cannot flex and is bonded on three sides. It tears, every time.
Caulking an empty lightweight tub. The bead spends its life in tension instead of compression.
Showering too early. Read the tube, then check the conditions on the tube. Cold and dry means slower, sometimes by a factor of sixteen.
Sealing the shower door weep holes. Those are drainage by design. Caulking them shut traps water inside the track.
Ignoring the ventilation. If mildew keeps returning on a properly installed silicone bead, the caulk is not the problem. A bathroom that stays saturated for hours after every shower grows surface mildew on anything. Run the fan for twenty minutes after you shower, and if there is no fan, that is the actual repair. Our guide to improving indoor air quality covers what a bathroom exhaust needs to move.
The Bottom Line
A bathtub caulk joint that lasts comes down to four things, and only one of them is which tube you buy.
Remove every trace of the old bead and get the substrate genuinely clean and genuinely dry, because adhesion is the whole job. Use 100 percent silicone, neutral cure if it sits near chrome or brass. Get the geometry right, which means backer rod in anything wider than a quarter inch and a bead depth that follows the ASTM ratio rather than however much caulk fits. And fill the tub first if it is acrylic, fiberglass, or thin steel, so the bead lives in compression rather than tension.
Do those four things and a silicone bead will outlast the paint in the room. Skip any one of them and you will be back here in a year, which is the cycle most people are stuck in.
If you are still assembling the kit for jobs like this, our tiered tool list for new homeowners covers what to buy first and what to skip. The same prep discipline applies to every wet-area job in the house, including the drain work in our guide on how to unclog a drain.
Frequently Asked Questions
Are you supposed to caulk around a bathtub?
Do you wet your finger when caulking?
Do I need to fill the bathtub before caulking, and how long do I leave it full?
Can I just caulk over old caulk?
Why do people use Windex when caulking?
Should you push or pull the caulk gun?
Where should you not caulk in a bathroom?
How long does bathtub caulk need to dry before a shower?
What is the best caulk for a bathtub?
How often should a bathtub be recaulked?
Related Articles
Bathroom Renovation Checklist for Beginners: A Licensed GC's Step-by-Step Guide
home-improvement
Essential Tools Every New Homeowner Needs: A Contractor's Tiered Buying Guide
power-tools-workshop
How to Grout Tile: A Contractor's Guide to Joints That Do Not Crumble
home-improvement
7 Best Bathroom Faucets of 2026
kitchen-tools
Best Dehumidifiers of 2026: Jake's Picks After 20+ Years in Basements
home-air-filtration
About the Reviewer

Jake Morrison, Licensed General Contractor
B.S. Construction Management, Purdue University
Jake Morrison has spent 14 years in residential construction and home renovation before founding DIYRated in 2026. After helping hundreds of homeowners choose the right tools and materials for their projects, he started writing the product guides he wished existed when he was starting out. Jake builds each pick from spec sheets, manuals and verified buyer reviews, and weighs how tools hold up for real owners over marketing claims.