Bathroom Renovation Checklist for Beginners: A Licensed GC's Step-by-Step Guide
By Jake Morrison, Licensed General Contractor Updated
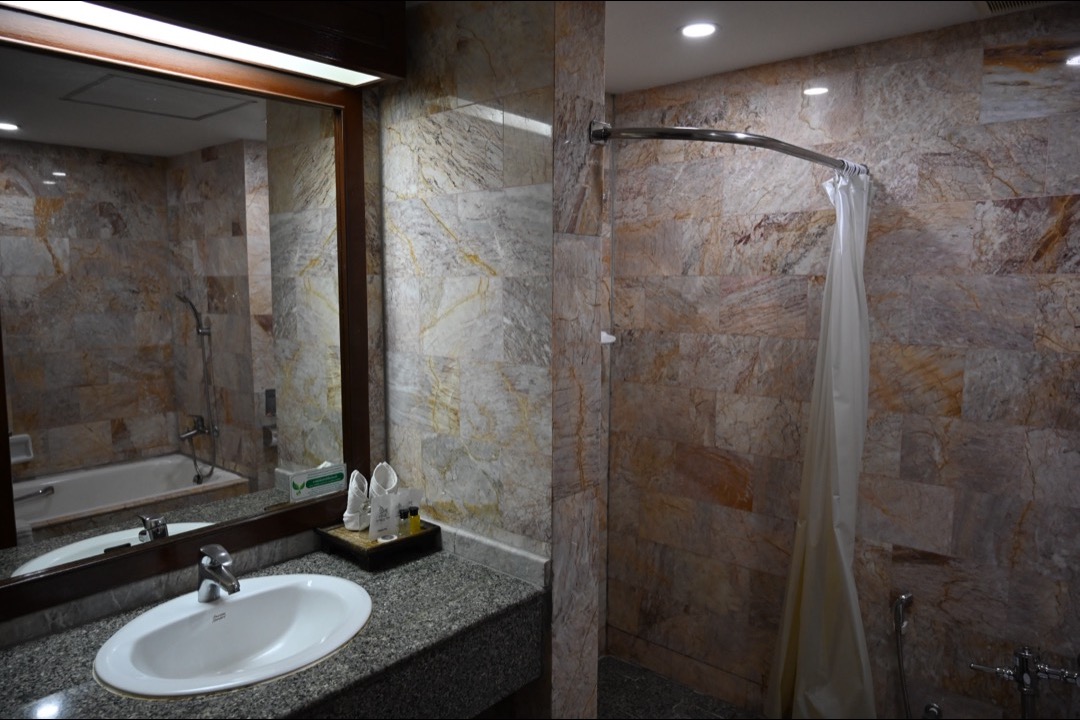
Bathrooms are the smallest rooms in the house and, dollar for square foot, the most expensive and most unforgiving to renovate. Everything in that room is connected to either water or electricity, usually both, and almost every mistake you can make in there is a mistake that hides behind a wall and reveals itself two years later. That is why a bathroom is simultaneously the room most homeowners want to renovate first and the room where I get the most calls to fix somebody’s weekend project.
This is the checklist I give clients before we start, written for someone who has never done this before. It is organized the way the work actually happens — in phases, in the order the trades have to show up — because the sequence is the part beginners get wrong far more often than the craftsmanship. It also includes the numbers that decide whether your layout passes inspection, the one step almost every first-timer skips, and an honest line between what you should do yourself and what you should hand to a professional.
Before You Touch Anything: The Four Decisions That Set Your Budget
Almost every bathroom budget is decided before demo, by four choices.
Do the drains move? This is the big one. If the toilet, sink, and shower drains stay exactly where they are, you are running a finish project: demo, surfaces, fixtures, done. The moment you move a drain — sliding the toilet over, converting a tub into a walk-in shower, adding a double vanity where a single one stood — you are opening the floor, re-sloping pipes, verifying the vent stack, and almost certainly pulling a permit. On a slab foundation, it means cutting concrete. Keeping the drains put is the cheapest decision available to you, and it costs you nothing in the finished look.
Is this the only full bathroom in the house? If yes, keep a tub. Buyers with young children filter listings without a bathtub straight out of their search, and that filter costs more at resale than a walk-in shower gains you. If you have a second full bath with a tub in it, converting the primary to a walk-in shower is one of the highest-value moves in a remodel.
How old is the house? This sets your contingency, not your finishes. Bathrooms in homes from the 1990s or later warrant a 10 to 15 percent contingency. Anything from the 1970s or earlier warrants 15 to 20 percent, and you should genuinely expect to spend it — bathrooms are the room where water has had decades to work on your framing quietly.
What are you actually fixing? Write down the real problem before you shop. “The vanity is ugly and there’s never enough light” is a $2,000 weekend. “The tile is cracked and the floor feels spongy near the toilet” is a subfloor repair, and no amount of new tile fixes it. Beginners routinely spend a full remodel budget re-skinning a bathroom whose actual problem was a leaking flange.
What a Bathroom Renovation Costs in 2026
The 2026 national average sits around $16,500, with most projects landing somewhere between $8,000 and $45,000. Broken down by scope, the ranges look like this:
- Powder room or small bath (under 40 sq ft): roughly $3,000 to $8,000. Fewer materials, but the same fixture types and much of the same labor.
- Standard family bath (40–100 sq ft): roughly $8,000 to $25,000 depending on finish level and whether the layout changes.
- Primary or master bath: starts around $18,000 and climbs past $50,000 without much effort once you add a separate tub, a tiled shower, and a double vanity.
Per square foot, budget work runs about $80 to $120, mid-range about $180 to $280, and high-end can pass $500. Costs are up roughly 4 to 6 percent over 2025 on labor and materials, so any figure you read from a couple of years ago is optimistic. Labor is typically 40 to 65 percent of the total, which is exactly why a hybrid DIY approach moves the number so much — and why deciding what to do yourself is a budgeting decision, not just a preference. If you’re weighing that trade-off across a whole project, my breakdown of when to DIY and when to call in a contractor walks through the same logic room by room, and the kitchen renovation budget guide applies it to the other expensive room in the house.
The 30% Rule: How Much You Should Actually Spend
There’s a guideline worth knowing before you set a number, and almost nobody writing about bathrooms mentions it: cap your total renovation spending — across the whole house, not per room — at roughly 30 percent of your home’s current market value. On a $400,000 house, that’s a $120,000 ceiling for everything you ever do to the place.
For a single bathroom, the practical version is that the project generally shouldn’t exceed 5 to 10 percent of the home’s value. The reason is unglamorous: at resale, an appraiser comps your house against the other houses on your street, not against your tile selection. A $35,000 spa bathroom in a $200,000 house is money that does not come back.
This is a guideline, not physics. If you’re staying twenty years and a beautiful bathroom makes your morning better, spend what makes you happy — you’re buying quality of life, not an investment. But if resale is anywhere in your thinking, the 30 percent ceiling is the guardrail that keeps you from overcapitalizing.
The Permit Question
Homeowners hate this section and then thank me for it. The line is clearer than most people assume.
| Work you’re doing | Permit? |
|---|---|
| Painting, new mirror, new accessories | Generally no |
| Swapping a vanity in the same footprint | Generally no |
| Replacing a faucet or toilet in the same location | Generally no |
| New flooring or a new tub surround in the same space | Generally no |
| New light fixture where a fixture already exists | Generally no |
| Moving or adding a drain line | Yes |
| Relocating the toilet, sink, or shower | Yes |
| Converting a tub to a walk-in shower | Yes |
| Adding or moving electrical circuits and outlets | Yes |
| Removing or altering a wall | Yes |
| Adding an exhaust fan where none existed | Yes |
| Any change to the vent stack | Yes |
The pattern is simple: cosmetic work in the same footprint is generally exempt; anything that touches the structure or the mechanical systems needs a permit. Requirements and fees vary by jurisdiction — expect a few hundred dollars and a couple of weeks of processing in most places — so call your building department before demo, not after. It’s a five-minute phone call.
Unpermitted plumbing and electrical is the kind of thing that surfaces during a home inspection when you sell, and if a leak or a fire ever traces back to it, your insurer will be very interested in whether the work was permitted.
Phase 1: Plan and Design (Weeks 1–3)
Nothing gets torn out yet. This phase is measuring, deciding, and confirming.
- Measure the room and draw the existing layout to scale, marking every drain, supply line, and outlet.
- Decide the layout — and check it against the code clearances in the next section before you fall in love with it.
- Choose every fixture and finish: toilet, vanity, sink, faucet, tub or shower base, tile, lighting, exhaust fan, mirror, hardware.
- Confirm the toilet’s rough-in dimension. It’s the distance from the finished wall to the center of the drain — usually 12 inches, but 10 or 14 in some older homes. Order the wrong one and it simply will not fit.
- Get the permit if you need one.
- Set the budget with the contingency built in, not bolted on afterward.
The Code Numbers That Decide Your Layout
These are the residential-code minimums that determine whether your floor plan is legal. Learn them now and you’ll never draw an illegal layout.
- Toilet: at least 15 inches from the centerline to any side wall, partition, or adjacent fixture on each side — a 30-inch-wide space minimum — and at least 21 inches of clear floor space in front of the bowl.
- Shower: minimum 30 inches by 30 inches, with at least 24 inches of clearance in front of the opening.
- Electrical: every bathroom receptacle must be GFCI protected, and the bathroom requires at least one dedicated 20-amp circuit for receptacles.
- Shower valve: must be an anti-scald (pressure-balancing or thermostatic) type, limited to a maximum of 120°F.
- Valve and head heights: the shower valve typically centers around 45 to 48 inches above the finished floor; the showerhead arm usually lands around 78 to 80 inches.
Treat these as minimums, not targets. A toilet with exactly 21 inches in front of it is legal and still feels like a phone booth. If the room allows, give yourself 24 to 30 inches.
Phase 2: Order and Stage Everything (Before Demo)
This is the phase beginners skip, and it is the number one cause of bathrooms that sit unusable for a month.
- Order every fixture and enough tile — plus 10 to 15 percent overage for cuts and breakage, from the same lot so the color matches.
- Take delivery of everything and unbox it. Inspect for damage and confirm dimensions against your plan. A cracked shower base discovered on installation day costs you two weeks; discovered before demo, it costs you a phone call.
- Set up a staging area, plan where the debris goes, and confirm you have a working bathroom to use for the duration.
- Line up your trades and put dates on the calendar.
Do not swing a hammer until the vanity is physically in your garage. I have watched more schedules die on this one point than on any other.
Phase 3: Demolition
- Shut off water at the fixture stops (or the main), and kill power to the bathroom at the breaker. Test that it’s actually dead.
- Protect the path from the bathroom to the exterior door — floors, corners, doorways.
- If the house predates about 1980, stop and test before you pry anything up. Old sheet flooring, tile mastic, and textured ceilings can contain asbestos, and paint from that era can contain lead. Both are licensed-abatement jobs, not a weekend with a pry bar, and a demo that aerosolizes either one contaminates the whole house. Test kits are cheap; the alternative is not.
- Remove in order: accessories, mirror, light fixtures, toilet, vanity, tub or shower, tile, then flooring, then drywall only where you need access.
- Inspect what you find. The subfloor around the toilet flange and under the tub is where rot lives. Fix it now — it’s cheap while it’s open and ruinous later.
Demo is dusty, sharp, and heavy, and it’s also the most beginner-friendly phase of the whole project. Wear real eye protection and a good pair of work gloves — there are more nails, screws, and glass shards in a bathroom demo than people expect. A shop vac is the difference between a controlled demo and a house full of drywall dust for a month; run it constantly, and consider a portable air purifier in the adjacent hallway if anyone in the house has allergies.
Phase 4: Rough-In — Plumbing, Electrical, and Ventilation
The walls are open. This is the only moment these things are cheap, and everything you skip here costs three times as much to add later.
- Plumbing: any drain relocation, new supply lines, the shower valve, the tub or shower base set and leveled.
- Electrical: the dedicated 20-amp GFCI-protected receptacle circuit, vanity lighting, a ceiling light, the exhaust fan circuit, and any extras — a heated floor mat, a receptacle inside the vanity for a hair dryer or an electric toothbrush, a switch for a future heater. Adding a circuit while the wall is open costs almost nothing. Adding one after the tile is in means demolishing your new tile.
- Ventilation: install the fan and duct it to the exterior — never into the attic. Size it at one CFM per square foot with a 50 CFM minimum. For a larger primary bath, use eight air changes per hour: length × width × height × 8 ÷ 60. An 8-by-12 bath with 8-foot ceilings needs about 102 CFM. Use rigid or smooth-wall duct in the shortest straight run you can manage, and put the fan on a timer switch so it runs 20 minutes after the shower ends.
- Blocking: add wood blocking in the walls now for grab bars, a future grab bar, the vanity, and the towel bars. It costs a few dollars of lumber and it is the thing people wish they had done a decade later.
- Inspection: if you pulled a permit, this is when the inspector comes. Do not close the walls first.
Rough-in is where I draw the line for most beginners. Drain lines have to be sloped and vented correctly or they clog and smell for the life of the house, and panel work is not a place to learn. Hire this out and do the rest yourself — it’s the highest-value split in a DIY bathroom.
Phase 5: Waterproofing — The Step Beginners Skip
This section is the reason I wrote this guide.
Tile is not waterproof. Grout is not waterproof. Cement backer board is not waterproof. Backer board is water-resistant — it means the board survives getting wet, not that it stops water from reaching the framing behind it. A tiled shower without a waterproofing membrane is a slow-motion structural failure. It will look perfect for two or three years while it quietly rots the studs and the subfloor, and then it will cost five figures to fix.
There are three legitimate ways to waterproof a shower, and most guides just tell you to “waterproof it” without ever explaining the difference between them:
| Method | What it is | Best for |
|---|---|---|
| Liquid-applied membrane | A paint-on rubberized coating rolled over backer board, joints, and corners in two coats | The most forgiving DIY option — hard to get catastrophically wrong, easy around odd shapes. Watch the coverage rate and the cure time between coats. |
| Sheet / foam board system | Waterproof foam panels or a sheet membrane with sealed, banded seams | The most reliable result and the fastest to tile over, but it demands precision at every seam and penetration. Costs more up front. |
| Traditional mud pan and liner | A sloped mortar bed over a PVC or hot-mopped liner | The old-school pro method. Bulletproof in skilled hands, genuinely difficult for a beginner to slope correctly. Hire this one out. |
Whichever you choose, do it properly:
- Install cement backer board (or an equivalent tile backer) on the shower walls, taping and setting the seams in thinset.
- Apply the waterproofing over it, covering every joint, corner, and penetration. Pick one manufacturer’s system and use its components together — mixing a foam board from one brand with a sealant from another is exactly how a warranty and a shower both fail.
- Pay obsessive attention to corners, the curb, the drain flange, and every screw penetration. That’s where failures start.
- Flood-test the pan for 24 hours before a single tile goes up. Plug the drain, fill it, mark the level, and come back tomorrow. If the level dropped, you just saved yourself a demolition.
The membrane costs a few hundred dollars and one extra day. Skipping it is the most expensive decision available in a bathroom renovation.
Phase 6: Tile
- Tile the shower walls first, then the floor (or the floor first, depending on your setup — but be consistent about which surface the other one dies into).
- Use the right trowel notch for the tile size, back-butter large-format tile, and check with a level constantly. Small errors compound fast on a wall.
- Let thinset cure roughly 24 hours before grouting. This is a cure time, not a suggestion — rushing it is how tile debonds.
- Grout, sponge off the haze, and let it cure before the shower gets wet.
- Caulk — do not grout — every change of plane: the inside corners, the wall-to-floor joint, and around the tub or pan. Those joints move, and grout cracks when it’s asked to flex.
Cutting tile is where a beginner’s tool budget actually matters. A cheap manual snap cutter handles straight cuts in standard ceramic, but the moment you’re into porcelain, large-format tile, or the notches around a valve and a drain, you want a wet saw — my breakdown of the best tile saws covers what’s worth renting versus buying for a single bathroom. Budget two or three weekends for a first-time shower wall, and be honest with yourself about whether this is the room where you want to learn.
Phase 7: Drywall, Prime, and Paint
- Hang, tape, and finish drywall on the non-wet walls.
- Prime everything.
- Paint before the vanity, toilet, and fixtures go back in. Cutting in around a vanity you already installed is miserable and slow, and it always looks worse.
- Use a paint rated for bathrooms — a satin or semi-gloss with mildew resistance. Flat paint in a bathroom is a mistake you get to live with every time someone showers. I go deeper on sheens and mildew-resistant formulas in the best interior paint roundup, and the step-by-step room painting guide covers the cut-in and rolling technique that makes a small room look professionally done.
Phase 8: Fixtures and Finish Plumbing
Now the room starts looking like a bathroom.
- Set the vanity, level and shim it, and anchor it into studs.
- Install the sink and the faucet — and do the faucet on the vanity before you push it against the wall if you possibly can, because connecting supply lines in the back of a cabinet is a knuckle-shredding job. The faucet is also the single fixture you touch most in the room, so it’s the one place I tell people not to buy builder-grade; the best bathroom faucets roundup breaks down where the money actually goes on cartridges and finishes.
- Set the toilet on a new wax ring (or a modern waxless seal) and a new flange bolt set. Do not reuse the old wax ring.
- Install the shower trim, the showerhead, and the tub spout.
- Hang the mirror, the vanity light, and the accessories — towel bars and the toilet paper holder into the blocking you added in Phase 4.
- Install trim and baseboard, and caulk it to the floor.
Phase 9: Punch List and First Run
- Run every fixture. Fill the sink, fill the tub, run the shower. Look under the vanity with a flashlight while the water runs.
- Check the toilet for rocking and for leaks at the base after a few flushes.
- Verify the GFCI trips and resets.
- Confirm the exhaust fan actually moves air — hold a square of toilet paper to the grille and see if it sticks.
- Touch up paint, clean the grout haze, and seal the grout if your grout type requires it.
- Live with it for a week and keep a running list. That’s your real punch list.
The Master Sequence, Condensed
If you take one thing from this guide, take this order:
Plan → order and receive everything → demo → rough-in plumbing and electrical → fan and framing → inspection → backer board → waterproofing → flood test → tile → drywall and paint → vanity and toilet → finish plumbing and trim → mirror, lighting, accessories → punch list.
The two rules that never bend: everything is in your garage before demo starts, and waterproofing happens before a single tile goes on the wall.
What to DIY and What to Hire Out
| Task | Beginner verdict |
|---|---|
| Demolition | DIY. Dusty and heavy, but hard to get wrong. Watch for asbestos in pre-1980 flooring. |
| Painting | DIY. The highest-value hour of labor you can do yourself. |
| Vanity, toilet, mirror, accessories | DIY. Very achievable with basic tools and patience. |
| Tile | Maybe. Learnable, but a shower wall is a brutal place to learn. Consider hiring the shower and DIYing the floor. |
| Drain relocation, vent stack, panel work | Hire out. Mistakes here are invisible, slow-acting, and expensive. |
| Shower waterproofing | Hire out on your first project unless you are willing to study one manufacturer’s system and follow it exactly. |
A hybrid project — pro rough-in, DIY demo and finish work — is what I recommend to most first-timers. You capture a large share of the labor savings and nothing is quietly rotting behind your new tile.
The Tools You’ll Actually Need
You do not need a workshop for this, but you do need the basics. A solid hand tool set covers the pry bars, utility knives, levels, and wrenches that make up most of a bathroom job, and a cordless drill is the single most-used power tool in the room — anchoring the vanity, driving backer board screws, mixing thinset with a paddle. Add a shop vac for dust and water, a wet saw or a good tile saw if you’re tiling, and a miter saw if you’re cutting your own baseboard and trim. Beyond that, rent rather than buy: an oscillating multi-tool and a right-angle drill are worth having for a week and not worth owning for one bathroom. If you’re building out a first tool kit from scratch, my list of the essential tools every new homeowner needs is the sensible starting point.
Seven Mistakes I See Beginners Make
- Starting demo before the fixtures arrive. Five-week vanity lead times are real. This is the number one schedule killer.
- Skipping or half-doing the waterproofing. Backer board is not a membrane. This is the expensive one.
- Undersizing or omitting the exhaust fan. Or venting it into the attic, which grows mold on your roof sheathing.
- Ordering the wrong toilet rough-in. Twelve inches is standard; ten and fourteen exist. Measure.
- Grouting the corners. Corners move. Caulk them, or watch them crack in a season.
- Not adding blocking while the walls are open. Grab bars, towel bars, a future shower seat — a few dollars of lumber now, a wall demolition later.
- Painting after the vanity is in. It’s slower, harder, and it never looks as good.
A Realistic Timeline
A professionally run bathroom is about two to three weeks of actual work, but four to six weeks on the calendar once you account for permits, inspections, and material lead times. A DIY bathroom on nights and weekends realistically runs six to ten weeks, and a first-time shower tile job can eat two or three weekends by itself.
Here’s how the active construction time actually breaks down:
| Phase | Pro crew | DIY (nights & weekends) |
|---|---|---|
| Design, permit, and material lead time | 4–8 weeks (before work starts) | 4–8 weeks (same — you can’t rush a vanity) |
| Demolition | 1–2 days | 1 weekend |
| Structural / subfloor repair (if needed) | 1–3 days | 1 weekend |
| Rough-in plumbing and electrical | 2–4 days | Hire out |
| Inspection | 1–3 days of waiting | 1–3 days of waiting |
| Backer board, waterproofing, and flood test | 3–5 days incl. cure | 1–2 weekends incl. cure |
| Tile | 3–7 days | 2–3 weekends |
| Drywall, prime, and paint | 2–3 days | 1 weekend |
| Vanity, toilet, and finish plumbing | 2–3 days | 1 weekend |
| Trim, accessories, and punch list | 1–2 days | 1 weekend |
The schedule killers are almost never the work. They are the vanity that ships in five weeks, the tile that arrives one box short, the inspection you can’t get for eight days, and the cure times that cannot be rushed no matter how motivated you are. Plan for those waits and the project feels controlled. Ignore them and it feels like a disaster.
One Last Thing About Moisture
The bathroom you finish is not the bathroom you’ll have in three years unless you manage the moisture that room produces. Run the fan every single time — on a timer, for twenty minutes after the shower. Squeegee the shower walls if you’re the sort of person who will. Keep the grout sealed if you used a grout that needs it. If the room is in a basement or the house runs humid, a dehumidifier nearby does more for the longevity of a new bathroom than any premium tile you could have bought, and it’s part of a broader approach to indoor air quality that pays off across the whole house. And if the drains start running slow a year in, deal with it early rather than reaching for the harshest thing on the shelf — my guide to unclogging a drain without chemicals will handle most of it, and it won’t eat the new fixtures you just paid for.
A bathroom done right — sequenced correctly, waterproofed properly, ventilated adequately — is a twenty-year room. A bathroom done fast is a two-year room with a five-figure repair bill attached. The difference between the two is almost entirely made in the phases nobody sees.
Frequently Asked Questions
In what order should a bathroom renovation be done?
How much does a bathroom renovation cost in 2026?
Do I need a permit to remodel a bathroom?
Can a beginner renovate a bathroom themselves?
How long does a bathroom renovation take?
What is the most common mistake in a bathroom remodel?
What are the code clearances for a bathroom layout?
What size exhaust fan do I need for a bathroom?
Should I do a tub or a walk-in shower?
What is the 30% rule in home renovation?
How much should I budget for a contingency?
Related Articles
Kitchen Renovation on a Budget: Where to Save and Splurge (A Licensed GC's Guide)
home-improvement
DIY vs Hiring a Contractor: A Licensed GC's Honest Guide to When You Should Call a Pro
power-tools-workshop
7 Best Bathroom Faucets of 2026
kitchen-tools
7 Best Interior Paints for Walls in 2026 (Tested by a Licensed Contractor)
painting-supplies
7 Best Tile Saws of 2026
power-tools-workshop
About the Reviewer

Jake Morrison, Licensed General Contractor
B.S. Construction Management, Purdue University
Jake Morrison has spent 14 years in residential construction and home renovation before founding DIYRated in 2026. After helping hundreds of homeowners choose the right tools and materials for their projects, he started writing the product guides he wished existed when he was starting out. Jake builds each pick from spec sheets, manuals and verified buyer reviews, and weighs how tools hold up for real owners over marketing claims.