How to Grout Tile: A Contractor's Guide to Joints That Do Not Crumble
By Jake Morrison, Licensed General Contractor Updated
The worst grout I ever pulled out was eleven weeks old. A kitchen floor, good porcelain, laid dead flat by somebody who knew what they were doing with a trowel. Every joint had turned to sand. You could drag a fingernail down a seam and pile up grit on the tile.
Nothing was wrong with the tile, the thinset, or the layout. The homeowner had grouted the whole floor from one batch over about four hours, and every time the bucket stiffened up he had splashed in more water and remixed it. That is the entire failure. Cement grout hydrates on its own schedule, and once it has started setting, adding water does not restart the clock. It breaks the crystal structure that was forming and you are left with colored dust held together by nothing.
Grouting looks like the easy part of a tile job. You have already done the layout, the cutting, and the flattening, and this is the step where you smear a paste around and wipe it off. That framing is why so many joints fail inside a year. Grouting is a chemistry job on a timer. The water ratio, the slake, the pot life, and the moment you first touch a sponge to the face all decide whether those joints last twenty years or eleven weeks, and none of them are about how steady your hand is.
This guide covers floors and walls, cement and epoxy, with the manufacturer figures that actually govern the timing. Most of the decisions get made before you open the bag.
What Grout Actually Does
Grout has three jobs, and two things people believe about it are wrong.
It fills the joint. A tile installation is a field of hard, brittle plates with gaps between them, and those gaps let dirt, water, and impact reach the setting bed. Filled joints turn a collection of individual tiles into a continuous surface that sheds most of what lands on it.
It buffers minor movement. Cement grout is rigid, but it is significantly softer than porcelain or stone. It absorbs the small dimensional differences between adjacent tiles and takes the edge off point loads. It transfers stress between tiles rather than letting a single tile carry it alone. What it will not do is absorb structural movement, which is a distinction I come back to further down because it is the number one reason grout cracks.
It protects the setting bed. The thinset under your tile is not meant to be exposed to standing water and grit through open seams.
Now the two myths. Grout is not an adhesive. It has essentially no bond strength holding your tile down. That is entirely the thinset’s job, done days earlier. If a tile is loose, grouting around it will not fix it, and the grout will crack out at that joint within weeks because a moving tile is grinding it from both sides. Pull the tile, scrape the back, reset it in fresh thinset, and grout after.
Grout is not a waterproofer. Standard cementitious grout is porous by design. Water passes through it. In a shower, the waterproofing is a membrane behind or beneath the tile, and the grout is a wear surface over the top of it. Anyone who tells you a shower is waterproof because it is grouted has skipped the layer that matters. Our bathroom renovation checklist covers where that membrane has to land in the trade sequence.
Choosing the Right Grout
Four families cover essentially everything sold at a tile counter. The specification that matters is the ANSI number, because that is what the manufacturer is warranting the product against.
| Grout type | ANSI standard | Joint width | Typical pot life | Cure before sealing | Needs sealing? |
|---|---|---|---|---|---|
| Unsanded cementitious | A118.6 | Under 1/8 in. per TCNA | Per the bag, typically well under an hour | Per the bag | Yes |
| Sanded cementitious | A118.6 | 1/8 in. and larger per TCNA; over 3/8 in. wants a heavily sanded product | Per the bag | Per the bag | Yes |
| High-performance polymer-modified | A118.7 | Per the bag, often one formula across a wide range | Custom publishes 60 to 90 minutes for Prism | Custom publishes at least 48 hours for Prism | Product-specific. MAPEI Ultracolor Plus FA and TEC Power Grout are marketed as needing none |
| Epoxy | A118.3 | Per the bag | Laticrete publishes about 80 minutes at 70F for SpectraLOCK PRO Premium | Not applicable | Never. Sealer cannot penetrate cured resin |
A few notes that the table cannot carry.
A118.6 is the baseline. It is the standard for ordinary cementitious grout, sanded or unsanded, and it is what most bagged consumer grout meets. It works, it is forgiving to mix, and it needs sealing.
A118.7 is the upgrade most people should buy. Polymer-modified cementitious grout handles like normal grout in the bucket but cures denser, holds color better, and resists staining considerably more. Custom Building Products publishes a sixty to ninety minute pot life for Prism in its technical data sheet, which is a genuinely long working window for a cement product, and calls for at least forty-eight hours of cure before sealing. MAPEI publishes roughly four and a half to five and a half quarts of water per twenty-five pound bag of Ultracolor Plus FA with a twenty-four hour minimum cure, and markets it as requiring no sealing at all.
A118.3 is epoxy and it is a different animal. No cement, no porosity, no sealing ever, and near-total stain resistance. The cost is the working window. Laticrete publishes about eighty minutes at 70F for SpectraLOCK PRO Premium, and that number falls off sharply above 90F to where a batch can flash-set mid-job. Epoxy is the right call for a commercial kitchen, a shower floor, or a countertop backsplash behind a range. It is a poor first grouting experience on a large floor.
Rapid-set products sit alongside these. ARDEX FL is a rapid-set flexible sanded grout that takes foot traffic at about ninety minutes at 20C, which is 68F. Fast is useful when you need the room back. Fast also means your mistakes cure before you can fix them.
Sanded vs Unsanded: The Rule and the Reason
The TCNA rule is straightforward. For cementitious grout, joints under 1/8 inch should generally get unsanded grout. Joints 1/8 inch and larger should get sanded. Joints over 3/8 inch usually need a more heavily sanded product still.
Every guide repeats that. Almost none explain why, and the mechanism is what lets you make the right call on the joints that fall near the line.
Sand is not filler and it is not there to save money on cement. Cement grout shrinks as it cures, because hydration consumes water and the paste contracts. In a narrow joint that shrinkage is trivial in absolute terms. In a wider joint there is far more material, so there is far more total shrinkage, and unrestrained shrinkage in a rigid material means cracking. Sand grains bridge across the joint and mechanically restrain that movement. The aggregate takes the shrinkage stress in compression between grains instead of letting the cement paste tear itself apart. That is the whole reason wide joints need sand and it is a reinforcement function, not a bulking one.
The rule runs the other way for the same reason. In a joint under about 1/8 inch, the sand grains are too coarse relative to the gap to pack in properly. They wedge, they bridge on top of each other instead of nesting, and you get two problems at once. The grains sit proud of the joint face, where the float drags them across the tile and scratches polished stone, glazed ceramic, and glass. And because they cannot pack, they leave voids in the body of the joint, so a narrow joint filled with sanded grout is weaker than the same joint filled with unsanded.
Practical consequences. If you are running a polished marble or glass mosaic with hairline joints, unsanded is not a preference, it is the only option that will not visibly damage the surface. If you have a mixed floor with joints on both sides of the line, buy for the wider joints and accept a slightly rougher finish rather than under-reinforcing the wide ones. And if your joints came out wider than planned because the tile is not calibrated, that is a cutting and layout problem to solve upstream at the saw. Our tile saw guide covers which machines hold a square, repeatable cut, which is what keeps joint width consistent enough that one grout choice covers the whole floor.
Tools and Setup
The list is short, and two items on it are worth more than the rest combined.
- A rubber grout float. The single most important tool here. A firm rubber face with a beveled edge, sized to your hand rather than to the room. Do not substitute a margin trowel, a squeegee, or a plastic putty knife. The float is what packs grout into the joint under pressure, and pressure is what makes a dense joint.
- Two buckets minimum, three is better. One for mixing, one for clean rinse water, and ideally a third to stage dirty water so your rinse bucket stays clean longer. Rinse water contaminated with grout slurry is how haze gets deposited back onto tile you just cleaned.
- Hydrophilic grout sponges, the rounded-edge kind. Square-edged household sponges dig into fresh joints at the corners. Buy at least two and expect to wear them out.
- A margin trowel for scraping the bucket, loading the float on walls, and cutting bagged powder into water without splashing. A decent hand tool set usually covers the margin trowel, the utility knife, and the scraper in one purchase.
- A drill with a mixing paddle. Hand mixing a full bag never fully wets the powder, and the dry pockets show up as color streaks. Run the drill slow, which I cover in the mixing section.
- Work gloves. Portland cement is caustic and will burn your hands over a few hours of contact. Nitrile-coated gloves, not leather, since leather soaks up slurry and holds it against your skin. Eye protection while you are mixing dry powder.
- Knee pads, the gel or hard-cap kind. You will spend hours on your knees on a hard, gritty surface and cheap foam pads compress to nothing in an afternoon.
- A shop vacuum for cleaning joints before you start. Anything in our shop vac roundup with a crevice tool pulls out spacer fragments and thinset dust far better than a broom, which mostly redistributes it.
- A raking work light. This is the underrated one. Grout haze and low joints are close to invisible under overhead lighting and obvious under a light placed low and shone across the surface. A single portable unit from our LED shop light guide will show you defects while you can still fix them.
Set the room up before you mix anything. Water source close by, buckets staged, drop cloths down, tape run, lighting positioned. Once the mix is made you are on a clock and you should not be walking to the garage to find a sponge.
Prep: The Part That Decides Everything
Prep failures do not show up until after the grout has cured, which is why they get skipped.
Wait for the thinset. Twenty-four to forty-eight hours after setting the tile, per the mortar bag. Grouting over green thinset traps the water it still needs to release, and that moisture pushes up through the fresh joints as blotchy discoloration and efflorescence. Big-format tile and non-porous porcelain lengthen this, because thinset under an impermeable tile can only dry through the joints. If the mortar bag says forty-eight and it has been cold, take the full time.
Clean the joints to depth. You want the joint open to at least two thirds of the tile thickness. Squeezed-up thinset in the seams is the most common reason a joint ends up too shallow to develop strength, and shallow joints are the ones that crumble first. Rake the high spots out with a utility knife or a grout saw, then vacuum every seam. Run a fingertip down a few of them. If you feel a ridge, keep going.
Get the spacers out. All of them, including the ones that sank below the surface. Grouting over a buried spacer gives you a plastic void behind a thin grout skin that cracks under the first load. A long thin screwdriver from a precision screwdriver set hooks the sunken ones out without chipping a tile edge, which is exactly what a utility knife does when you pry with it.
Dampen the joints for cement grout, and get this right. Porous tile and a dry joint pull mix water out of the grout the instant it goes in, which starves the cement of the water it needs to hydrate and leaves you with a weak, powdery, blotchy joint. Wipe the surface with a damp sponge until the joints are uniformly damp and the tile faces are clean. There must be no standing water anywhere. Water sitting in a joint dilutes the grout locally and you get a light patch that never matches. Damp, not wet, and uniform across the whole section so the color cures even.
Tape off what you do not want grouted. Change-of-plane joints, expansion joints, the edge where tile meets a different material, and any trim profile. Masking those now is much faster than raking cured grout out of them later.
Mixing Grout (and Why Pot Life Is the Number That Matters)
This is where the eleven-week kitchen floor died, so I will be specific.
Water goes in the bucket first, then the powder. Powder first and you get dry pockets welded to the bottom that never disperse. Measure the water rather than eyeballing it. MAPEI publishes roughly four and a half to five and a half quarts per twenty-five pound bag for Ultracolor Plus FA, and that range is your entire tolerance for a bag that size. Start at the low end. You can always add a small amount before the slake.
Mix slow. A drill on high whips air into the mix, and entrained air becomes voids in the cured joint. Slow speed, paddle kept below the surface, mix until uniform and no longer.
Slake it. Let the mixed grout stand for the time on the bag, usually five to ten minutes, then remix briefly without adding water. Slaking lets the polymers and the cement fully wet out. Grout that has slaked handles noticeably better and, more importantly, its final consistency is the honest one. Grout you use immediately feels stiffer than it will be in five minutes, which is what tempts people to add water they do not need.
Never re-temper. This is the rule that matters more than everything else on this page. Once the batch stiffens because its pot life is ending, it is finished. Adding water to make it workable again does not reverse the set. It disrupts the cement crystals that have already formed and raises the water-to-cement ratio in one motion, and the result is grout that looks fine going in and turns to powder in your joints months later. Custom’s published sixty to ninety minute pot life for Prism is not a suggestion, it is the window in which that batch is structurally valid. When it stiffens, dump it and mix a fresh batch.
Which means: mix small. A half bag at a time on a floor, less on a wall. A partial batch you throw away costs a fraction of a bag. A full batch you re-tempered costs you the entire floor.
Grouting a Floor
Plan your exit before you start. Grout the section furthest from the door first and work back toward it, so you are never standing on fresh joints.
Work in sections of roughly ten to twenty square feet in normal conditions, less if the room is hot or you are using a rapid-set product. The section size is set by your pot life and your cleanup speed, not by ambition.
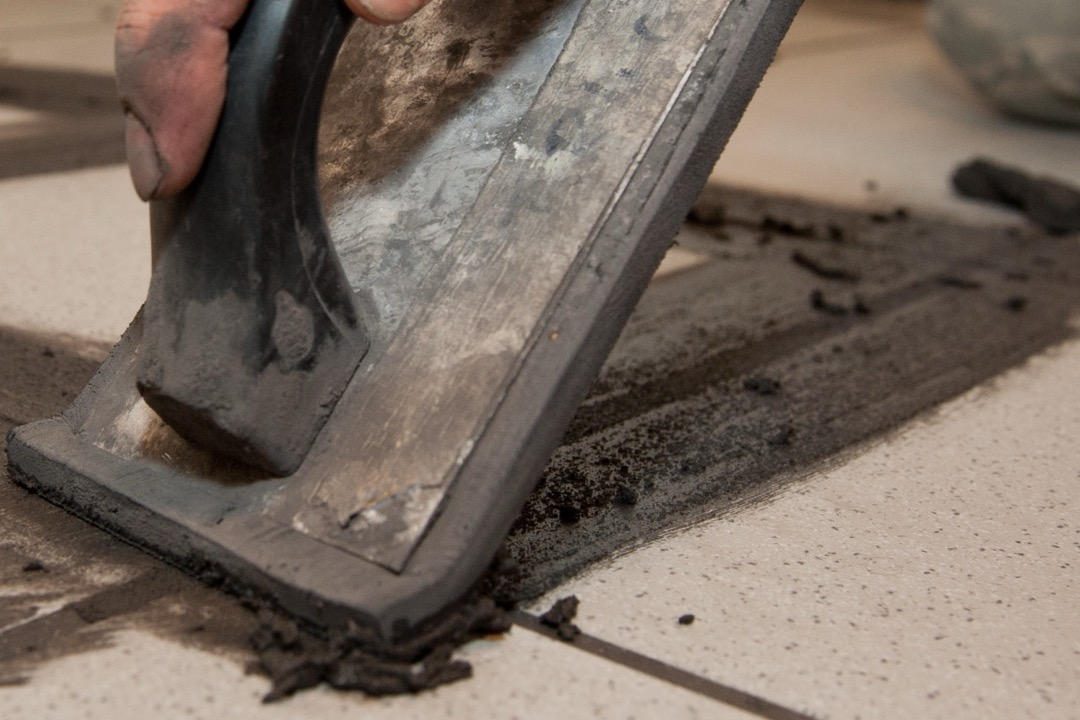
Load the float with a margin trowel and hold it at about a forty-five degree angle to the surface. Spread the grout diagonally across the joints, never parallel to them. A pass running along a joint skims material over the top and leaves air underneath. A diagonal pass forces material down into the joint and packs it. Make two or three passes over the same area from different directions, because a joint you approached from one angle only is rarely full at the far edge.
Press hard. You are compacting, not spreading. A well-packed joint is dense all the way down, and density is what resists water and traffic.
Then strike off. Tip the float up to a steep angle, near seventy or eighty degrees, and sweep diagonally across the joints again to shear off the excess. Diagonal again, for the same reason: a steep float running parallel to a joint scoops grout back out of it. Get as much excess off the tile as you can with the float, because everything you leave on the face is something your sponge has to handle, and the sponge is the step most likely to damage the joint.
Look down the joints under your raking light before you move on. Low spots and pinholes are trivial to fix now with a bit more grout and another packing pass. After the grout sets they are permanent.
Grouting a Wall
The mechanics are the same and gravity changes everything about the handling.
Mix stiffer than you would for a floor, closer to thick peanut butter than to cake frosting. A wall mix that flows is a wall mix that ends up on the floor and on the top edge of your tub.
Do not load a heavy pile onto the float face. Transfer a modest amount to the tile with a margin trowel, then use the float to drive it in. Work bottom to top so fallout lands on tile you have not cleaned yet. Hold a bucket under your working line, and tape a drop cloth over the tub, vanity, or counter below. On a kitchen backsplash, protect the countertop as if you expected to drop the whole batch on it, since the cost of a resurfaced counter is a real line item in any kitchen renovation budget.
Keep sections small, two or three square feet. A stiff mix in a warm bathroom sets faster than the same product on a cool floor, and you want to be sponging each section while it is still in its window.
The other wall-specific issue is that a vertical surface shows every inconsistency in the joint face. Wall joints get looked at from two feet away in good light, and floor joints get looked at from six feet up. Take the extra pass.
Grouting a Shower or Wet Area
Inside a shower I use epoxy, and I would tell any homeowner willing to accept the working window to do the same. Cementitious grout in a shower is porous, and it stays wet for hours after every use, so it accumulates soap scum in its capillaries and darkens no matter how diligently you seal it. Epoxy to ANSI A118.3 is non-porous, so there is nothing for the soap film to soak into and the color stays put.
Understand the trade before you commit. Laticrete publishes about eighty minutes of working time at 70F for SpectraLOCK PRO Premium, and that drops sharply above 90F, to the point where a batch can flash-set while you are still holding the float. Mix small, keep the material out of direct sun, and do not grout a shower in an unconditioned house in August.
If you use cement grout instead, the sealing timing is not optional. Let it cure the full published time before sealing, and understand that you are sealing porosity, not creating waterproofing. Custom publishes at least forty-eight hours for Prism. Sealing a shower joint early traps the mix water inside and you get exactly the blotchy, hazy result the sealer was supposed to prevent.
One more shower-specific note: Custom’s data sheet for Polyblend Plus sanded calls for misting exterior installations with clean cool water for three days. Cement grout cures by hydration rather than by drying, and pulling water out of it too fast weakens it. A shower that will not be used for a few days is closer to an exterior condition than people assume.
The Sponge Pass: Timing Is the Whole Job
More grout jobs are ruined at the sponge than anywhere else.
Wait for the initial set. Fifteen to thirty minutes is the usual range for cement grout, but go by touch rather than by the clock. Press a fingertip into a joint. Grout on your finger and a dent left behind means it is too soft and the sponge will excavate it. A print that holds without transferring material means you are in the window.
Then use the sponge correctly, which mostly means using less water than feels natural.
Wring it until it is barely damp. A dripping sponge floods the joint face and washes cement out of it, which leaves a rough, pitted, chalky surface and a joint that is weaker than the one you packed. That washed-out look people blame on cheap grout is nearly always a wet sponge.
Wipe diagonally across the joints, one direction per stroke, and lift the sponge at the end of each pass rather than dragging it back. Rinse and wring after every stroke or two. Turn the sponge to a clean face constantly. When the rinse water clouds up, change it, because rinsing in slurry just spreads a thinner layer of slurry across everything.
Expect two or three passes with time between them. The first takes the bulk off the tile. The second cleans and shapes the joint face. The third, with a nearly dry sponge or a clean cloth, evens the joint profile and lifts the first film of haze. Do not chase perfection on the first pass while the grout is at its softest.
The joint should end up slightly concave and flush with the tile edges. Deeply dished joints mean you sponged too wet or too early. Joints proud of the tile mean you did not strike off enough with the float.
Removing Grout Haze
Haze is the thin cement film left across the tile face after the water evaporates. It looks like a dull white or gray fog and it is close to invisible until the light hits it right, which is another argument for a raking light while you still have easy options.
The removal difficulty escalates fast, and Custom Building Products’ data sheet for Polyblend Plus sanded lays out the escalation clearly.
Within the first day, haze comes off with a clean damp sponge and a lot of rinse water, or with a dry microfiber cloth once the surface is fully dry. This is the easy window and it costs you fifteen minutes.
At about three days, it has hardened. Custom names Aqua Mix NanoScrub, a micro-abrasive cleaner, for stubborn haze at this point. You are now doing mechanical removal rather than washing.
At about ten days, Custom escalates to sulfamic acid crystals. That is a genuine acid cleaning, it requires ventilation and eye protection, and it can etch natural stone and damage some glazes if you get it wrong. It also attacks the grout joints themselves if you leave it dwelling.
The lesson is that haze is a scheduling problem. Do the dry buff the day after you grout, before the sealer, and you never have to own sulfamic acid crystals.
One thing not to do: a steam mop is excellent on cured, sealed grout during ordinary maintenance and it has no business anywhere near a floor that was grouted this week. Forcing steam into a joint that is still hydrating drives water where it does not belong and can lift a fresh sealer. Give it a couple of weeks.
How Long Grout Takes to Cure
Every figure below is the manufacturer’s own published number. The spread is the point.
| Product | Type | Published figure |
|---|---|---|
| Custom Building Products Prism (TDS-128) | Polymer-modified, ANSI A118.7 | Pot life 60 to 90 minutes; cure at least 48 hours before sealing |
| Custom Building Products Polyblend Plus, sanded (TDS-360) | Cementitious | Exterior installs need misting with clean cool water for 3 days; stubborn haze washable at 3 days with Aqua Mix NanoScrub, or at 10 days with sulfamic acid crystals |
| MAPEI Ultracolor Plus FA | Polymer-modified | Roughly 4.5 to 5.5 quarts of water per 25 lb bag; 24 hours minimum cure; marketed as requiring no sealing |
| Laticrete SpectraLOCK PRO Premium | Epoxy, ANSI A118.3 | About 80 minutes working time at 70F, dropping sharply above 90F to where it can flash-set mid-job |
| Bostik Dimension RapidCure | Rapid-cure | Wait 3 hours in warm dry conditions (above 70F, under 50% RH) or 6 hours in cool humid conditions before further cleaning |
| ARDEX FL | Rapid-set flexible sanded | Foot traffic after about 90 minutes at 20C (68F) |
| TEC Power Grout | Polymer-modified | Marketed as never needing sealing |
Two distinctions to keep straight. Initial set is when the joint stops deforming and will take light traffic. Full cure is when hydration has finished and the joint has reached its design strength, and that is days later on a cement product. ARDEX FL taking foot traffic at ninety minutes does not mean it is cured at ninety minutes.
Temperature and humidity move all of these. Bostik spelling out two different waits for warm-dry versus cool-humid is the honest version of what every cement product does. Cold slows hydration. Hot and dry accelerates the set and can pull water out before hydration finishes, which is why misting exists as an instruction. Keep the room within the temperature range on the bag for the full cure period, not just while you are working.
Sealing: Cement Yes, Epoxy Never
The rule is absolute in both directions.
Standard cementitious grout to ANSI A118.6 gets sealed. It cures porous, and those pores wick liquid and everything dissolved in it into the body of the joint. A penetrating sealer lines the capillaries so a spill sits on top long enough for you to wipe it. Reapply on the maker’s schedule, which is usually every one to two years in a kitchen and longer in a low-traffic room.
Wait for the published cure before you seal. Custom publishes at least forty-eight hours for Prism. Sealing early traps mix water inside a joint that is still hydrating, which gives you blotchy discoloration you cannot wash off and a hazy surface film. There is no way to speed this up and no benefit to trying.
Never seal true epoxy grout. Epoxy is non-porous. Sealer has nowhere to penetrate, so it sits on the cured resin, dries as a film, and then wears off in patches that look worse than anything it was meant to prevent. If a product data sheet says A118.3, put the sealer away.
Check the data sheet on polymer-modified products before assuming. MAPEI markets Ultracolor Plus FA as requiring no sealing, and TEC markets Power Grout the same way. Within a single brand, some lines want sealer and some do not, so read the sheet for the exact product in your bag rather than the brand’s general advice.
Where Grout Does Not Belong
Grout goes in plane-to-plane joints between coplanar tiles that do not move relative to each other. That is the only place it belongs.
Every change-of-plane joint gets flexible sealant instead. Tub to tile. Floor to wall. Every inside corner. The perimeter where tile meets a different material. Anywhere the installation crosses an expansion joint or a control joint in the slab.
The reason is movement. Those joints exist precisely because two surfaces move independently, and grout is a rigid cement product with essentially no ability to stretch. Put it across a moving seam and it does not flex, it cracks. Then the crack becomes the direct water path into the wall cavity or the subfloor, which is worse than an open joint would have been, because a cracked grout line looks sealed. A shower corner grouted instead of caulked is one of the most reliable ways to rot a bottom plate quietly for years.
If you grouted an inside corner already, rake it out with a grout saw, clean the substrate down to bare tile, dry it, and run a proper sealant bead. The technique, the joint geometry, and the product chemistry are all covered in our guide on how to caulk a bathtub, and the same rules apply to any change-of-plane joint in a tile installation.
Why Grout Cracks, Crumbles, or Discolors
Three failure modes, three different root causes, and the fix depends entirely on telling them apart.
Cracking is a substrate problem. Per TCNA, grout cracks because the substrate deflects and moves. Undersized joists, spans that are too long for the load, a subfloor that flexes underfoot, or a missing movement joint all transmit stress straight into a rigid grout line, and the grout fails because it is the weakest brittle element in the assembly. The important consequence: switching to a better grout does not fix a cracking floor. It buys you a slightly longer wait for the same crack. The fix is a deflection-rated substrate, adequate framing, and movement joints where the standard calls for them. If you regrout a cracked floor without addressing the movement, the new joints crack in the same places.
Crumbling and powdering is a water problem. Either too much mix water in the first place, or grout that was worked past its pot life and re-tempered with extra water to make it workable again. Both raise the water-to-cement ratio, and a high water-to-cement ratio produces weak, porous cement paste. That is the whole mechanism, and it is exactly what killed the kitchen floor I opened this guide with. There is no repair short of raking the joints out and regrouting, this time measuring the water and dumping any batch that stiffens.
Discoloration has three usual causes. Inconsistent water ratio between batches, which shows up as blocks of slightly different color corresponding to your working sections. Efflorescence, where moisture wicking up through the assembly carries dissolved salts to the surface and deposits them as a white bloom, which points at a moisture source under the tile rather than at the grout. Or sealing too early, which traps mix water in a joint that is still hydrating and leaves a blotchy, cloudy face.
Diagnose before you repair. A crumbling joint and a cracked joint look similar from standing height and have nothing in common underneath.
What I Would Do Differently on Your First Job
Five decisions carry most of the outcome, and none of them happen while you are holding the float.
Buy a polymer-modified grout to ANSI A118.7 rather than the cheapest bag. The longer pot life alone is worth it on a first job, and better color retention and stain resistance come along with it. If it is a shower, seriously consider epoxy and accept the shorter window.
Measure the water and mix half batches. Nobody has ever regretted throwing away a partial bucket. Everybody who has re-tempered a batch has regretted it about six months later.
Test the sponge window on one joint instead of guessing. Fingertip test, one joint, then commit. The sponge is where a good pack job gets destroyed.
Set up a raking light before you mix. You cannot fix a low joint or a haze film you cannot see, and both are trivially fixable in the first twenty-four hours.
Caulk every change of plane, without exception. No inside corners, no tub lines, no floor-to-wall transitions in grout. That single habit prevents the most expensive failure on this page.
Grout the far side of the room first, work back toward the door, and give the joints the full cure time on the bag before you put the furniture back. A properly mixed, properly packed cement joint that got sealed on schedule will outlast the paint in the room. The version that got an extra splash of water at hour three will not make it to next summer.
Frequently Asked Questions
How long do you leave grout before wiping it off?
Can I just put new grout over old grout?
Is it really necessary to seal grout on tile?
Is there a grout that doesn't need to be sealed?
What are the most common grouting mistakes?
How long does grout take to dry before you can walk on it?
How do you grout wall tile without it falling off the float?
Why do some contractors skip sealing grout?
Related Articles
How to Caulk a Bathtub: A Contractor's Guide to a Bead That Lasts
home-improvement
Bathroom Renovation Checklist for Beginners: A Licensed GC's Step-by-Step Guide
home-improvement
7 Best Tile Saws of 2026
power-tools-workshop
11 Best Work Gloves of 2026: A Contractor's Picks
safety-security
7 Best Hand Tool Sets of 2026
power-tools-workshop
About the Reviewer

Jake Morrison, Licensed General Contractor
B.S. Construction Management, Purdue University
Jake Morrison has spent 14 years in residential construction and home renovation before founding DIYRated in 2026. After helping hundreds of homeowners choose the right tools and materials for their projects, he started writing the product guides he wished existed when he was starting out. Jake builds each pick from spec sheets, manuals and verified buyer reviews, and weighs how tools hold up for real owners over marketing claims.