Kitchen Renovation on a Budget: Where to Save and Splurge (A Licensed GC's Guide)
By Jake Morrison, Licensed General Contractor Updated
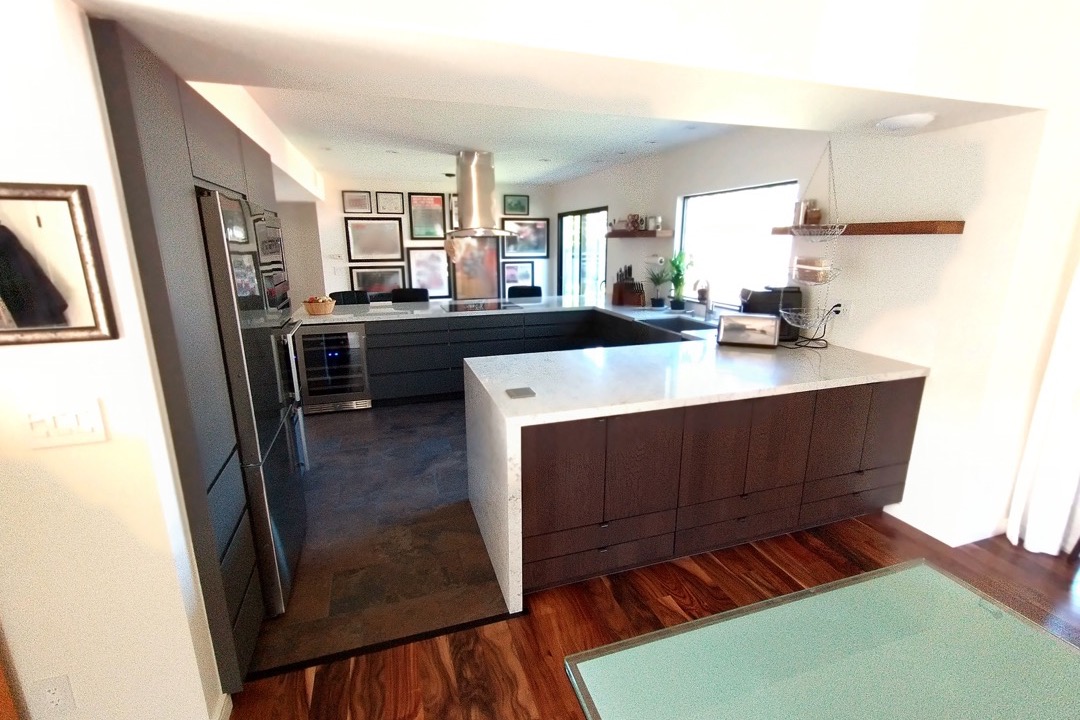
Every kitchen remodel I have ever run started with the same conversation: the homeowner has a number in their head, a board full of inspiration photos, and almost no idea which of those photos quietly tripled the budget. After more than twenty years of pulling permits, scheduling trades, and walking clients through their options on a torn-out kitchen floor, I can tell you that a budget kitchen renovation is not about buying cheap things. It is about knowing exactly where a dollar buys lasting value and where it buys nothing but regret.
This guide is the version of that conversation I wish every homeowner had before they signed a contract or swung a hammer. It covers what a kitchen actually costs in 2026, how that money breaks down, and — the part that matters most — precisely where to save and where to spend. But it also covers the things no glossy remodeling article will tell you: which projects trigger a permit, the order trades have to show up in so you do not pay them to stand around, what gets found after demo, and how to phase the whole thing across a couple of years if you cannot write one big check. That field-tested side is where most budget remodels are won or lost.
What a Kitchen Remodel Actually Costs in 2026
Let me give you honest numbers, because the ranges you see thrown around online are often either marketing optimism or scare-tactic worst cases. There are really three tiers, and which one you are in is determined almost entirely by whether you touch the layout and the mechanical systems.
Minor and cosmetic — roughly $5,000 to $20,000. This is paint, new hardware, a fresh backsplash, updated lighting, possibly new appliances, and either painted or refaced cabinets, all on the existing footprint. Nothing moves. This is the tier where a disciplined homeowner doing some of the labor gets the biggest transformation per dollar.
Mid-range — roughly $25,000 to $50,000. New cabinets, new countertops, new appliances, new flooring, updated lighting and a new sink and faucet — but the layout stays put. This is the most common “real remodel” and where most of my clients land. The national average for a midrange kitchen sits around $27,000 to $35,000, and the industry’s standard reference is a 10-by-10 kitchen, which runs roughly $18,000 to $50,000 depending on finish level.
Full gut and high-end — $75,000 to $150,000 and up. Layout changes, walls coming out, plumbing and gas relocated, custom cabinetry, premium stone, and high-end appliances. In expensive metros this tier has no real ceiling.
The guardrail I give every client to keep the dream in check: don’t spend more than about 10 to 15 percent of your home’s value on the kitchen. Spending $80,000 on a kitchen in a $300,000 house is over-improving for the neighborhood, and you will not see that money again when you sell. The kitchen should be the best room in a house at its price point — not a room that belongs in a house worth twice as much.
How Your Budget Breaks Down by Component
When you understand where the money goes, you understand where the savings live. These percentages are the consensus across the cost data I trust, and they hold up remarkably well across project sizes:
- Cabinets and hardware — 29 to 40 percent. The single biggest spend, and the decision that sets your ceiling.
- Labor and installation — 20 to 35 percent. Climbs steeply the moment the layout or structure changes.
- Appliances and ventilation — 10 to 20 percent. Wide range depending on whether you keep existing units.
- Countertops — 10 to 15 percent. Material choice swings this dramatically.
- Flooring — 5 to 10 percent. Often skipped entirely in minor remodels.
- Lighting and electrical — 5 to 10 percent. Chronically underbudgeted, and expensive to add later.
- Plumbing — 4 to 6 percent. Balloons fast if you move the sink or drains.
- Backsplash — 2 to 5 percent. The best visual impact per dollar in the whole kitchen.
- Contingency — 10 to 20 percent. Non-negotiable, and larger for older homes.
Look at that list and one thing should jump out: cabinets plus labor is more than half of almost every kitchen budget. That is why the two decisions that move your total the most are your cabinet strategy and whether your labor includes the expensive, invisible work of moving mechanical systems. Nail those two and the rest is detail.
Where to Save (Without Cheaping Out)
Saving money on a kitchen is not about buying the worst version of everything. It is about identifying the places where the cheaper option performs identically and the difference is pure vanity.
Keep your existing layout. I will say it again because it is the most important sentence in this guide: the layout is the biggest budget lever you have. Every appliance, the sink, and the major runs that stay put is money you do not spend on opening floors, re-routing drains, and pulling permits. A great-looking kitchen on the existing footprint beats a mediocre one you bankrupted yourself relocating.
Choose cabinets by tier honestly. Ready-to-assemble (RTA) cabinets have gotten genuinely good, and for a budget kitchen a quality plywood RTA line installed well looks like a far more expensive kitchen. Semi-custom is the sweet spot for most mid-range remodels. Reserve full custom for genuinely odd spaces or for a forever home where you will amortize the cost over decades. And if your existing boxes are solid, painting or refacing them rather than replacing is the largest single saving available to you.
Use laminate or entry quartz where it makes sense. Modern laminate countertops are not your grandmother’s laminate — the printing and edge profiles have improved enormously, and in a starter home, a rental, or any budget-driven kitchen, a quality laminate is a smart, durable, low-cost call rather than an embarrassing compromise. Entry-level quartz is the next step up and still well short of premium natural stone.
Be strategic about appliances. If your current appliances work and match, keep them and put the money elsewhere. If you are replacing, a mid-tier suite from a reliable brand outperforms a single flashy showpiece surrounded by builder-grade. Decide where appliances actually matter to you — many homeowners find a quiet, well-built dishwasher changes daily life more than a six-burner range they use twice a year. Our guide to the best dishwasher brands breaks down where the real reliability differences are if you are choosing one.
Do the demolition and the painting yourself. Demo is unskilled, satisfying, and genuinely saves labor — just shut off the water and power first, and watch for the surprises I cover below. Painting the walls before cabinets go in, and painting the cabinets if the boxes are sound, is the highest-value DIY in the whole project. If you are tackling the walls yourself, our how to paint a room walkthrough covers the prep that separates a pro-looking job from a streaky one, and the roundup of the best interior paint will steer you to a durable, scrubbable finish that holds up to kitchen grease and humidity.
Where to Splurge (What I Tell Every Client)
Now the other side. Saving everywhere is how you end up with a kitchen that looks fine on day one and falls apart in year three. There are specific places where spending more is genuinely the cheaper long-term decision.
Cabinet box construction. I keep coming back to the boxes because they matter that much. Solid plywood sides, a sturdy hanging system, and quality full-extension drawer glides are what you are actually buying when you buy good cabinets. The doors are the part everyone admires and the cheapest part to change later. Spend on the box even if it means a plainer door.
Electrical capacity. While the walls are open, add more circuits and outlets than you think you need. This is the splurge that is almost free now and brutally expensive later — once the drywall and backsplash are in, adding a circuit means demolishing finished work. Plan for dedicated appliance circuits, plenty of countertop outlets, and the code-required GFCI protection, and ask your electrician to rough in for anything you might add down the road.
Ventilation that actually vents. A range hood ducted to the exterior in a short, smooth run is one of the best dollars you will spend. A recirculating hood that filters air and dumps it back into the room does almost nothing for grease, moisture, and odor. If you are doing any wall or ceiling work anyway, get the exterior duct run done while the access is free.
Lighting, especially under-cabinet. Lighting is chronically underbudgeted and disproportionately responsible for how expensive a finished kitchen looks. Layered lighting — ceiling, task, and under-cabinet — transforms a space, and under-cabinet lighting in particular delivers a high-end feel for modest money. Our roundup of the best under-cabinet lights covers hardwired and plug-in options depending on whether your walls are open.
The faucet and sink. You touch these dozens of times a day, for the entire life of the kitchen. A quality faucet with a good cartridge and a deep, well-built sink is worth buying above builder-grade, and it is a relatively small line item. Our guide to the best kitchen faucets compares pull-down sprayers, finishes, and the valve quality that determines whether a faucet drips in two years or twenty.
And one more, while we are talking about open walls: if you are running electrical anyway, it is the cheap moment to upgrade other systems that share the space. A lot of my clients add a smart thermostat and other low-voltage upgrades during a kitchen project precisely because the access is already there and the marginal labor is near zero.
Cabinet Refacing vs. Replacing — The GC Decision Rule
Refacing gets mentioned a lot, but the useful part is knowing when it actually makes sense. Here is the rule I use.
Refacing means new doors, new drawer fronts, and a matching veneer skin over your existing cabinet boxes. It only makes sense if the boxes are worth saving. Open a cabinet and check three things: are the sides solid plywood or solid wood rather than swollen particleboard; is there any water damage or sag, especially under the sink and at the toe kick; and do the doors and drawers still hang and run true. If the boxes pass — and quality older kitchens often do — refacing at roughly $6,000 to $12,000 is a genuinely smart alternative to $15,000 to $25,000-plus for full replacement, and you keep your kitchen usable through most of the work.
If the boxes fail — and builder-grade particleboard from the 1990s very often has, with swelling at the base and glides pulling out of their screws — refacing is throwing good money after bad. You will spend thousands skinning a structure that is already failing. When the boxes are gone, replace them and treat the door style as a separate decision driven by your budget.
The Permit Question — What Triggers One and What Doesn’t
I have pulled hundreds of permits, and I can tell you that the homeowners who get burned are almost always the ones who assumed a kitchen is “just cosmetic.” Here is the simple decision tree.
Generally no permit required: painting, new cabinet doors or refacing, countertops in the same footprint, a backsplash, swapping a faucet or a light fixture for one in the same location, and new flooring. If you are refreshing surfaces and nothing mechanical moves, you are usually clear.
Almost always requires a permit: moving or adding electrical circuits, relocating plumbing (moving the sink, adding an island with water, re-routing a drain), removing or altering a wall, adding or moving a gas line, and changing the ventilation that penetrates the building envelope.
What happens if you skip it: unpermitted work can void the relevant portion of your homeowner’s insurance if there is ever a fire or flood traced to it, it can generate fines and forced re-inspection, and it reliably surfaces at sale when a buyer’s inspector or appraiser notices work that does not match the permit history. I have watched unpermitted kitchens blow up real estate deals at the worst possible moment. The permit is cheap insurance — call your local building department before the work starts, because requirements genuinely vary by jurisdiction and a five-minute call removes all the risk.
The Trade Sequencing No One Tells You About
Here is the single biggest reason kitchen remodels run over budget, and it has almost nothing to do with the price of materials: trades showing up in the wrong order. Every out-of-sequence trip is wasted labor you usually pay for, and every delay cascades into the next trade’s schedule.
The correct order, the way I run it: demo first; then rough-in electrical and plumbing while the walls are open; insulation and drywall; prime and paint the walls (far easier before the cabinets are in); flooring or cabinets depending on your installer’s preference; cabinet installation, leveled and secured; then — and only then — the countertop template, because templating requires the actual installed cabinets. Countertop fabrication then takes two to three weeks, a stretch during which you have no sink, so plan your camp-kitchen accordingly. After the counters are set: final sink and plumbing hookup, appliances, backsplash, lighting and fixtures, and finally the punch list.
The expensive failures are almost always sequencing failures. A countertop crew that arrives to template before the cabinets are installed is a wasted trip. A backsplash installed before the electrical is finished gets torn out. Getting the order right is free, and getting it wrong costs thousands — which is exactly why, on the gray-zone projects, having a contractor who runs this sequence in their sleep is worth paying for. If you are weighing how much of this to take on yourself, our honest breakdown of DIY versus hiring a contractor walks through which kitchen tasks are safe to own and which are a category mistake regardless of skill.
When you do solicit bids, vet them like a pro: insist on a line-itemized bid rather than a single lump sum, be wary of any contractor demanding more than about 30 percent upfront, understand what “allowances” cover and where they get padded, and remember that the lowest bid is frequently the one that forgot something you will pay for later as a change order.
What Gets Found After Demo — Hidden Costs by Home Age
Demo is the moment of truth, because it is when the walls give up their secrets. The hidden costs that wreck budgets scale directly with the age of the house.
In homes built before about 1980, watch for asbestos in old vinyl floor tile and in joint compound, which requires licensed abatement and is not a DIY situation; knob-and-tube wiring that legally cannot share a circuit with modern kitchen appliances and often needs replacement; and galvanized steel supply lines that are corroding shut from the inside. In any older home, you may also find water damage and mold behind the sink cabinet, or a drain line sloped wrong that has to be redone to pass inspection.
This is precisely why the contingency is non-negotiable. For a 1990s-or-newer home, 10 to 15 percent covers the realistic surprises. For a 1950s-or-earlier home, budget 15 to 20 percent and genuinely expect to spend a good share of it. The homeowners who cut the contingency to afford nicer counters are the ones whose projects stall the day the first surprise appears.
How to Phase a Kitchen Remodel Across 2–3 Years
No other guide covers this, and it is the most practical option for a homeowner who wants the whole kitchen but cannot write one big check. The key is phasing in an order that never makes you tear out finished work — which is the trap most DIY phasing falls into.
Phase 1 — infrastructure first. Anything that requires opening walls or floors: electrical upgrades and added circuits, plumbing re-routes, any structural change, and ventilation ducting. This is unglamorous and partly invisible, which is exactly why people skip it — and exactly why it has to come first. You never want to install a beautiful backsplash in year one only to demolish it for electrical in year three.
Phase 2 — surfaces and the big-ticket items. Cabinets, countertops, and appliances. This is the phase that visually transforms the kitchen, and because the infrastructure is already done, it goes in cleanly.
Phase 3 — cosmetic finishes. Backsplash, final lighting and fixtures, hardware, and paint. These are the cheapest, most DIY-friendly elements and the ones it is safe to leave for last because nothing else depends on them.
Phasing in this order means each phase builds on the last instead of undoing it. The mistake to avoid is doing the fun, visible phase first because it is gratifying — that is how people end up ripping out a year-old finish to chase a wire.
ROI — Will You Get Your Money Back?
The honest answer: usually not all of it, and a minor remodel returns more proportionally than a major one. The remodeling cost-versus-value data consistently shows that a minor midrange kitchen remodel recoups close to its full cost at resale, while a major upscale remodel returns roughly half. That is not an argument against remodeling — you remodel a kitchen to live in it, not to flip it — but it is a strong argument for the budget-disciplined approach this whole guide advocates. The cosmetic-and-strategic refresh is not just cheaper to do; it is the version that comes closest to paying for itself. Pour $120,000 into a showpiece in a modest neighborhood and you are buying enjoyment, not equity.
The Bottom Line
A budget kitchen renovation is an exercise in judgment, not deprivation. Keep the layout, buy the better cabinet box in a plainer door, spend on the invisible infrastructure while the walls are open, save on the cosmetic surfaces you can upgrade cheaply later, and protect yourself with a contingency sized to the age of your house. Respect the permit rules and the trade sequence, because those are where budgets quietly hemorrhage. Do that, and a five-figure kitchen can look and function like one that cost far more — which, after twenty years of doing this, is the only definition of a successful budget remodel I trust. Before you start, make sure your toolkit is ready for the DIY pieces you plan to own; our guide to the essential tools every new homeowner needs covers the priority hand and power tools that show up in nearly every kitchen project.
Frequently Asked Questions
What is a realistic budget for a kitchen remodel in 2026?
What is the most expensive part of a kitchen remodel?
Can I remodel a kitchen for $15,000?
What is the cheapest way to renovate a kitchen?
Should I reface or replace my kitchen cabinets?
Do I need a permit to remodel my kitchen?
What should I splurge on in a kitchen remodel?
In what order should a kitchen remodel be done?
What are the hidden costs of a kitchen remodel?
How do I pay for a kitchen remodel if I don't have the savings?
Related Articles
DIY vs Hiring a Contractor: A Licensed GC's Honest Guide to When You Should Call a Pro
power-tools-workshop
Bathroom Renovation Checklist for Beginners: A Licensed GC's Step-by-Step Guide
home-improvement
7 Best Interior Paints for Walls in 2026 (Tested by a Licensed Contractor)
painting-supplies
9 Best Kitchen Faucets of 2026
kitchen-tools
Best Under Cabinet Lights in 2026, Tested and Ranked by a Licensed Contractor
lighting
About the Reviewer

Jake Morrison, Licensed General Contractor
B.S. Construction Management, Purdue University
Jake Morrison has spent 14 years in residential construction and home renovation before founding DIYRated in 2026. After helping hundreds of homeowners choose the right tools and materials for their projects, he started writing the product guides he wished existed when he was starting out. Jake builds each pick from spec sheets, manuals and verified buyer reviews, and weighs how tools hold up for real owners over marketing claims.