How to Install a Garbage Disposal: A Contractor's Step-by-Step Guide
By Jake Morrison, Licensed General Contractor Updated
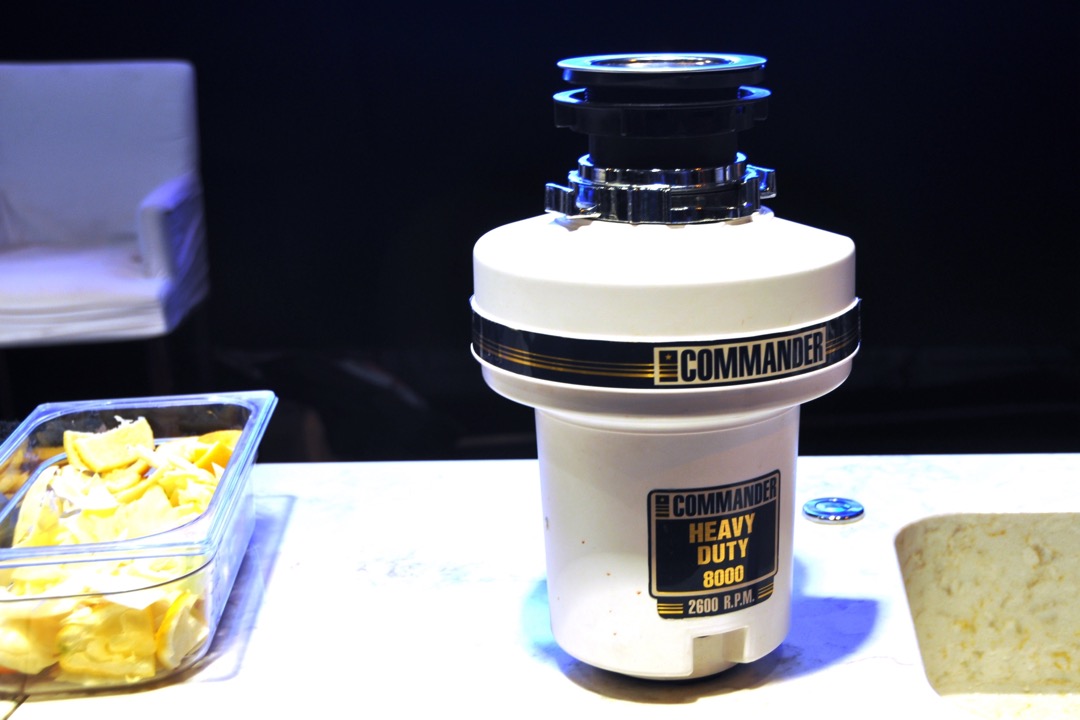
The call I get most about garbage disposals is not about a jammed or dead unit. It is about a new one somebody installed last weekend that is now dripping into the cabinet, or a dishwasher that stopped draining the same day the disposal went in. Both are almost always the same two mistakes: a mounting ring that was not fully locked, or the dishwasher knockout plug that never got knocked out. Neither one takes skill to avoid. It takes doing the steps in the right order.
This is the order I install them in. It covers both the common job (replacing a dead disposal) and the harder one (adding a disposal to a sink that never had one), with the parts most guides skip: matching the drain height, the dishwasher air gap question, and testing for leaks before you ever turn the power on.
Before You Start: Decide What Kind of Job This Is
Three questions decide how hard your install will be. Answer them before you buy anything.
Is this a replacement or a first install? A replacement uses the outlet, switch and drain that are already there. A first install may need a new receptacle under the sink, a wall or air switch, new drain parts, and sometimes a circuit. Budget an hour or two for a swap and most of a day for a first install, plus electrician time if you need new wiring.
Corded or hardwired? Look under the sink. If the old unit plugs into an outlet, buy a power cord kit for the new one (most disposals do not ship with a cord) or a model that comes with one. If a cable runs straight into the bottom of the old unit, it is hardwired, and you will reconnect the same way.
Does a dishwasher drain into it? If so, you need to knock out the dishwasher plug on the new unit and think about the air gap or high loop, covered below.
Then pick the unit. Size and noise matter more than most people expect, and drain height (covered below) can rule some models out. My roundup of the best garbage disposals breaks it down by 1/2 HP, 3/4 HP, compact units for tight cabinets and quiet models. If you are on a septic system, start with the septic-friendly picks, since a disposal adds solids to the tank and septic-rated units are built to help break them down.
Tools and Materials
- Screwdrivers, both flat and Phillips. A decent screwdriver set with a long flat blade helps with the mounting ring.
- Adjustable pliers or groove-joint pliers
- Hammer, for the dishwasher knockout
- Hacksaw or tubing cutter, in case the discharge tube needs trimming
- Non-contact voltage tester. If you have never used one, my guide to using a multimeter covers confirming a circuit is dead.
- Wire strippers and wire nuts, for hardwired units or cord kits
- Plumber’s putty, or stain-free putty for stone and quartz sinks
- Power cord kit, if the unit is corded and does not include one
- Bucket and towels
- A paint can or a stack of books to support the unit while you hang it
- A bright work light. Under a sink you are working in your own shadow, and an LED work light makes a real difference.
- Work gloves, because the inside of a sink flange and old drain parts have sharp edges
Most of this is in any basic hand tool set.
Step 1: Shut Off Power and Confirm It Is Off
Unplug the old disposal if it is corded. Then turn off the breaker that feeds it and test. For a hardwired unit, open the electrical cover plate on the bottom of the disposal and check the wires with a voltage tester before you touch them. Breaker panels are mislabeled in a large share of the houses I work in, and the switch on the wall does not count as a disconnect. Test, do not assume.
Step 2: Remove the Old Disposal
Put a bucket under the trap, then loosen the slip nut where the discharge tube meets the drain and pull the tube free. Disconnect the dishwasher hose from the side of the disposal if there is one.
Now support the unit from below, because a disposal weighs more than it looks. On the common three-bolt mount, slide a screwdriver into one of the ears on the lower mounting ring and turn it to the left (counterclockwise from below). The unit will drop free once the ring rotates off its tabs. Twist-on mounts release with a similar turn by hand or with the wrench that came with the unit.
For a hardwired unit, remove the cover plate, undo the wire nuts, loosen the cable clamp and pull the cable out. Note which wire went where, though it is almost always black to black, white to white, and bare or green to the green ground screw.
Step 3: Install the New Sink Flange and Mount
If the new disposal uses the same mount and the old flange is clean, sealed and not corroded, you can skip to Step 4. Otherwise, take the old mount off: loosen the three mounting screws, pry off the snap ring, and push the old flange up and out of the sink. Scrape off all the old putty and clean the sink opening.
To install the new one:
- Roll a rope of plumber’s putty about half an inch thick and press it around the underside of the new flange lip.
- Press the flange into the sink opening from above. Put something heavy in the sink on top of it, or have a helper hold it down, so it does not lift while you work below.
- From underneath, slide on the fiber gasket, the backup ring and the mounting ring, in the order shown in your manual. Then snap the retaining ring into the groove on the flange. It takes firm pressure, and it is the step that makes people think they are doing it wrong. They are not.
- Tighten the three mounting screws evenly, a little at a time, until the ring is snug against the sink and the flange is seated. Do not crank one screw down all the way first, or the flange will cock to one side and leak.
- Wipe away the putty that squeezed out around the flange in the sink.
Step 4: Prepare the Unit on the Bench
Do these on a counter or the floor, where you can see what you are doing, not upside down in the cabinet.
Knock out the dishwasher plug, if a dishwasher drains into this sink. Set a long screwdriver against the plug inside the dishwasher inlet and tap it with a hammer until it breaks free. Then reach into the grinding chamber and take out the loose plastic disc. This is the single most common disposal install mistake I see. Forget it and the dishwasher floods on its first cycle. Leave the disc inside and it jams the unit.
Wire the power cord or prepare for hardwiring. Remove the electrical cover plate on the bottom of the disposal. Feed the cord or cable through a strain relief or cable clamp, connect black to black and white to white with wire nuts, and fasten the bare or green ground wire to the green ground screw. Tuck the wires in and replace the cover. Cord kits come with instructions for your model; follow them.
Attach the discharge tube to the side outlet with its gasket and flange, but leave it loose enough to rotate.
Step 5: Check the Drain Height Before You Hang It
This is the step every other guide leaves out, and it is the one that turns a simple swap into a plumbing problem.
The disposal’s side outlet has to sit higher than the point where the drain enters the wall (the trap arm). If the wall drain is higher than the disposal outlet, water cannot fall from the disposal to the trap, so it sits in the bottom of the unit and stinks. A new disposal is often taller than the old one, especially when you step up in horsepower, which moves the outlet lower.
To check it, measure from the bottom of the sink down to the center of the wall drain. Then find the new unit’s drain height in its specs (the distance from the sink bottom to the center of the discharge outlet) and compare. If the disposal outlet comes out above the wall drain, you are fine. If not, you have three options:
- Choose a compact disposal with a shorter body and a higher outlet.
- Use an offset or flexible discharge tube, which buys back a little height in some layouts.
- Have a plumber lower the drain in the wall, which means opening the cabinet back and moving the fitting. That is the right fix in an older kitchen with a high drain, and it is not a beginner job.
On a double-bowl sink, check the continuous waste (the tee that joins both bowls) as well. The disposal’s discharge should enter below the other bowl’s drain, so ground food does not back up into the second sink.
Step 6: Hang the Disposal
Rest the unit on a paint can or a stack of books under the sink to take the weight. Lift it into place so the three tabs on the top of the unit line up with the mounting ring ramps, then turn the lower mounting ring to the right until all three tabs ride up and lock over the ridges. Use a screwdriver in one of the ears for the last bit of leverage.
Look at all three tabs. A ring that is locked on two points and not the third is the top cause of leaks at the top of a new disposal, and it can feel tight when it is not. Before the last turn, rotate the unit so the discharge outlet lines up with the drain and the dishwasher inlet faces the dishwasher hose.
Step 7: Connect the Drain and Dishwasher
Connect the discharge tube to the trap. If the tube is too long, trim it with a hacksaw so it meets the trap without stressing either part. Hand-tighten the slip nuts, then give them a quarter turn with pliers. Overtightening plastic slip nuts cracks them. If the old trap is brittle, discolored or the threads are stripped, replace it now. Those parts are cheap and a cracked one is a guaranteed drip.
Slide the dishwasher hose over the inlet on the side of the disposal and secure it with a hose clamp.
Air gap or high loop
The dishwasher drain hose needs protection against dirty sink water siphoning back into the dishwasher. There are two ways to do it, and your local code decides which:
- Air gap: a small fitting mounted on the countertop or sink deck, with one hose from the dishwasher in and one hose to the disposal out. Plumbing codes based on the Uniform Plumbing Code, used in California and much of the West, generally require one.
- High loop: the drain hose is looped up and fastened as high as possible to the underside of the countertop before it drops to the disposal. Many jurisdictions on the International Plumbing Code accept this.
If you are replacing a disposal and there is already an air gap on the counter, keep it. If there is neither, at minimum make a high loop, and check with your local building department on which one they want. It is a quick phone call. If you are also replacing the faucet, it is the right time to plan an air gap hole, and my kitchen faucet guide covers which deck layouts leave room for one.
Step 8: Test for Leaks Before Turning On the Power
Most people flip the switch first. I test in this order, because a leak is much easier to find with the motor off and nothing vibrating:
- Run water with the power still off. Let the tap run into the disposal for a minute and check every joint with a dry paper towel: the sink flange, the top of the unit, the discharge tube, the trap and the dishwasher inlet. Paper towels show a drip that your fingers will miss.
- Do a fill-and-drain test. Put the stopper in, fill the sink most of the way, then pull it. The weight of a full bowl puts much more pressure on every joint than a running tap does. Check again.
- Turn the power back on and run it. Run cold water and turn on the disposal. Listen for grinding or rattling, which usually means something fell into the chamber (like the knockout disc). Check the joints once more while it runs.
- Run the dishwasher drain. Start a short dishwasher cycle or a drain cycle and watch the dishwasher inlet and the hose connection.
Check under the sink again the next morning. A slow weep at a slip nut sometimes only shows up after a few hours.
Electrical Notes Worth Knowing
The National Electrical Code (Section 422.16) lets a disposal be cord-and-plug connected with a cord between 18 and 36 inches long, a grounding-type plug, and a receptacle that is accessible under the sink. Current editions of the code also call for GFCI protection on kitchen receptacles. Local adoption varies, so if you are adding a new outlet, check with your inspector.
For control, you have three choices. A wall switch is the most common. An air switch puts a push button on the sink deck that sends a pulse of air to a controller under the sink, so there is no electricity near the water and no wall work, which makes it a good option for a first install. A batch-feed disposal needs no switch at all: it runs only when you put the stopper in and turn it, which also keeps hands out of the chamber.
If any of this means running new wire, adding an outlet or installing a switch in the wall, that is the part I hand to a licensed electrician, even on jobs where I do the plumbing myself. It is a short visit and it keeps the job inspectable.
Common Installation Mistakes
- Forgetting the dishwasher knockout, or leaving the disc inside the chamber
- A mounting ring locked on two tabs instead of three
- Tightening the three mount screws unevenly, so the flange seats crooked
- Overtightening plastic slip nuts and cracking them
- Reusing a brittle old trap
- Hanging a taller unit without checking drain height
- Skipping the high loop or air gap on the dishwasher hose
- Testing with the power on first, so a leak is hidden by vibration
After the Install: Keep It Running
A disposal installed right should last ten years or more if you treat it well. Run cold water while grinding, keep grease, fibrous peels and coffee grounds out of it, and clean the splash guard every few weeks. My guide on how to clean a garbage disposal walks through the routine, and the best garbage disposal cleaners roundup covers which products are worth using. Keep caustic chemical drain openers out of it: they sit against the seals and do not fix a mechanical clog. If the line downstream does slow down, my guide to unclogging a drain and the drain cleaner roundup cover what is safe to use.
If the disposal feeds a dishwasher that is near the end of its life, it is worth replacing both while the cabinet is empty. My guide to the best dishwasher brands covers which ones hold up.
Frequently Asked Questions
Can I install a garbage disposal myself?
Do I need a plumber's putty or silicone for the sink flange?
Do I have to knock out the dishwasher plug on a new disposal?
Can I reuse the old mounting assembly when I replace a disposal?
Does a garbage disposal need its own circuit?
Related Articles
How to Clean a Garbage Disposal: A Contractor's Method That Actually Kills the Smell
plumbing
11 Best Garbage Disposal Cleaners of 2026: A Contractor's Picks by Format
plumbing
10 Best Garbage Disposals of 2026: A Contractor's Picks by HP, Brand, and Sink
plumbing
7 Best Dishwasher Brands of 2026
laundry-appliances
9 Best Kitchen Faucets of 2026
kitchen-tools
About the Reviewer

Jake Morrison, Licensed General Contractor
B.S. Construction Management, Purdue University
Jake Morrison has spent 14 years in residential construction and home renovation before founding DIYRated in 2026. After helping hundreds of homeowners choose the right tools and materials for their projects, he started writing the product guides he wished existed when he was starting out. Jake builds each pick from spec sheets, manuals and verified buyer reviews, and weighs how tools hold up for real owners over marketing claims.