How to Use a Multimeter (Without Blowing a Fuse or Trusting a Bad Reading)
By Jake Morrison, Licensed General Contractor Updated
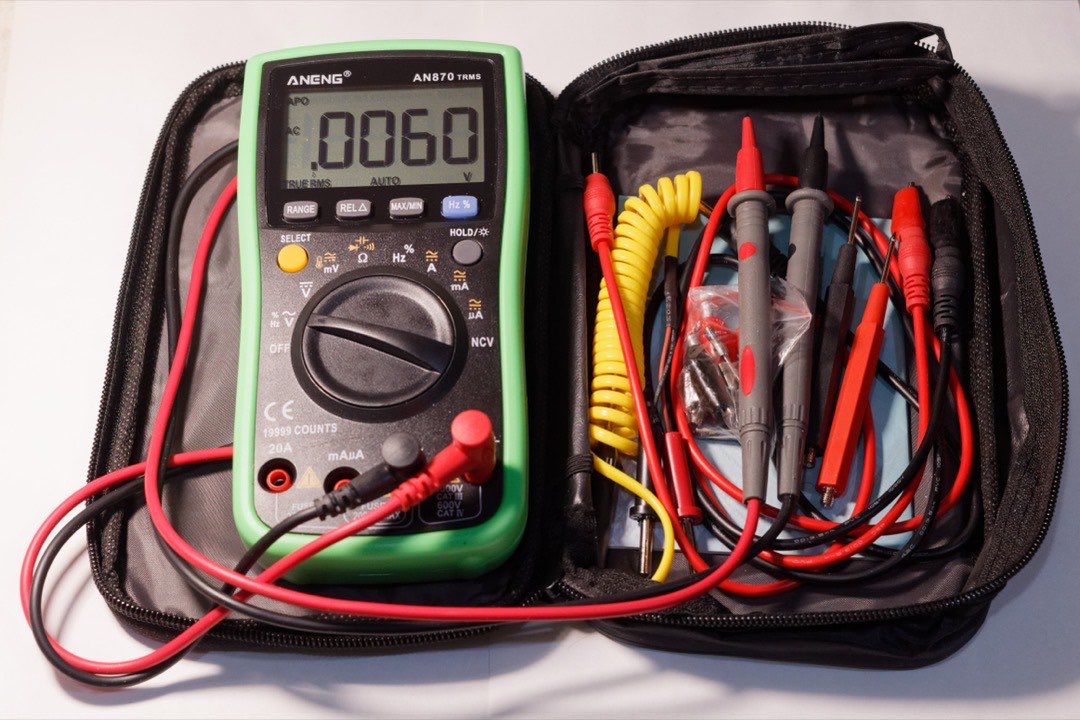
The worst reading I ever saw on a job site was a zero. A helper on my crew, about three weeks in, was about to swap a kitchen receptacle. He put his meter on the outlet, read a flat zero, and told me the circuit was dead. It was not dead. It was 120 volts, and the dial was sitting on DC volts instead of AC. Most digital meters will show something close to zero when you measure AC on a DC setting, so the meter told him exactly what he expected to hear.
Nobody got hurt, because I made him test a receptacle we knew was live first. It also read zero, and that is when we found the dial. A multimeter is simple to operate and easy to misread, and almost every bad outcome I have seen comes from trusting a single reading with no way to check it.
This guide covers the dial, the jacks, the safety ratings, and the jobs a homeowner actually uses a meter for, from checking a smart thermostat wire to finding out why a sump pump will not kick on.
What a Multimeter Actually Measures
A digital multimeter measures three core things plus a few extras.
Voltage is electrical pressure, measured across two points while the circuit is energized.
Resistance is how much a component opposes current, in ohms. The meter measures it by pushing its own small test current through the part, which is why resistance is always measured with the power off.
Current is the flow itself, in amps. You break the circuit open and put the meter in the gap. This is the setting that blows fuses.
Continuity is a fast pass/fail version of resistance: the meter beeps when the resistance between the probes falls below a threshold that varies by model, usually somewhere in the tens of ohms.
Diode test, frequency and capacitance are extras. For house work, voltage, resistance and continuity cover nearly everything.
Reading the Dial
The symbols are close to universal across brands.
| Dial marking | What it measures | Typical house use |
|---|---|---|
| V with a wavy line | AC voltage | Outlets, switches, thermostat and doorbell wiring |
| V with a solid and dashed line | DC voltage | Batteries, car systems, low-voltage LED drivers |
| mV | Millivolts | Rarely needed at home |
| Omega symbol | Resistance in ohms | Heating elements, motor windings, sensors |
| Sound-wave symbol | Continuity | Fuses, switches, cords, broken wires |
| Arrow into a bar | Diode test | Electronics work |
| A, mA, microamps | Current | Draw of a device, battery drain |
| Hz | Frequency | Generator output |
The jacks
The jacks decide which path the current takes inside the meter, and getting them wrong is how people break meters.
- COM is common. The black lead lives here for every measurement, always.
- V and Omega (often marked VΩ) is where the red lead goes for voltage, resistance, continuity and diode.
- mA or microamp is the small-current jack, protected by a small internal fuse.
- 10A or 20A is the high-current jack, protected by a larger fuse, and many meters only allow it for short bursts. The manual gives the time limit.
Some meters warn you if the red lead is in a current jack while the dial is on voltage. Do not rely on it.
CAT ratings
Near the jacks you will find a marking like CAT III 600V. Most homeowner guides skip it or call it a voltage limit, and the category half matters just as much.
The measurement categories come from IEC 61010, the international safety standard for test equipment. They describe where in the installation the meter is safe to use, based on the transient energy available there. A transient is a short high-voltage spike, from nearby lightning or a large motor switching off, and it carries more energy the closer you are to the utility.
| Category | Where it applies | Examples in a house |
|---|---|---|
| CAT II | Loads connected through a receptacle | Appliances, power tools, anything with a plug |
| CAT III | The building’s fixed distribution | The panel, feeders, hardwired fixtures and equipment |
| CAT IV | The origin of the installation | Service entrance, meter base, the utility side |
Each category is paired with a voltage, and a higher category at the same voltage means the meter was built and tested to survive a bigger spike.
My rule for homeowners is CAT III 600V as the minimum for anything wired into the house, including the moment you take the cover off the panel. A CAT II only meter is fine for a cord, a battery or an appliance on the bench, and it should stay there. The printed rating is a claim, so look for an independent lab mark such as UL, CSA, TÜV or Intertek ETL. The leads carry their own rating too, and the pair is only as safe as the lower of the two. Fluke’s meter safety literature makes the same point about leads.
Auto-Ranging vs Manual Ranging
A manual-ranging meter makes you choose the scale, such as 2V, 20V, 200V or 600V. You pick the first range above what you expect. Too low and the display shows OL. Too high and you lose resolution.
An auto-ranging meter picks the scale for you. For a homeowner, get auto-ranging. It removes a decision you can get wrong with your hands near a live circuit.
The other feature worth paying for is true-RMS. An ordinary average-responding meter is calibrated on the assumption that AC is a clean sine wave. Plenty of household loads distort the waveform: variable-speed motors, dimmers, LED drivers and electronic power supplies. On those, an average-responding meter can read noticeably high or low. A true-RMS meter reads the actual heating value of the waveform.
Safety Rules Before You Touch Anything
These are the habits I hold my crew to.
- Inspect the leads. Cracked insulation, exposed copper near the plug or a loose tip means the leads get replaced.
- Fingers behind the guards. The raised ring on each probe handle marks where your fingers stop.
- Black lead first, red lead second. Connect the black lead to neutral or ground first, then touch the red to the hot. Take the red off first. That way only one probe is ever on the hot side while contact is being made or broken.
- One hand where you can. Clip the black lead on with an alligator clip and probe with one hand. Keep the other hand off boxes, pipes, and the panel enclosure, so there is no path through your chest.
- Resistance and continuity only on a dead circuit. The meter supplies its own current for those tests. Connected to a live circuit, it reads garbage at best and blows a fuse or damages the meter at worst.
- Live-dead-live. Before you trust a “dead” reading, test the meter on a source you know is live, test the circuit, then test the known-live source again. If the meter, a lead, the battery, the fuse or the dial setting is wrong, that check catches it. NFPA 70E, the workplace electrical safety standard, builds the same idea into how electricians verify a circuit is de-energized.
A non-contact voltage tester, the pen that beeps near a live wire, is a screening tool. It cannot prove anything is dead, and it does not replace a meter. And ordinary work gloves are not electrical protection. Insulating gloves are a separate product rated to ASTM D120. For household testing, the real protection is your technique, a rated meter, and a set of insulated screwdrivers rated to 1000V under IEC 60900 when you open a device.
Measuring AC and DC Voltage
Black in COM, red in VΩ, dial on AC volts (DC for batteries). What normal looks like in a house:
- 120V circuits. ANSI C84.1 Range A puts the service voltage for a nominal 120V system at 114 to 126 volts. A receptacle at the far end of a long circuit with a load running can read a few volts under that.
- 240V circuits. Leg to leg, roughly 228 to 252 volts. Each leg to neutral reads about 120.
- Low-voltage controls. Thermostat and doorbell transformers, covered below.
On DC, reversed leads just show a minus sign.
Ghost voltage. A typical digital meter has a very high input impedance, commonly around ten megohms, so it draws almost no current. That also means it can read tens of volts on a disconnected wire, picked up by capacitive coupling from a live cable running beside it in the same wall. Some meters have a LoZ (low impedance) mode that loads the circuit enough to drain that phantom reading away. Without LoZ, treat any unexpected reading as live until you have proven otherwise.
Testing Resistance
Power off, then isolate the part. If the component is still connected to the rest of the circuit, the meter measures every parallel path around it too, so disconnect at least one side.
Touch the probes together first to see the few tenths of an ohm the leads add, and subtract it or zero it with the REL button.
This is how you check a water heater or dryer element, a thermal fuse, or motor windings against the service manual’s figure. OL means open. Near zero where it should be tens of ohms means a short.
Testing Continuity
Continuity is the setting you will use most after voltage. Power off, dial to the sound-wave symbol, probe both ends of the path. A beep means a complete path. Silence and OL mean a break.
Use it for fuses, switches, cords and suspect wire runs.
Measuring Current, and Why the Amps Jack Blows Fuses
On the current setting, the meter routes everything through a shunt, a resistor with nearly zero resistance, and reads the tiny voltage across it. It is designed to sit in series, as part of the circuit. Put those same leads across a voltage source, such as the two slots of a receptacle, and that near-zero resistance becomes a dead short. The internal fuse blows, if the meter has a proper one. A cheap meter without good fusing can be damaged or fail violently.
To measure current, power off, open the circuit, and connect the meter into the gap. Start in the 10A jack if you do not know the draw. Then move the red lead back to VΩ as soon as you finish. The classic accident is the next person picking up the meter, setting the dial to volts, and putting it on an outlet with the lead still in the amps jack.
For AC current at home, a clamp meter is the better tool. It measures around one conductor without breaking the circuit. Clamp a single wire, not a whole cord, because the current going out and coming back cancels.
If your meter stops reading current after a test, a blown fuse is the likely cause. Replace it with the exact type and rating the manufacturer specifies. Quality meters use high-rupture-capacity fuses, and a generic glass fuse of the same amperage is not a substitute.
Practical Homeowner Jobs
Testing an outlet
Three readings tell you almost everything about a receptacle. With the ground hole at the bottom, the short slot on the right is hot, the tall slot on the left is neutral, and the round hole is ground.
| Probes on | Correctly wired | What a wrong reading means |
|---|---|---|
| Hot to neutral | About 120V | Zero: no power, tripped breaker or GFCI, loose connection |
| Hot to ground | About 120V | Zero with hot-neutral correct: missing or open ground |
| Neutral to ground | Near zero, a volt or two at most under load | Around 120V: hot and neutral reversed |
Fix either fault before you plug in a computer or surge protector. The NEC allows an ungrounded two-prong location to take a GFCI receptacle labeled “No Equipment Ground,” so it is not automatically a rewire. Fuses test the same way as any continuity check, covered in the FAQ below.
Testing a battery
DC volts, red to positive. A fresh alkaline AA or AAA reads about 1.5 to 1.6 volts. Well under 1.3 volts is spent for most devices. An unloaded reading flatters a weak battery, so a cell that reads fine can still sag the moment a device pulls on it. Rechargeable NiMH cells read lower, about 1.2 to 1.4 volts when charged, so do not throw them out on an alkaline standard. For smoke and CO alarms, follow the manufacturer’s replacement schedule instead of a meter reading.
Testing an extension cord
Unplugged. Continuity from each prong to the matching slot at the other end: hot to hot, neutral to neutral, ground to ground. Then check hot to neutral across the prongs at one end, which should read open. Flex the cord along its length while you watch the display, because a broken strand often shows up only when the cord bends. And most space heater makers say plainly not to run their heaters on an extension cord at all.
Testing a switch
Breaker off, confirm dead, then disconnect the switch or at least one wire from it. Continuity across the two terminals should beep in the on position and read open in the off position. On a three-way switch, the darker common screw should show continuity to one traveler in one position and the other traveler when you flip it. The same test runs down a dead garbage disposal: check the wall switch before you blame the motor, and press the red reset button on the underside of the unit.
Before you replace any fixture, a ceiling fan or a run of under-cabinet lights, use the meter to prove the circuit is dead at the wires you are about to touch, using live-dead-live. A breaker label is a guess someone wrote years ago.
Sump pump float switches
Many pumps use a tethered float with a piggyback plug: the float’s plug goes into the wall and the pump plugs into the back of it. Unplug everything, then check continuity between each prong of the float’s plug and the matching slot on its piggyback socket. One pair should open with the float hanging down and close when you lift it. If it never closes, the switch is the problem, not the pump. If you are shopping, our sump pump roundup covers switch types.
Thermostat and doorbell low voltage
Both run on a transformer that steps line voltage down to low-voltage AC. At a thermostat, with the system powered, measure AC volts between R and C. A reading somewhere in the mid-20s confirms a working 24V circuit and, more importantly for a smart thermostat, that you actually have a C wire. Be careful not to bridge R and C with a probe tip or a screwdriver, since that short can blow the small fuse on the furnace control board.
At a doorbell, most transformers put out 16V AC, and most video doorbells want something in the 16 to 24V AC range plus a minimum VA rating, both printed on the transformer label and in the doorbell’s install guide. An unloaded reading runs a little high. If the reading is under the doorbell’s minimum, the transformer is the upgrade, not the doorbell.
Generator output
AC volts at a receptacle on a portable generator running under load should read close to 120, and the Hz function should show close to 60. A conventional generator’s waveform is less clean than an inverter’s, which is another place true-RMS earns its keep.
Reading OL and Other Display Messages
- OL. Over range or open. Normal for an open circuit on continuity, a sign to go up a range on voltage.
- A minus sign. Reversed leads on DC.
- Battery icon. Replace the battery now. A weak meter battery can produce believable wrong readings.
- HOLD. The display is frozen on the last reading. A held zero says nothing about the circuit right now.
- REL or a delta symbol. Relative mode, displaying the difference from a stored value.
- LEAd or a flashing warning. The red lead is in a current jack with the dial on another function. Move it.
What I Actually Carry
A CAT III rated auto-ranging true-RMS meter with a LoZ mode, a clamp meter for current, and a non-contact tester for a first pass. The meter lives in its case in the top drawer of my tool chest, with spare fuses of the right type taped inside the lid, and the leads get looked over every time they come out. An LED shop light over the bench makes the small print on a transformer label readable.
For a first kit, a meter belongs alongside a hand tool set, a tape and a stud finder. Our new homeowner tool guide covers the rest. And if the reading points to the panel, aluminum branch wiring, or anything you are not sure how to make safe, read our take on when to hire a contractor.
The Short Version
Black lead in COM, red lead in VΩ, and put the red lead back there after any current test. Buy CAT III 600V or better, auto-ranging, true-RMS. Measure voltage across, current in series, and resistance and continuity only with the power off. Check the dial is on AC before you call a household circuit dead, and never trust a dead reading until the meter has also read a known live source before and after it. The meter gives you an honest reading only after you have checked the meter too.
Cover photo: Aneng AN870 multimeter, via Wikimedia Commons, dedicated to the public domain (CC0).
Frequently Asked Questions
Can I get shocked using a multimeter?
Why does my multimeter read OL?
What should a household outlet read on a multimeter?
What is the difference between CAT II and CAT III on a multimeter?
What setting do I use to test a fuse with a multimeter?
Related Articles
How to Use a Stud Finder (And How to Tell When It Is Lying to You)
power-tools-workshop
7 Best Hand Tool Sets of 2026
power-tools-workshop
7 Best Screwdriver Sets of 2026
power-tools-workshop
Essential Tools Every New Homeowner Needs: A Contractor's Tiered Buying Guide
power-tools-workshop
8 Best Smart Thermostats of 2026: A Contractor's Honest Picks
home-air-filtration
About the Reviewer

Jake Morrison, Licensed General Contractor
B.S. Construction Management, Purdue University
Jake Morrison has spent 14 years in residential construction and home renovation before founding DIYRated in 2026. After helping hundreds of homeowners choose the right tools and materials for their projects, he started writing the product guides he wished existed when he was starting out. Jake builds each pick from spec sheets, manuals and verified buyer reviews, and weighs how tools hold up for real owners over marketing claims.