How to Fix a Leaky Toilet: Find the Source, Then Fix It
By Jake Morrison, Licensed General Contractor Updated
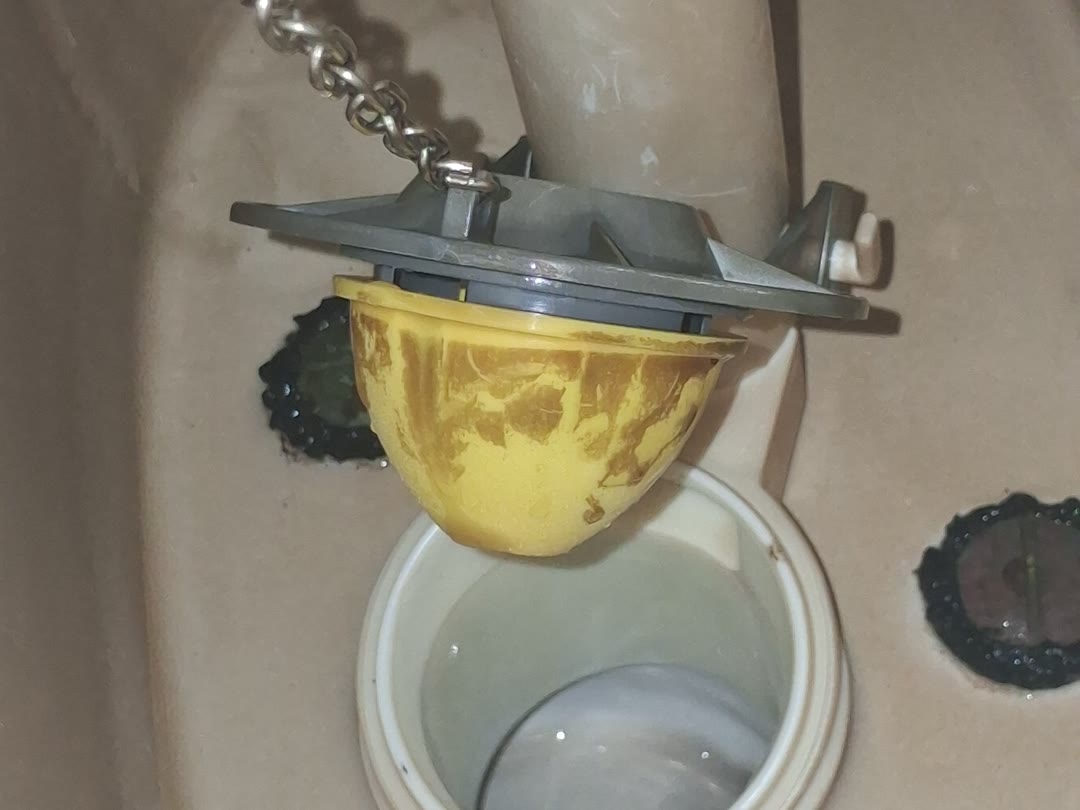
Most toilet leaks come down to one of five parts: the wax ring under the toilet, the bolts and gasket that hold the tank to the bowl, the supply line and shutoff valve, the flapper inside the tank, or a crack in the porcelain. The hard part is figuring out which one you have.
I am a licensed general contractor, and on plenty of leaky toilet calls the homeowner has already installed a new part and the floor is still wet. They replaced the flapper when the wax ring was gone, or tightened the closet bolts when the supply line was dripping. So this guide starts where the repair actually starts: finding the water.
A toilet that runs, refills on its own or keeps hissing after a flush is usually a fill valve or chain problem, and that is a separate repair. Here I am covering water that escapes where it should not: onto the floor, or silently from the tank into the bowl.
What You Will Need
An adjustable wrench and a small socket set handle the closet bolt nuts and the supply line, and a stiff putty knife scrapes off old wax. A decent hand tool set covers all three. A long flat-blade screwdriver holds the tank bolt heads still from inside the tank, and a good screwdriver set will have one long enough to reach.
If you are pulling the toilet or the tank, a wet/dry shop vac gets the last water out of the tank and bowl fast. Wear work gloves for the old wax ring and corroded bolts. The back of a toilet is dark, so an LED shop light aimed behind the bowl helps when you are hunting a drip.
Find Where the Water Is Coming From
Start by drying everything: the floor around the toilet, the outside of the tank, the tank bolts underneath, the supply line and the shutoff valve. Then lay strips of dry paper towel around the base of the bowl, under each tank bolt where it comes through the bottom of the tank, and under the supply connection. Wait ten minutes and look. Then flush once and look again.
The timing tells you most of what you need to know:
- Water that shows up only after a flush, around the base, points to the wax ring or the flange under it. The tank-to-bowl gasket also carries water only during a flush, so check the towels under the tank too.
- Water that is there all the time points to the tank bolts, the supply line, the fill valve connection or the shutoff valve.
- Moisture beaded evenly over the whole outside of the tank is condensation.
- A dry floor with a faint trickle, or a tank that refills on its own, means a silent leak into the bowl.
Follow wet towels upward. The highest wet spot is usually the source.
| Symptom | Likely cause | Fix |
|---|---|---|
| Water around the base after flushing | Failed wax ring or damaged flange | Pull the toilet and replace the wax ring |
| Toilet rocks, water at the base | Loose closet bolts, crushed wax ring | Snug the bolts; reset on a new ring if it still leaks |
| Steady drip under the tank | Tank bolt washers worn or loose | Tighten evenly or replace tank bolts and washers |
| Water between tank and bowl during flushes | Worn tank-to-bowl gasket | Remove the tank and replace the gasket |
| Drip at the supply connection | Loose coupling nut or worn supply line | Hand-tighten the nut or replace the line |
| Drip from the shutoff valve stem | Loose packing nut | Snug the packing nut or replace the valve |
| Beads over the whole tank in humid weather | Condensation | Control humidity or add a tank liner |
| Dye in the bowl with no flush | Leaking flapper or flush valve seat | Replace the flapper or the flush valve |
| Damp line from one spot on the porcelain | Hairline crack | Replace the tank or toilet |
Water Around the Base of the Toilet
If the toilet rocks
Sit on the toilet and shift your weight side to side. If it moves, the closet bolts under the plastic caps at the base have loosened, and every rock squashes the wax ring further out of shape.
Snug each nut a little on one side, then the other. Stop as soon as the toilet no longer rocks. Overtightening is how people crack a toilet base, and porcelain gives no warning before it splits. On an uneven floor, slide plastic toilet shims under the low spots instead of cranking harder.
If water still shows after flushing, or the toilet rocked for weeks, the wax ring has failed and the toilet needs resetting.
Replacing the wax ring
- Shut off the water at the valve behind the toilet and flush to drain the tank.
- Empty the tank and bowl with a sponge or a wet/dry vac, or the bowl water spills across the floor when you lift.
- Disconnect the supply line from the bottom of the tank.
- Remove the closet bolt nuts.
- Rock the toilet slightly to break the seal, lift it straight up, and lay it on its side on an old towel.
- Stuff a rag in the drain opening to block sewer gas.
- Scrape all the old wax off the flange and off the horn on the bottom of the toilet.
- Inspect the flange. It should be solid, screwed down, not cracked, and flush with or slightly above the finished floor.
- Slide new T-bolts into the flange slots.
- Press a new wax ring onto the flange or the toilet horn, per the package directions.
- Pull the rag and set the toilet straight down over the bolts in one motion. Do not slide it once it touches the wax.
- Press down with your body weight, then tighten the nuts a little at a time, alternating sides, until the toilet sits firm.
- Reconnect the supply, turn the water on and flush several times while you watch the base.
Wax is single use. If you set the toilet down crooked and have to lift it again, scrape it off and start over with a new ring.
Wax ring or wax-free seal
A standard wax ring is still what I use on most floors. Oatey, which makes both kinds, says wax-free seals may not perform as well on uneven or damaged flanges. A wax-free foam or rubber seal is cleaner and can be repositioned, a fair pick for a clean, level flange.
Flange height decides the ring. A flange flush with or slightly above the finished floor takes a standard ring. A flange below the floor, common after new tile raised the floor, needs an extra-thick ring or a flange spacer. A standard ring on a recessed flange is one of the most common reasons a brand-new wax ring leaks within a month.
Water Leaking Between the Tank and the Bowl
On a two-piece toilet, two or three bolts run through the bottom of the tank into the bowl, each with a rubber washer inside the tank and a nut underneath. A sponge tank-to-bowl gasket seals the flush valve opening.
For a dripping bolt, try snugging it first. Hold the bolt head still from inside the tank with a flat-blade screwdriver, and turn the nut underneath a quarter to a half turn at a time, alternating between bolts. Korky recommends having a helper press down evenly on the tank while you tighten so it seats level. Stop when the tank feels solid. If the rubber washers inside start to bulge out around the bolt heads, you have gone too far, and the tank can crack as easily as the base.
If the bolts are rusted, the washers are hard, or tightening does not stop the drip, replace them. Shut off the water, flush, sponge the tank dry, disconnect the supply, remove the bolts and lift the tank off. Replace the tank-to-bowl gasket while it is off. Gaskets come in 2-inch and 3-inch sizes to match the flush valve, so bring the old one to the store. Reinstall with new bolts and washers using the same gradual, alternating tightening.
Leaks at the Supply Line, Shutoff Valve or Fill Valve
The supply line runs from the shutoff valve up to the fill valve shank under the tank, and three spots leak here.
The coupling nut where the supply line meets the plastic fill valve shank should be hand-tightened only. Korky advises against tape or sealant on that connection, because the washer inside the nut does the sealing and a wrench can crack the plastic threads. If hand-tight does not stop it, replace the line. Just above it, a larger plastic lock nut holds the fill valve to the tank; if water seeps around the shank, give that a snug hand turn too.
Old solid plastic or vinyl supply lines get brittle. Replace them with braided stainless lines. IBHS, the insurance industry’s research group, recommends braided stainless hoses for the appliance supply lines in its water-damage guidance and lists a leaking supply valve as a reason to repair or replace toilet parts. I hold toilet lines to the same standard: braided stainless, and a new one whenever the old line is kinked, corroded at the nut or older than the toilet’s last repair.
If water weeps from the shutoff valve stem, snug the packing nut behind the handle while holding the valve body still with a second wrench. If it still leaks, or the valve will not close fully, the valve needs replacing, which means shutting off water to the house.
Is the Tank Sweating or Actually Leaking?
In humid weather, cold water in the tank meets warm room air and condensation forms over the whole outside of the porcelain, then drips from the bottom edge. It can look like a serious leak.
Dry the entire tank, wait half an hour, and check with a dry tissue. Moisture that returns evenly everywhere is condensation. Moisture at one spot, such as a bolt or a connection, is a leak. A leaking flapper makes sweating worse, because the tank keeps refilling with cold water all day.
To stop it, cut the humidity. Run the exhaust fan during and after showers, and in a damp house a dehumidifier helps; my guide to reducing humidity in your home covers the rest. An insulated tank liner, foam panels glued inside the tank, keeps the outside of the porcelain closer to room temperature.
The Silent Leak: Tank Into Bowl
This leak never wets the floor, so it runs for months. Water slips past the flapper or the flush valve seat, the tank level drops, and the fill valve tops it back up.
Do a dye test. Add a few drops of food coloring to the tank and do not flush. EPA WaterSense says to wait at least 10 minutes; the NYC Department of Environmental Protection says 10 to 15. Any color in the bowl means the flapper or its seat is leaking. Flush afterward so the dye does not stain.
A flapper is a quick swap: shut off the water, flush, unhook the chain and pop the flapper’s ears off the pegs on the overflow tube. Korky’s sizing rule: a flush valve opening about the size of a baseball or an orange takes a 2-inch flapper, and one closer to a grapefruit or softball takes a 3-inch. While the flapper is off, run a finger around the valve seat. If it feels rough or pitted with minerals, a new flapper will still leak, and the seat needs cleaning or the flush valve needs replacing.
EPA WaterSense suggests replacing flappers at least every five years. The NYC Department of Environmental Protection warns that in-tank chlorine tablets break down flapper rubber faster.
If the dye test is clean but the tank still refills, or water spills down the overflow tube, that is a fill valve problem and part of fixing a running toilet.
Cracked Tank or Bowl
A hairline crack leaks from the same spot every time. With the water off and everything dry, look over the tank and bowl with a flashlight held at a low angle. Look for a thin dark line. A crack below the waterline in the bowl can show up as water at the base that a new wax ring does not stop.
Porcelain cannot be reliably repaired. Waterproof epoxy may hold a hairline crack in a tank for a short while, but treat it as a stopgap until a replacement arrives, because a cracked tank can let go all at once. For a cracked bowl, or a cracked tank on an older toilet, replacing the whole toilet is usually the better money. If you are already planning work in the room, my bathroom renovation checklist helps you time it.
Why a Slow Leak Is Worth Fixing This Week
EPA WaterSense estimates that household leaks waste more than 9,300 gallons a year, and that nine percent of homes have leaks of 50 gallons or more a day. A worn flapper alone can silently leak thousands of gallons a year, and every one shows up on the water bill.
A base leak also soaks the subfloor a little with every flush, and plywood stays wet under vinyl or tile long enough to rot. By the time the floor feels soft, the repair has grown from a wax ring to replacing subfloor. If you find water at the base, pick it up with the shop vac, fix the seal, and run a dehumidifier or fan for a day or two to dry the area before you caulk or lay new flooring.
A toilet that overflows because it is partly clogged has a drain problem, and the fix is different. A plunger or auger usually clears it, my guide to unclogging a drain covers the basics, and the drain cleaners roundup includes a toilet-specific clog remover.
When to Call a Plumber
Call a licensed plumber when:
- The flange is broken, rotted or well below the floor, and you are not comfortable repairing it.
- The toilet sits on a cast iron flange, common in older homes, which takes different parts and some care.
- The shutoff valve is corroded and will not close, or breaks when you turn it.
- The subfloor around the toilet feels soft or spongy.
- There is a water stain on the ceiling below the bathroom.
If the toilet has no tank and flushes with a lever on a chrome valve on the wall (a flushometer, common in commercial buildings), the valve and parts are different. That is usually a plumber’s job.
My Bottom Line
Find the water before you buy anything. Dry everything, lay out paper towels, and let the timing point you: after a flush means the wax ring, all the time means the tank bolts or the supply side, and dye in the bowl means the flapper.
Most of these leaks need a few parts and the basics in a hand tool set, plus a shop vac for emptying the bowl and cleaning up the floor. When you caulk the base after the repair, use the same bead technique from my guide to caulking a bathtub and leave the back open. If this toilet ever leaks again, you will see it on the floor instead of on the ceiling below.
Frequently Asked Questions
Can you fix a leak at the base of a toilet without removing it?
How do I know if my toilet is leaking from the tank into the bowl?
Should you caulk around the base of a toilet?
Is a sweating toilet tank the same as a leak?
How often should toilet parts be replaced to prevent leaks?
Related Articles
How to Caulk a Bathtub: A Contractor's Guide to a Bead That Lasts
home-improvement
Best Dehumidifiers of 2026: Jake's Picks After 20+ Years in Basements
home-air-filtration
7 Best Hand Tool Sets of 2026
power-tools-workshop
7 Best Shop Vacs of 2026
vacuums-floor-care
7 Best Screwdriver Sets of 2026
power-tools-workshop
About the Reviewer

Jake Morrison, Licensed General Contractor
B.S. Construction Management, Purdue University
Jake Morrison has spent 14 years in residential construction and home renovation before founding DIYRated in 2026. After helping hundreds of homeowners choose the right tools and materials for their projects, he started writing the product guides he wished existed when he was starting out. Jake builds each pick from spec sheets, manuals and verified buyer reviews, and weighs how tools hold up for real owners over marketing claims.