How to Hang a Shelf: A Contractor's Guide to Every Wall Type
Licensed GC Jake Morrison on how to hang a shelf that holds. The leverage math nobody explains, published anchor load numbers, and the exact method for drywall, plaster, brick, tile, closets, and floating shelves.
Updated
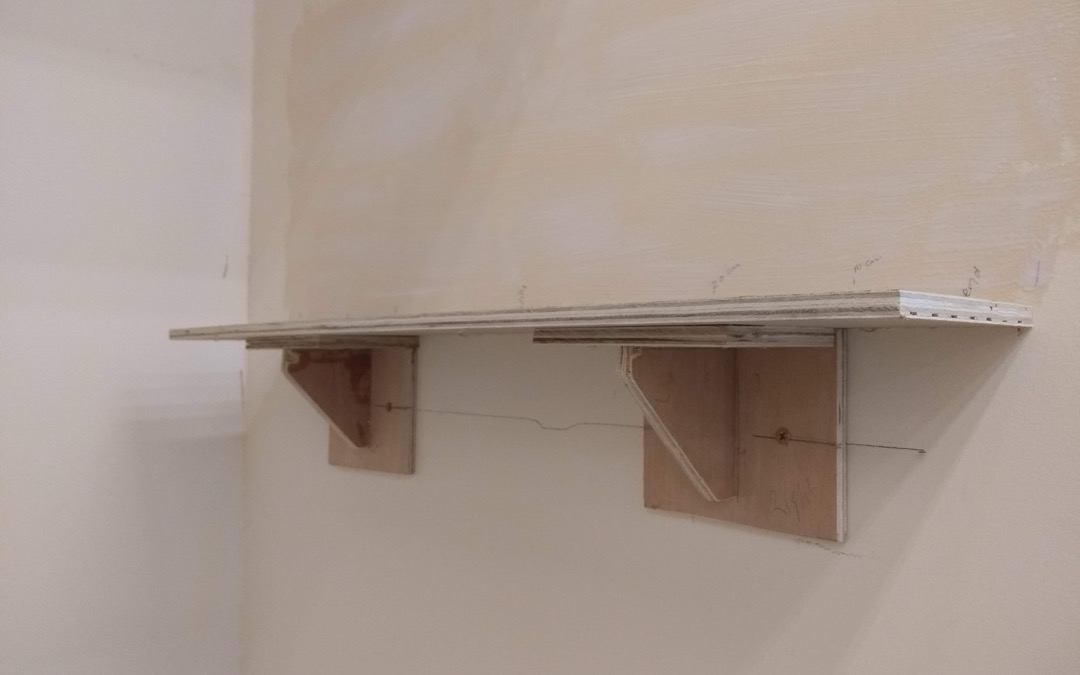
I have taken more shelves off walls than I have put up, and almost none of them failed the way people expect. The board was fine. The brackets were fine. What gave way was a half inch of gypsum around a plastic anchor, quietly crushed a little more every time somebody set a book down, until one afternoon it let go and took a dinner-plate chunk of drywall with it.
Hanging a shelf is genuinely a beginner project. It is also a project with a specific, predictable failure mode that almost every guide skips, because explaining it requires talking about leverage. Once you understand the leverage, every other decision in this guide (which anchor, how deep, how far apart, stud or no stud) answers itself.
Why Shelves Actually Fail
A shelf is a cantilever. The load sits out away from the wall, and the wall has to resist not just the weight but the rotation that weight creates.
Picture a bracket with two screws, one near the top and one near the bottom, four inches apart vertically. You set 40 pounds of books on a 10-inch deep shelf, so the weight is centered about five inches out from the wall. The bottom screw acts as a pivot. The top screw has to resist the whole rotation, and the force on it is the load multiplied by the ratio of those two distances:
Top fastener load ≈ shelf load × (distance out from wall ÷ fastener spacing)
Five inches divided by four inches is 1.25, so 40 pounds of books puts roughly 50 pounds of straight pull-out force on that top screw. The shelf weighs less than the force trying to rip it off the wall.
Now do the same math for a floating shelf, where the hidden mounting plate might have its fasteners only two and a half inches apart. Five divided by two and a half is 2. The same 40 pounds of books now pulls with 80 pounds. Nothing about the shelf changed except how far apart the fasteners are, and the load on the wall doubled.
This is not a theory I invented. TOGGLER, which publishes real laboratory data for its anchors, states plainly that holding strength varies “inversely with variations in hole diameter and the distance of the load from the wall.” The manufacturer is telling you, in a footnote nobody reads, that a deep shelf derates their own anchor.
Three practical consequences follow, and they drive everything below:
- Deeper shelves are harder on the wall than heavier shelves. Doubling the depth doubles the pull-out force. Doubling the weight also doubles it. Most people only think about weight.
- Taller brackets and taller mounting plates are stronger than short ones, because increasing the fastener spacing directly divides the load down.
- Pull-out is the failure mode that matters, not the shelf breaking or the screw shearing. Everything you buy should be chosen for its pull-out number.
What a Stud Holds Versus What Drywall Holds
Here is the comparison nobody puts side by side, using published figures rather than the numbers printed on the front of a hardware package.
For fasteners into wood framing, the National Design Specification for Wood Construction gives an allowable withdrawal value of W = 2850 × G² × D pounds per inch of thread penetration, where G is the wood’s specific gravity and D is the screw’s diameter. The 2850 constant already includes roughly a five-to-one reduction from the load at which the connection actually fails, so these are conservative working numbers, not breaking points.
For a number 10 screw (0.190 inches) driven one and a half inches into a common spruce-pine-fir stud (G = 0.42), that works out to about 143 pounds of allowable withdrawal per screw. In denser Douglas fir framing it is closer to 203 pounds.
For drywall, TOGGLER publishes the following for its SNAPTOGGLE metal toggle:
| Anchor | Base material | Ultimate pull-out | Ultimate shear |
|---|---|---|---|
| SNAPTOGGLE 1/4-20 | 1/2” drywall | 265 lb | 241 lb |
| SNAPTOGGLE 1/4-20 | 5/8” drywall | 356 lb | 324 lb |
| SNAPTOGGLE 3/16-24 | 1/2” drywall | 238 lb | 247 lb |
| SNAPTOGGLE 1/4-20 | Concrete block | 1,080 lb | not published |
Those are ultimate figures, meaning the load at which the assembly destroyed itself in a lab. The same data sheet says: “Industry standards recommend 1/4 of ultimate test load.” Apply that quarter and the quarter-inch toggle’s realistic working load in standard half-inch drywall is around 66 pounds.
So one good screw into a stud is worth roughly two of the best drywall anchors on the market, and it costs a fraction as much. That ratio is the entire argument for finding your studs, and it gets more lopsided against drywall as the shelf gets deeper.
It is also worth noting what is missing from that table: the plastic ribbed and conical anchors that come taped inside the shelf box. Those do not carry published pull-out ratings anyone quotes, because they fail by tearing a cone of gypsum out of the wall rather than by breaking. Throw that bag away. It is the cheapest upgrade in this entire project.
Tools and Materials You Actually Need
Nothing here is exotic, and most of it belongs in a starter kit anyway.
- A drill/driver. You need variable speed and a clutch far more than you need raw power, because the difference between a bracket screwed tight and a bracket that has crushed the drywall paper behind it is about half a turn. Any of the compact models in our cordless drill roundup will do this job for the next decade.
- A stud finder, or a rare-earth magnet on a string if you prefer the old method of hunting drywall screws.
- A level, at least 24 inches. A torpedo level is too short to trust across a shelf span. A basic hand tool set usually covers the level, tape, and pencil in one purchase.
- A tape measure you can read confidently. If fractions still slow you down, spend ten minutes with our guide on how to read a tape measure first, because every mistake in this project starts as a measurement.
- Screws sized to the job. Number 8 or number 10 wood screws, long enough for at least one and a half inches of thread in the stud after passing through the bracket and the drywall.
- Metal toggles, if any bracket will land off-stud.
- Painter’s tape, for the layout trick in the floating shelf section.
- Safety glasses, and work gloves if you are drilling masonry.
An impact driver is optional for a shelf and genuinely useful if you are driving lag screws into framing for something heavy. If you go that route, the models in our impact driver guide all have enough control to avoid snapping a screw head, which a cheap one will do.
Step One: Find the Studs, and Verify Them
Electronic stud finders read density changes through the wall. They are good, not infallible, and they will happily flag a plumbing stack, a duct, or a stack of drywall shims as a stud.
Sweep horizontally at the height you plan to mount, and mark both edges of what the tool reports. A real stud reads about an inch and a half wide. If your marks are three inches apart, you have probably found two studs nailed together at a corner or an opening, which is even better. If they are half an inch apart, you have found something else.
Verify before you commit. Drive a small finish nail or a narrow drill bit through the drywall in the middle of your mark, in a spot the bracket will cover. Solid resistance for the full depth means wood. A sudden drop into nothing means empty bay. This takes fifteen seconds and prevents the single most common version of this project going wrong: three holes in a row, none of them in a stud, and a wall that now needs patching before it needs a shelf.
Once you find one stud, the next ones are almost always 16 inches away on center, sometimes 24 in newer or garage construction. Measure from the center of the one you confirmed rather than hunting from scratch.
Before you drill anywhere, think about what lives inside the wall. Electrical cable runs vertically to outlets and switches and often horizontally between them, stapled to the stud faces. Never drill blind directly above or below an outlet, a switch, a light fixture, or a sink. If your bracket has to land in one of those zones, use a stud finder with live-wire detection, and drill shallow first to confirm.
How to Hang a Shelf with Brackets
This is the baseline method, and if the studs cooperate it is a twenty-minute job.
- Hold the shelf up and pick a height by eye. Have someone hold it, or prop it, and look at it from where you will actually stand. Adjust until it looks right, then mark the wall lightly at the top edge of the board.
- Draw a level line. Set your level on that mark and draw a light pencil line the length of the shelf. Do not measure down from the ceiling and do not measure up from the floor, because neither one is reliably level in a real house.
- Subtract the bracket geometry. Most brackets sit under the shelf, so your bracket’s top screw hole is some distance below the line you just drew. Measure that offset on the bracket itself and mark the screw positions on the wall accordingly. Doing this on paper first is what separates a clean install from four extra holes.
- Position the first bracket on a stud with its top screw at your mark. Check it plumb with the level, then mark both screw holes.
- Drill pilot holes. In softwood framing, a pilot about 70 percent of the screw’s shank diameter is right: it lets the threads bite fully without splitting the stud. Skipping the pilot is how a number 10 screw ends up half driven and stripped.
- Drive the screws, and stop when the bracket is snug. Set your drill’s clutch a few numbers below maximum. Overtightening does not make the bracket stronger. It crushes the drywall paper behind the bracket, and once that paper is crushed the bracket has room to rock, which loosens the connection every time the shelf is loaded.
- Mount the second bracket the same way, then lay the level across both brackets before the shelf goes on. This is your last cheap chance to correct anything.
- Set the shelf on and fasten it down. Short screws up through the bracket holes into the underside of the board keep the shelf from sliding or tipping when someone pulls a book off the end. Make sure they are short enough not to punch through the top surface, which is a mistake you only make once.
For bracket spacing, three-quarter-inch solid wood or good plywood handles about 32 inches between supports under a book load before sag becomes visible. Particleboard and melamine want closer to 24. And keep the overhang past the outer bracket to a few inches, because a long overhang is a lever that lifts the other end of the shelf.
One more geometry rule that gets ignored: the bracket should extend at least two thirds of the shelf’s depth. A 10-inch shelf on a 5-inch bracket has an unsupported front edge that will tip the moment someone leans on it.
How to Hang a Floating Shelf
Floating shelves are the most-searched version of this project and the most likely to fail, for exactly the reason laid out at the top: all the load funnels into fasteners that sit only a couple of inches apart.
There are three common hardware types.
Rod-style brackets are steel pins protruding from a wall plate. The shelf is bored with matching holes and slides on. These look cleanest and are the least forgiving, because the rods themselves are cantilevers that will bend under load and leave the shelf visibly drooping. The bore holes must be drilled straight and to the exact spacing, which is a drill press job or a very careful jig job, ideally clamped down on a solid workbench.
Blind mounting plates are a flat steel plate that screws to the wall while the shelf, hollow inside, slips over it. These spread the load better than rods and are what most manufactured floating shelves ship with.
Cleats are the shop-built version: a strip of wood screwed to the wall, with the shelf built as a hollow box that slides over it. Nothing outperforms a cleat for the money, because a cleat can span multiple studs and put every pound into framing.
The install:
- Find and mark your studs first, then decide where the shelf goes. This is the reverse of the bracket process and it is deliberate. A floating shelf that misses its studs has no good fallback.
- Transfer the mounting holes with painter’s tape. Run a strip of tape across the back of the shelf or across the mounting plate, mark the hole centers on the tape with a pencil, peel the tape off in one piece, and stick it to the wall. Level the tape, and drill through your marks. This trick eliminates the measure-transfer error that ruins most floating shelf installs, and it works just as well for keyhole slots on the back of a picture ledge.
- Drill pilot holes and mount the hardware, checking level on the plate or on the rods themselves before you drive the last screw.
- Slide the shelf on and check for droop. Sight along the top from one end. A brand new floating shelf that already reads slightly nose-down will only get worse.
If the studs are in the wrong place, build a ledger. Screw a length of three-quarter-inch plywood or one-by-four horizontally across two studs, then mount the floating hardware anywhere along it. Paint the ledger the wall color and it disappears. This is the single most useful technique in this article and it applies to every heavy shelf, not just floating ones.
How to Hang a Shelf on Drywall Without Studs
Sometimes the shelf has to go where the studs are not. When that happens, the anchor choice is the whole job.
| Anchor type | How it works | Honest verdict |
|---|---|---|
| Plastic conical / ribbed | Expands against the hole edge | Avoid. Fails by tearing gypsum out. These are the free ones in the box |
| Self-drilling threaded (nylon or zinc) | Screws its own coarse thread into the gypsum | Acceptable for light decor only. Very sensitive to overtightening |
| Molly bolt (sleeve anchor) | Metal sleeve collapses into a flange behind the wall | Decent, permanent, and the sleeve stays in the wall forever |
| Metal toggle (strap-style) | Steel channel spans behind the drywall | Best available. Published ratings, reusable hole, highest pull-out |
| Traditional wing toggle | Spring wings open behind the wall | Strong, but needs a much larger hole and the wings drop into the cavity if the bolt comes out |
Use metal toggles, use at least two per bracket, and design against a working load near 66 pounds per anchor rather than the ultimate figure on the package. Drill the specified hole diameter exactly, because an oversized hole degrades the rating, which is the other half of that manufacturer footnote about hole diameter.
There is a hybrid that is often the right answer and rarely mentioned: put one bracket on a stud and anchor only the other one. Half the load lands in framing, the anchored side carries less, and you keep the shelf where you wanted it. Take the stud whenever you can get it, even if you can only get one.
For heavy loads with no usable studs at all, go back to the ledger. There is no drywall anchor that beats a board spanning two studs.
Plaster, Brick, Concrete, and Tile
Plaster and lath. Old plaster is brittle and fails in tension, so the enemy is vibration. No hammer drill, no hammer setting, no nails. Tape the spot, use a sharp twist bit at low speed with light pressure, and let the bit cut rather than pushing it. You will drill through plaster, then hit wood lath. If the bit suddenly spins free, you have found a gap between lath strips, which is a dead spot for fasteners; move half an inch and try again. Plaster walls are thick, so buy longer screws than you think, and hunt for the studs, because the framing is worth far more than the plaster.
Brick and concrete block. Use a hammer drill with a masonry bit, and either concrete screws (a quarter-inch concrete screw needs a 3/16-inch pilot and at least an inch of embedment, with 1 3/4 inches being a better target) or sleeve anchors for heavier work. The old debate is whether to drill the brick face or the mortar joint. The brick itself holds more load; the mortar joint is softer, easier to drill, and far easier to repair invisibly if you ever remove the shelf. For a light shelf, joints are fine. For anything with real weight on it, go into the face of the brick. Blow the dust out of the hole before you set the anchor, because drilling dust left in the hole is the most common reason a masonry anchor underperforms.
Tile. Put tape over the spot, start with a diamond or carbide tile bit at low speed with no hammer function, and keep the bit cool. Once you are through the tile, switch to the appropriate bit and setting for whatever is behind it. Do not overtighten against tile, ever. Tile is strong in compression and weak in tension, and a screw pulled down hard against the glaze will crack it in a star pattern that no amount of caulk hides.
How to Hang a Closet Shelf
Closet shelving is its own system, and treating it like a decorative shelf is why closet rods sag.
Wire shelving mounts on three separate things working together: a back clip every foot or so along the rear wall, angled support brackets running down to the wall roughly every two to three feet, and end brackets at each side wall. The clips take anchors, and this is one of the few cases where a lot of small anchors genuinely works, because the load spreads across many points rather than concentrating on two. Every clip matters. Skipping every other one is why the shelf bows in the middle under a winter coat load.
Set your level line first and run the whole length, because a wire shelf that is even slightly off level will let hangers slide to one end. For a single shelf-and-rod closet, that line generally lands somewhere between 66 and 72 inches from the floor, which leaves full-length hanging space below. For a double-hang closet, the upper shelf goes near 84 inches and the lower rod near 42.
Solid closet shelves are the same job as a bracket shelf, with one addition: they are usually long enough to need three or more supports, and the front edge takes abuse from things being shoved onto it. Support every stud you can reach.
While you are in there, the lighting is usually the other half of the problem. A closet or pantry with a proper LED shop light overhead is genuinely more usable than one with an extra shelf.
Getting It Level, and Getting It to Look Level
These are two different goals and they occasionally conflict.
Use a level at least as long as the span between your brackets. A short torpedo level can read perfectly true and still leave you a quarter inch out across three feet, because a small angular error compounds over distance. A laser level is faster if you have one, and worth borrowing for a long run of shelves.
Then check the room. If your shelf sits close to a ceiling line, a chair rail, a window head, or a run of cabinets, and that reference is not itself level (which in an older house it usually is not), a technically perfect shelf will read crooked because the eye compares it to the nearest line, not to gravity. When the discrepancy is small, split the difference. When it is large, go level and accept it, because a shelf that slopes visibly downhill looks like a mistake no matter what it is parallel to.
One last check before you load it: press down on the front edge of the shelf, hard, at each end. Any movement, creak, or flex you feel now is movement you will feel every day, and it is much easier to add a third bracket before the shelf is full of books.
The Mistakes That Cost People Their Drywall
Overtightening the bracket screws. This is the most common one and the least visible. Once the drywall paper under the bracket is crushed, the bracket has room to rock, and every load cycle works the fastener looser. Snug, then stop.
Using the anchors that came in the box. Manufacturers include the cheapest anchor that will pass a shipping-weight test. They are not sized for your shelf, your wall thickness, or your load.
Measuring down from the ceiling. Ceilings are not level, floors are not flat, and the two are rarely parallel. Level from a level.
Ignoring shelf depth. A 12-inch shelf holding the same weight as a 6-inch shelf puts twice the pull-out force on the wall. If you upgrade to deeper shelves later, upgrade the fasteners too.
Drilling above an outlet without checking. Cable runs vertically from every device box and gets stapled to stud faces along the way. A stud finder with AC detection costs very little compared to a call-out for a nicked wire in a finished wall.
Loading it immediately. Adhesive products need their full cure time, and even mechanical fasteners benefit from you checking level once more before the shelf disappears under stuff.
For garage and utility spaces where you are hanging a lot of shelving at once, it is usually worth stepping back and looking at the whole wall rather than the individual shelf. Our guides to garage storage systems and organizing a garage on a budget cover the rail-and-track systems that make sense once you are past two or three shelves, because they put every load into a continuous ledger by design.
The Bottom Line
Hanging a shelf that lasts comes down to four decisions, and none of them involve the shelf.
Find the studs and use them, because one screw into framing carries roughly twice what the best drywall toggle does. Respect the leverage, because a deep shelf multiplies its own load and a mounting plate with closely spaced fasteners multiplies it further. Buy real metal toggles for anything that has to go off-stud, and design to a quarter of the number printed on the package. And when the studs are simply in the wrong place, put up a ledger instead of hunting for a stronger anchor, because that is what the trades do and it works every time.
If you are still assembling the kit for jobs like this, our tiered tool list for new homeowners sets out what to buy first and what to skip, and a good drill with a working clutch will do more for the quality of this install than anything else you own.
Frequently Asked Questions
What is the easiest way to hang a shelf?
How do you hang a really heavy shelf?
How do you anchor a shelf to a wall without hitting a stud?
Is there a way to hang a shelf without drilling?
Will Command strips hold up a shelf?
How high should a shelf be hung?
How far apart should shelf brackets be?
How do you hang a shelf on a plaster wall without cracking it?
How do you hang a floating shelf without studs?
Related Articles
About the Reviewer

Jake Morrison, Licensed General Contractor
B.S. Construction Management, Purdue University
Jake Morrison has spent 14 years in residential construction and home renovation before founding DIYRated in 2026. After helping hundreds of homeowners choose the right tools and materials for their projects, he started writing the product guides he wished existed when he was starting out. Jake tests every major product recommendation in his workshop in Indianapolis and focuses on real-world performance over spec-sheet marketing.