Garage Organization on a Budget: A Licensed GC's Zone-by-Zone Playbook
A licensed general contractor's field-tested plan for organizing a garage cheaply — go-vertical strategy, pegboard vs slatwall vs French cleat cost math, overhead load ratings, stud-anchoring, what to never store out there, and a phased $50/$200/$500 plan.
Updated
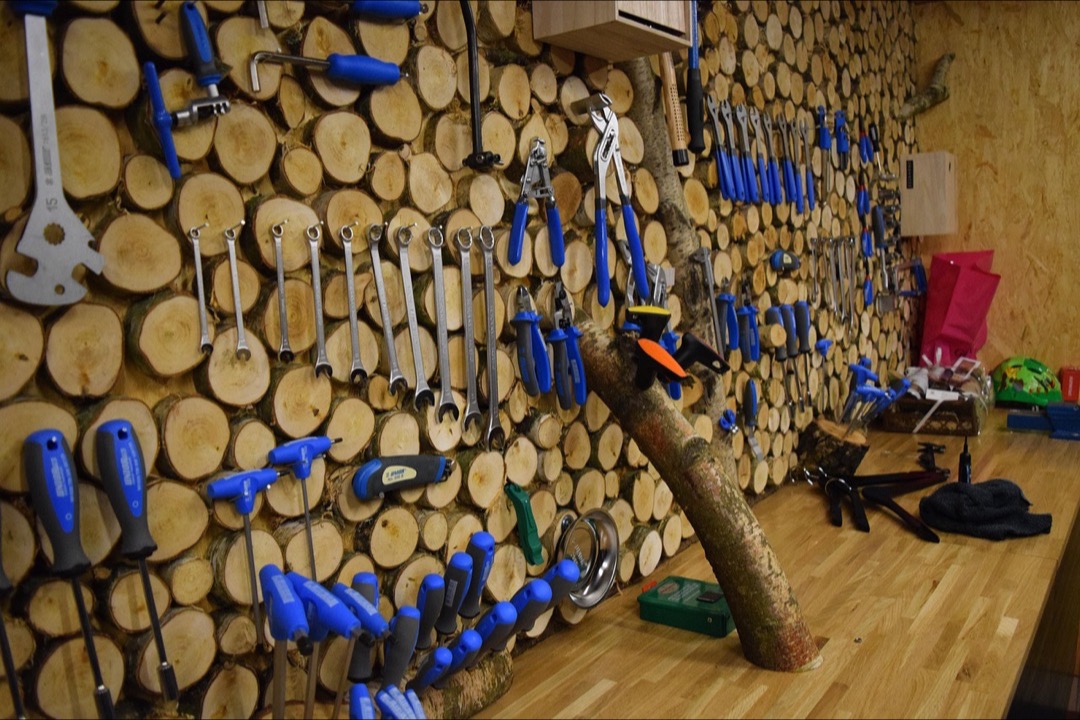
Every garage I have ever walked into for a renovation estimate tells the same story before the homeowner says a word. The car is parked in the driveway. There is a lawnmower somewhere under a tarp of extension cords. A wall of cardboard boxes has been slowly migrating toward the center of the room for years, and somewhere in there is a $200 tool nobody can find, so they bought a second one. After more than twenty years of building, renovating, and organizing job-site trailers where a lost tool costs real money by the hour, I can tell you that a disorganized garage is not a storage problem. It is a system problem — and the good news is that fixing it costs far less than anyone expects.
The showroom garages you see online, with wall-to-wall slatwall and custom cabinets and mirror-gloss epoxy floors, run several thousand dollars and are mostly for the photograph. This guide is the opposite of that. It is the version I give friends who ask how to get their garage back for a couple hundred dollars and a weekend, built around one idea that does most of the work: stop storing things on the floor. Everything below flows from that. We will purge first, go vertical, zone the space, compare the wall systems on an honest dollar-per-square-foot basis, use the ceiling you are ignoring, and — the part most guides skip — anchor it all so it does not come down on your car. I will end with a phased plan for what to buy first if all you have is $50, $200, or $500.
Step One: Purge Before You Buy a Single Bin
The most expensive mistake in garage organization is buying storage for stuff you should not be keeping. Before you spend a dollar on shelving, you pull everything out onto the driveway — everything — and sort it into four piles: keep, donate, trash, and belongs-somewhere-else-in-the-house. Be ruthless. The average two-car garage is holding hundreds of dollars of storage products dedicated to items the owner would not miss if they vanished.
While the garage is empty, this is your one free chance to clean the slab and knock down the cobwebs, and it is the perfect moment to run a shop vacuum over the whole floor and into the corners where sawdust and leaves collect — a good shop vac is the single most-used tool in any organized garage, and starting with a genuinely clean, empty box makes every decision that follows easier. An empty garage also lets you see the walls and ceiling clearly, which is where the real storage is hiding.
One contractor’s rule that saves people the most grief: decide what does not belong in a garage at all before you organize what does. Freeze-sensitive paint, important documents, photos, pet food, and anything electronic should go back inside the house. I cover the full “never store this in a garage” list in the FAQ below, because getting it wrong is how a budget project turns into a ruined-belongings bill or, worse, a fire risk near the water heater.
The One Rule That Doubles Your Space for Almost Nothing: Go Vertical
Here is the single most important sentence in this guide: the floor is for the car and the workbench, and almost nothing else. Every item you can lift onto a wall or up to the ceiling is floor space returned to you, and wall and ceiling space is storage you already bought with your mortgage and are currently wasting.
Walk into any professional’s garage or a well-run job-site trailer and you will notice the floor is remarkably clear. That is not tidiness for its own sake — it is a system. When everything hangs on a wall or sits overhead, three things happen: you can see everything you own at a glance, clutter has nowhere to pile up because the floor is off-limits, and the space feels twice as large. You do not need to buy expensive furniture to achieve this. You need to move storage up. That principle alone, executed with cheap materials, outperforms a garage full of pricey cabinets sitting on the floor.
Zone Your Garage — It Costs Nothing and Changes Everything
Before you mount anything, spend twenty minutes deciding what goes where. Zoning is free, and it is the difference between a garage that stays organized and one that slides back into chaos in a month. I break a typical garage into four zones:
- The work zone — a bench and the tools you use constantly, along one wall within arm’s reach of each other. This is the heart of the garage and deserves the best wall real estate. If you do not have a proper bench yet, a solid workbench is the anchor the whole zone organizes around, and the rolling drawers of a tool chest keep your most-used hand tools sorted instead of dumped in a bucket.
- The daily-and-seasonal zone — lawn and garden gear, sports equipment, the things you reach for weekly or by season. These want to be easy to grab but out of the main traffic path.
- The long-term zone — holiday decorations, luggage, camping gear, keepsakes. These get touched a couple of times a year, so they go in the least convenient spot: up on the ceiling. More on that below.
- The hazardous zone — fuel, propane, and chemicals, stored deliberately away from the water heater and any ignition source, ideally in a ventilated cabinet.
Group like with like, put the frequently-used near the door you enter from, and banish the rarely-used to overhead. Getting the zones right first means every hook and shelf you install afterward lands in the right place instead of being moved twice.
Wall Systems Compared: What Actually Holds Up on a Budget
This is where people overspend, so let me lay the four common wall systems out honestly, cheapest to priciest.
Pegboard is the budget champion and where most homeowners should start. A single 4-by-8 sheet covers 32 square feet of wall for very little money and holds a startling amount of light-duty gear — hand tools, cordless-tool batteries, spray cans, cords, clamps. Two non-negotiables make it work: fur it out from the wall with the spacers (the hooks need room to seat behind the board), and screw it into the studs, not just the drywall. Its limit is weight — hardboard pegboard sags and the hooks pop out under anything heavy.
Slatwall panels are the mid-tier upgrade. They carry three to four times the load per hook, the accessories lock in so they will not fall out when you bump them, and they look clean wall-to-wall. You pay several times the pegboard price per square foot for that strength and polish.
Steel track / rail systems (a horizontal rail with hang-anywhere hooks) are the sweet spot for heavy items — shovels, rakes, a bike, a string trimmer, extension cords. A single rail lag-bolted across the studs holds serious weight for a modest price and is the cheapest way to get heavy long-handled gear off the floor.
French cleats are the DIY-hero option if you own basic tools. A cleat is nothing more than a board ripped at 45 degrees; you screw one half to the studs and hang shop-made holders on it. Material cost is close to nothing — it is scrap plywood and screws — and it holds more than pegboard while being completely reconfigurable. It costs you time and a circular saw instead of money, which is exactly the trade a budget project wants to make.
The winning budget move is not to pick one — it is to mix them. Run cheap pegboard across the big light-duty field, add a short rail or a strip of slatwall exactly where the heavy things hang, and build a French cleat wall if you have the tools and a free afternoon. If you would rather buy a coordinated, ready-made kit than assemble the pieces, our roundup of the best garage storage systems compares the complete wall-and-rail kits by load rating and cost per foot so you can see where the money actually goes.
Overhead Storage: The Cheapest Square Footage You Own
Look up. The space above your car and above the garage door is, in almost every home I inspect, completely empty — and it is the single most underused storage in the building. Overhead racks and ceiling-mounted platforms turn that dead air into deep storage for exactly the long-term-zone items we set aside earlier: holiday bins, luggage, camping gear, the stuff you need four times a year and never in a hurry.
Overhead is also where the budget-versus-safety line is brightest, so here is the contractor’s truth. The weight rating on a ceiling rack — usually 250 to 600 pounds — is real only if every lag bolt lands in a joist or truss. An overhead rack anchored to drywall is not storage; it is a countdown. Before you buy, figure out which direction your ceiling framing runs and how far apart the members sit, because that determines both which rack fits and where the bolts have to go. Load the heavy items toward the wall side to reduce leverage, never exceed the rating, and leave clearance for the garage door track, springs, and opener travel so nothing fouls the door. Driving those lag bolts is a job for an impact driver or a strong cordless drill — the leverage matters, and hand-driving them into a joist over your head is misery. Get the anchoring right and the ceiling is the best value in the whole garage.
Shelving and Bins: Buy vs. Build, and the Cheapest Reliable Wins
For the things that genuinely need to sit on a surface, you have two honest paths. Wire or steel utility shelving is cheap, fast, and strong enough for most garage loads — a single freestanding unit organizes a wall’s worth of bins in an hour. If you own a saw and want to spend even less, a DIY 2x4-and-plywood shelf lag-bolted to the studs is nearly indestructible and costs a fraction of a cabinet; it is the highest strength-per-dollar shelf you can own.
Whatever holds your stuff, standardize your bins. Buy one size of clear, stackable tote and stick with it — clear so you can see in, one size so they stack square and use the space efficiently. Then label everything; a cheap labeler or even a marker on tape is the single highest-return-per-dollar organization tool there is, because an organized garage that nobody can navigate slides back to chaos in weeks. For the drawer of loose screws and fasteners every garage accumulates, a small-parts organizer or a row of jars on a shelf saves you the second trip to the hardware store for something you already owned.
Don’t Skip This: Anchor Into Studs, Not Drywall
This is the section that separates a garage that works from one that fails, and it is the part budget guides never cover. Garage drywall is not a structural anchor. Anything that bears weight — pegboard, rails, shelves, and above all overhead racks — must be fastened into the studs behind the drywall or the joists above it. A cheap stud finder pays for itself the first time it keeps a loaded shelf on the wall.
The fastener matters as much as the target. Into a stud or joist, use a lag screw or structural wood screw sized for the load — not the drywall screws that come in the junk drawer, which are brittle and snap under shear. Where you genuinely cannot hit a stud and the load is light, a proper toggle bolt is your fallback, but treat “I’ll just use a drywall anchor” as a red flag for anything you would not want to catch with your foot when it falls. The two minutes it takes to find the stud and drive the right fastener is the cheapest insurance in the entire project. If you are still building out your fastener and driver collection, our guide to the essential tools every new homeowner needs covers the drill, driver, and stud finder that make this whole job safe and quick.
Here is a pro trick worth the small extra effort when you are covering a whole wall: screw a sheet of 3/4-inch plywood across the studs first, then mount your pegboard, rails, or hooks to the plywood. A stud wall only gives you a solid fastening point every 16 inches; a plywood backer turns the entire bay into one continuous, load-bearing surface, so you can hang a heavy hook anywhere you want instead of only where a stud happens to land. It costs one sheet of plywood and an hour, and it is the difference between a wall you fight and a wall that holds whatever you ask of it. And for anything tall that stands on the floor — a storage cabinet, a bank of shelving — take the same thirty seconds you would in a child’s bedroom and anchor the top of it to a stud with an anti-tip strap. A loaded cabinet that tips forward in a garage full of kids and bikes is a genuine hazard, and the fix is a two-dollar bracket.
Light It So You Can Use It
A dark garage stays disorganized because you cannot find anything in it, and the single builder-grade bulb in the center of most garages leaves the walls — where all your new storage now lives — in shadow. Swapping in a couple of bright, plug-in LED shop lights is a sub-$100 upgrade that makes the workbench usable after dark and, honestly, makes the whole space feel finished. It is the cheap final touch that makes everything else you just installed actually get used.
Respect the Clearances Most Guides Never Mention
This is where a contractor’s eye earns its keep, because an organized garage that violates a safety clearance is worse than a messy one. As you decide what hangs and stacks where, hold three no-go zones sacred. Keep at least 18 inches of clear space above and around a gas water heater — it draws combustion air and its burner is an open flame, and boxing it in with storage is a fire and carbon-monoxide risk. Keep the area in front of your electrical panel completely clear — code wants roughly three feet of working space — so a shelf or a stack of totes never blocks the one thing you need to reach fast in an emergency. And store fuel and propane with deliberate distance from any ignition source, ideally in a ventilated spot, never tucked beside the water heater because the corner was empty. Because the garage is exactly the room where these ignition sources live, it is also the room that most needs a working alarm overhead; if yours is old or missing, a current smoke and CO detector is a ten-minute install and the cheapest safety upgrade in the house. Organize around the clearances, not through them.
A Phased Budget Plan: What to Buy First
You do not have to do this all at once, and you should not. Here is the order I would spend in, because each phase stands on its own and builds toward the next.
With $0 — the free tier. Before you spend anything, mine what is already free. The purge itself costs nothing and does the heaviest lifting. Cardboard boxes make serviceable drawer dividers and small-parts bins; the sturdy fridge-pack boxes from a case of soda are the perfect size for spray cans and shop rags. Scrap 2x4s and plywood from a project — or from your town’s bulk-trash night — build the French cleats and simple shelves in this whole guide. A Habitat for Humanity ReStore routinely has solid used cabinets for a fraction of new. And a roll of painter’s tape with a marker is a labeling system that works today. It is amazing how far a free afternoon and what you already own will get you before a dollar is spent.
With $50 — the purge-and-lift phase. Spend nothing on the purge itself, then buy one sheet of pegboard with hooks and a pack of clear totes and a labeler. Get the hand tools onto the wall and the seasonal clutter into labeled bins on whatever shelf you already own. This phase alone transforms the space, and it is proof of the whole strategy: the cheapest move is the highest-impact one.
With $200 — the wall-and-ceiling phase. Add a steel utility shelf or a French cleat wall for the heavy and awkward items, and — the big one — a single overhead rack anchored into the joists for the long-term zone. This is the phase that clears the floor for the car. A stud finder and the right lag screws come out of this budget too.
With $500 — the finish-it phase. Now you add the things that make it a genuine workshop: a proper workbench as the anchor of the work zone, a rolling tool chest for your most-used tools, a run of slatwall where the heavy gear hangs, and bright LED shop lighting overhead. At this point you have a fully zoned, floor-clear, well-lit garage that cost a fraction of the showroom version and works just as hard.
The Bottom Line
A budget garage organization is not an exercise in buying cheap — it is an exercise in spending on the two things that actually multiply your space (the walls and the ceiling) and refusing to spend on the things that merely look expensive. Purge first so you are not storing storage. Get everything off the floor. Zone the room before you mount a single hook. Mix your wall systems so cheap pegboard does the light work and a targeted rail or cleat handles the heavy. Use the ceiling you have been ignoring, and anchor all of it into real framing so it stays up. Do that in phases, starting with the fifty-dollar sheet of pegboard, and within a couple of weekends you will park the car back in the garage for the first time in years — which, after two decades of doing this, is the only measure of a successful garage project I trust.
Frequently Asked Questions
How much does it realistically cost to organize a garage?
What is the cheapest way to add storage to a garage?
Is pegboard or slatwall better for garage organization?
Are overhead garage storage racks safe, and how much weight can they hold?
What should you never store in a garage?
Related Articles
About the Reviewer

Jake Morrison, Licensed General Contractor
B.S. Construction Management, Purdue University
Jake Morrison has spent 14 years in residential construction and home renovation before founding DIYRated in 2026. After helping hundreds of homeowners choose the right tools and materials for their projects, he started writing the product guides he wished existed when he was starting out. Jake tests every major product recommendation in his workshop in Indianapolis and focuses on real-world performance over spec-sheet marketing.