How to Refinish Furniture: The Decisions That Happen Before You Touch Sandpaper
A licensed GC's field method for refinishing wood furniture: identifying the old finish with a solvent test, spotting veneer before you sand through it, what replaced methylene chloride strippers, blotch control, and the barrier coat that saves a stain job.
Updated
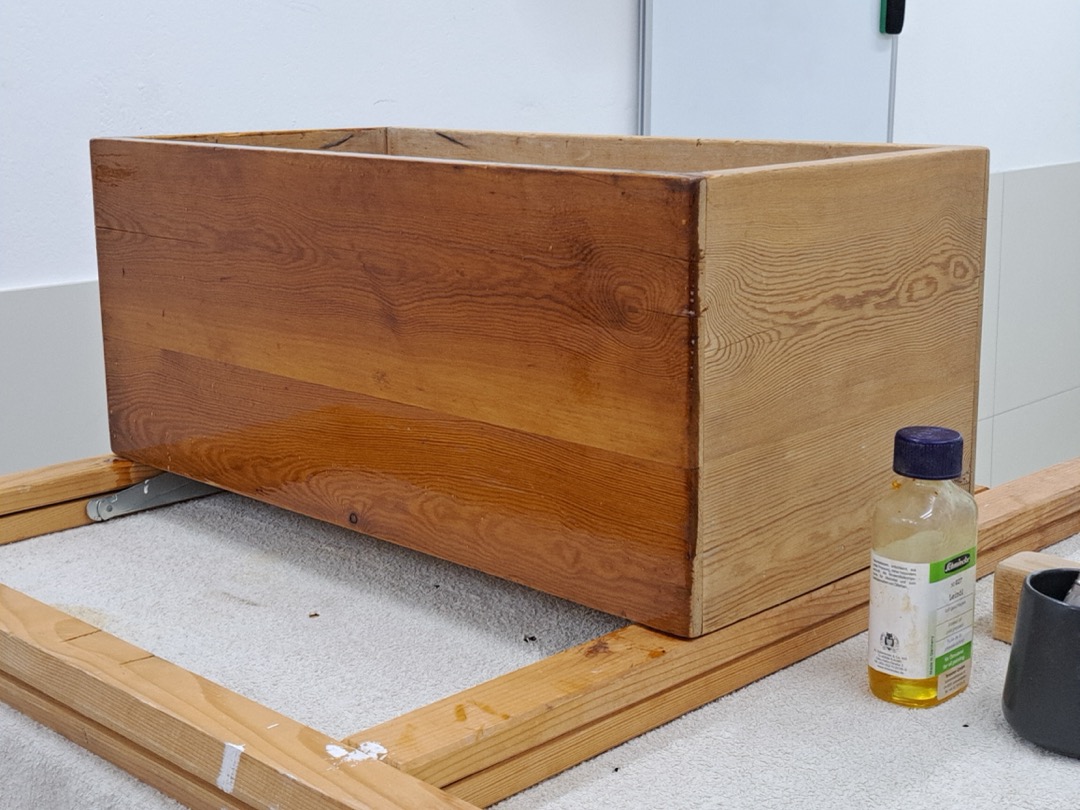
I refinish two or three pieces a year, usually because a client wants to keep a table that does not match the new floor, or because something solid and well-made turned up at an estate sale for less than the cost of the hardware on it. Most of those jobs go well. The ones that go badly almost never fail at the sanding or the staining. They fail at a decision made in the first twenty minutes, before any tool came out.
The standard guide walks you through strip, sand, stain, seal. That sequence is correct, and it is also the sequence that produces pieces with sanded-through veneer, blotchy pine, and a topcoat that peels off in sheets six months later. What the sequence leaves out is the diagnostic work: what the existing finish actually is, whether the wood under it is solid or a paper-thin veneer, whether this particular species is going to blotch, and whether the piece is worth refinishing in the first place.
This is the method I use, in the order I use it, including the parts nobody puts in a ten-step listicle.
Refinish, Restore, or Revive: Three Different Jobs
People use these words interchangeably and they describe three different amounts of work.
Reviving means cleaning the existing finish and improving it without removing it. Mineral spirits to cut the wax and polish buildup, a compatible recoat or a blend-in restorer, maybe a fresh coat of paste wax. An evening’s work, and the right answer more often than the internet suggests.
Restoring means repairing the piece without changing its character: regluing joints, patching veneer, filling losses, touching up color locally, and leaving as much original surface intact as possible. This is what you do to something old and good.
Refinishing means removing the existing finish down to bare wood and building a new one. It is the most thorough option and the most destructive, and it is the only one that can genuinely change the color of a piece.
Before you commit, understand the timeline. Refinishing is not a Saturday. Stripping a piece with several layers on it can take an overnight dwell. Stain needs to dry before a sealer goes over it. Every topcoat needs its recoat window respected, and there are usually three to five of them. A realistic schedule for a single piece is a weekend of active work spread across four or five days of waiting, and then a month of gentle use while the finish cures. Every guide that presents this as an afternoon project is skipping the waiting, which is most of the calendar.
Start by Deciding Whether to Refinish at All
Refinishing destroys the original surface. That is fine on a mass-produced oak dresser from the 1990s and it is a genuine loss on a few categories of piece, so it is worth thirty seconds of thought.
Leave it alone, or get an opinion first, if any of these apply. The piece is a signed or documented antique, where original finish and patina carry most of the value and stripping can remove a large fraction of it overnight. The finish is original milk paint or early painted decoration, which collectors value specifically because it survived. The piece has a shellac finish in good condition, which can almost always be revived rather than removed. Or the piece is painted and predates 1978, in which case the paint may contain lead and sanding it dry is the single worst thing you can do to it.
Refinish without hesitation when the piece is a common production item, when the existing finish is already failing, or when the wood underneath is sound and the surface is not. Good bones with a bad finish is exactly the case this work is for.
There is a third answer that people skip: clean it and stop. A large share of “this needs refinishing” pieces are actually carrying twenty years of wax, furniture polish, and kitchen grease on top of an intact finish. Wipe the piece down with mineral spirits on a rag, work in sections, and change rags as they load up. On maybe one piece in four, that is the whole job.
Identify the Existing Finish Before You Buy Anything
Everything downstream depends on what is currently on the wood, and you can find out in five minutes with three solvents and a hidden spot. Work on the underside of a tabletop, the back of a leg, or inside a drawer skirt.
Put a few drops of denatured alcohol on the test spot and wait about thirty seconds. If the finish softens, gets sticky, and can be smeared with a fingertip, it is shellac. Shellac was the default furniture finish in North America into the 1920s and is common on anything older than that.
If alcohol does nothing, try lacquer thinner. If the finish dissolves and goes gummy, it is nitrocellulose lacquer, which is what most factory furniture from roughly the 1930s through the 1980s wears.
If neither solvent touches it, the finish is a cured film that does not re-dissolve: varnish, polyurethane, conversion varnish, or a catalyzed coating. Those have to be removed mechanically or with a stripper that attacks the film chemically rather than by re-dissolving it.
If the surface feels like wood rather than plastic, absorbs a drop of water slowly, and shows no film edge where it meets a chip, you are probably looking at an oil or oil-and-wax finish, which simply needs cleaning and recoating.
This test decides the next three steps. Shellac and lacquer can often be repaired by re-flowing the existing film with their own solvent, a technique called reamalgamation that takes an hour and no stripper at all. Varnish and polyurethane cannot. Knowing which one you have is the difference between an afternoon and a weekend.
Solid Wood or Veneer, and the Two-Minute Check
This is the mistake that ends projects. Modern furniture veneer is often thinner than a sheet of copy paper, and a random orbit sander will go through it in the time it takes to say so. Once through, you have a pale patch of plywood or particleboard core that cannot be sanded out, stained to match, or hidden.
Four checks, in order of how fast they are:
End grain. On solid wood, the face grain wraps onto the edge and becomes visible end grain, with pores and growth rings. On veneer, the face pattern stops dead at the edge and meets either a thin dark glue seam or a strip of edge banding whose grain runs the wrong way.
Symmetry. Book-matched mirror patterns, four-quarter starburst tops, and grain that repeats identically across a wide panel are all veneer signatures. A solid board does not do that by accident.
The underside. Flip it. Veneered panels are almost always plywood or MDF core, and the core is usually visible from below or inside a case.
Repeats. Printed veneer and laminate repeat the same knot at a fixed interval. If you see the same figure twice, it was printed.
If the piece is veneered, the whole plan changes: strip chemically rather than sanding, sand by hand with a flat block and nothing coarser than 150 grit, keep a strong raking light on the surface so you see color change the instant it starts, and stop early. If the piece is solid, you have room to be aggressive.
Clean the Piece Before Anything Else
Strip a dirty piece and you push decades of wax, silicone polish, and kitchen grease into the open wood, where it will cause the new finish to crawl into fisheyes weeks later. Clean first, every time.
Remove the hardware and bag it by location so it goes back where it came from. Photograph the piece from several angles before disassembly if there is anything you might not remember.
Wash with a mild degreaser or a dilute dish soap solution, working in small sections and drying as you go. Wood and standing water are a bad combination, so damp rather than wet, and dry immediately.
Follow with a mineral spirits wipe on a clean rag, changing rags as they discolor. This is what actually pulls the wax and polish film off, and it is the step people skip. It also previews the color the wood will have under a clear finish, which occasionally changes the plan entirely.
Let the piece dry fully before doing anything else. Mineral spirits need a few hours to flash off completely, and stripping or sanding over a still-wet surface accomplishes nothing.
Is It Better to Sand or Strip?
For a film finish on solid wood, strip first and sand second, almost every time. Sanding a cured finish off is slow, it loads and ruins abrasive at a startling rate, and the heat generated by a power sander softens the finish so it gums the disc rather than cutting. Chemical stripping does the bulk removal with almost no risk of changing the shape of the piece, and sanding afterward becomes a light job on mostly bare wood.
Sand-only makes sense in two narrow cases: an oil finish that never formed a film, and a flat panel with a thin finish where you value speed over the last few thousandths of wood.
Strip-only, with no sanding at all, is the right call on carved detail, turned legs, and any surface where sanding would round over a crisp edge or blur a molding profile.
What Is Actually in a Paint Stripper Now
The chemistry on the shelf changed, and most refinishing advice online has not caught up.
Methylene chloride was the fast, evil, wonderfully effective stripper that every older guide assumes you are using. EPA’s 2019 rule prohibits its manufacture, processing, and distribution for consumer paint and coating removal, which is why you have not seen it in a retail store since late 2019. That consumer rule is separate from EPA’s broader 2024 methylene chloride rule, which the Fifth Circuit vacated and remanded in September 2026; the practical situation for a homeowner is unchanged either way. You will not be buying it at a big-box store.
What you will find instead:
NMP-based strippers (n-methylpyrrolidone) work on nearly everything including polyurethane and epoxy, with dwell times measured in hours rather than minutes. They are slow, they stay wet a long time, and they need real ventilation and chemical-resistant gloves.
Benzyl alcohol and DBE blends are the most common “safer” formulations. Effective on lacquer, shellac, varnish, and most paints, with dwell times from thirty minutes to several hours depending on how many layers are on there.
Soy and citrus strippers are the gentlest and the slowest. They will take off shellac and lacquer readily and will take off old polyurethane eventually, sometimes overnight. Their real advantage is that they can be used indoors without evacuating the house, and they do not flash off in ten minutes on a warm day.
Caustic (lye-based) strippers and dip tanks cut through anything but darken wood, raise grain badly, dissolve hide glue, and can leave residue that interferes with the new finish. Avoid them on anything you care about, and avoid dip-stripping services on veneered or glued-up furniture entirely.
The real change in technique is patience. Every replacement chemistry needs dwell time the old products did not. The single most common stripping failure I see is someone scraping too early, getting half the finish, and concluding the stripper does not work.
How to Strip a Piece Without Making a Mess of It
Set up outdoors or in a garage with the door open and a fan pulling air away from you, on a surface you can ruin. A dedicated bench makes this far easier than working on sawhorses, and if you are setting a shop up from scratch our workbench roundup covers the surfaces that survive this kind of work.
The hardware should already be off from the cleaning step. A basic screwdriver set with hollow-ground tips is what to use for that, because the slotted screws in old furniture are soft and a modern tapered driver will chew the slots out.
Brush the stripper on thick, in one direction, and do not brush it back and forth. These products work by staying wet, and every stroke you take accelerates evaporation. Lay it on like frosting and walk away.
Cover the wet stripper with plastic sheeting or cling film. This is the trick that makes the slow modern strippers usable: the plastic stops evaporation, keeps the chemistry working, and lets an overnight dwell actually happen. On a heavy multi-layer job, cover it and check in the morning.
Test with a scraper at the edge before you commit. If the finish comes up to bare wood in a clean sheet, the whole panel is ready. If it comes up gummy and partial, it needs more time, not more scraping.
Scrape with a plastic scraper on veneer and flat work, and use a stiff nylon brush, brass brush, or coarse twine for carving and turnings. Steel wool is fine with most strippers, but never with a caustic or water-based one on oak, because iron residue plus oak tannin equals black stains that go deep.
Neutralize exactly as the label says. Some strippers need a mineral spirits wipe, some need water, some need nothing. Getting this wrong is a leading cause of finishes that will not dry.
Nitrile gloves, not fabric ones. Standard shop gloves from our work glove roundup are the right thing for handling and moving the piece, but stripper needs a chemical-resistant glove underneath or instead, and the thin disposable nitrile at the paint counter is not rated for extended contact with NMP.
Repairs Come Before Sanding, Not After
Loose joints, missing veneer chips, gouges, and old repairs all get handled while the wood is bare and before the final sanding pass. The order matters because every repair leaves something to sand flush, and doing repairs after final sanding means re-sanding the area anyway.
Reglue loose joints properly, which usually means taking the joint apart, scraping the old glue out, and clamping it back with fresh glue. Injecting glue into a wobbly joint without disassembly is a temporary fix that fails again in a year.
Fill gouges with a filler you have tested for color under finish, because almost every wood filler dries a different shade than it looks wet, and most of them take stain differently than the surrounding wood. Test on scrap. On a piece where the repair will be visible, tinted shellac stick or a burn-in stick applied after the sealer coat gives far better color control than filling bare wood.
Steam out dents rather than filling them. A damp cloth and a hot iron held on the dent will swell crushed fibers back up on most solid woods, and a dent that steams out leaves no color mismatch at all. This does not work where the fibers are cut rather than compressed, and it does not work on veneer over a void.
Water rings are a finish problem, not a wood problem, in the large majority of cases. If you are stripping the piece anyway, they go away with the finish. If the ring is dark rather than white, it has reached the wood and needs oxalic acid to bleach, followed by a thorough neutralizing wash.
Sanding: The Grit Ladder and Where to Stop
The point of sanding is not smoothness. It is scratch uniformity. Stain makes every scratch pattern visible, and a single 80 grit gouge left under a 180 grit surface will show up as a dark line the moment color goes on.
Start no coarser than you need. On stripped bare wood, 100 or 120 grit is usually plenty; 80 grit is for leveling actual damage and it leaves scratches that take two full grits to remove. Move up in steps without skipping: 100 to 150 to 180. Each grit’s job is to remove the previous grit’s scratches, and skipping a step means the finer paper is polishing the coarse scratches rather than cutting them out.
Stop at 150 or 180 for oil-based stain on open-grain woods like oak and ash. Stop at 180 for closed-grain woods. Going to 220 and beyond burnishes the surface, closes the pores, and reduces stain uptake, which is how people end up with a stain that “did not take.”
Sand with the grain, always, on the final grit at minimum. A random orbit sander leaves swirl marks that are invisible on bare wood and glaringly obvious under stain, so the last pass on any surface that will be stained should be by hand with the grain, with a flat block behind the paper on flat surfaces.
Check with raking light between grits. Kill the overhead light, put a work light low and nearly parallel to the surface, and look across it. Every scratch, every glue spot, every dished area shows up under raking light and disappears under overhead light. This is the highest-value habit in the entire process, and a decent LED shop light on a stand is what makes it practical. If a flaw is visible now, it will be visible and permanent under the topcoat.
Vacuum, then wipe with a cloth barely damp with mineral spirits. The mineral spirits wipe does double duty: it lifts the fine dust that a vacuum leaves behind, and it temporarily wets the wood so you see approximately what the finish will look like, which reveals remaining scratches and glue residue before it is too late.
Dust Control Is a Finish Quality Issue
Sanding dust that is still airborne when you apply finish lands in the finish. That is the whole problem, and it is why professional finish rooms are separate from sanding rooms.
Sand with dust extraction connected, not with the little bag on the sander. A shop vac with a fine filter hooked to the sander’s port captures the overwhelming majority of the dust at the source, and our shop vac roundup covers which ones have the filtration and the hose fittings to actually do it. A vacuum without a fine or HEPA filter will pass wood dust straight through and redistribute it.
Let the room settle before finishing. Fine dust stays airborne for hours. Sand one day, clean, and finish the next. If you are working in a space you also live in, running an air cleaner in the room between the sanding and the finishing makes a visible difference to how clean the first coat lays down; the units in our home air purifier roundup are what most people already have available.
Vacuum the floor and the bench, not just the piece. Walking across a dusty floor while carrying a wet-finished panel is how dust gets into a coat that was clean thirty seconds earlier.
Raise the Grain Before You Stain
Any water-based product, including water-based dye, water-based stain, and water-based topcoat, will swell the surface fibers and leave the wood feeling rough after the first coat. You can deal with that after the fact by sanding a wet coat, which is unpleasant, or you can get ahead of it.
Wipe the bare sanded wood with a damp cloth, let it dry fully, and then knock the raised fibers down with the final grit, sanding very lightly. The wood will now stay smooth when the water-based product goes on. Skip this entirely if every product in your schedule is solvent-based.
Blotch-Prone Woods and What to Do About Them
Pine, maple, birch, cherry, alder, and poplar share a problem: density varies within the same board, and the soft areas drink stain while the dense areas repel it. The result is the cloudy, mottled look that makes a DIY refinish read as a DIY refinish.
You choose one of three defenses before you stain, never after.
Pre-stain wood conditioner is a thinned binder that partially seals the porous areas so absorption evens out. The critical detail is the timing window on the can. Conditioner works while it is still wet, usually somewhere between fifteen minutes and two hours after application. Wait too long and it has fully cured into a seal that blocks stain everywhere.
A shellac washcoat is the same idea with more control. Dewaxed shellac thinned to roughly a one pound cut, brushed or wiped on, allowed to dry, and scuffed lightly with 320 grit gives an even, predictable base. I use this on cherry and pine because I can dial the concentration up if the test board still blotches.
Gel stain avoids the problem instead of solving it. Because gel stain is thick and does not penetrate much, it colors the surface fairly uniformly regardless of what the wood underneath is doing. It also gives you less depth and less grain contrast, which is the trade.
Test every one of these on scrap or on the underside of the piece before committing. A conditioner that works beautifully on pine will lighten the final color on cherry by a noticeable amount, and you want to discover that on a hidden surface.
Stain: Pigment, Dye, and Gel
Three different products get called stain, and they behave differently enough that the choice matters more than the color name on the can.
Pigment stain is finely ground colored solid suspended in a binder. The pigment lodges in the pores and in any scratch, which is why it emphasizes grain and also why it advertises sanding mistakes. It is the most forgiving to apply, the most widely available, and it will not shift color much in sunlight.
Dye is dissolved rather than suspended, so it colors the wood fibers themselves rather than filling the pores. Dye gives a clearer, deeper, more transparent color and will not muddy figured wood the way pigment can. It is also less lightfast than pigment in most formulations, so a dyed piece in a sunny window will fade faster.
Gel stain is a thick pigment stain that sits on the surface. It is the right answer on blotch-prone wood, on veneer where you cannot afford to sand, and over an existing finish that you cleaned and scuffed rather than stripped.
Whatever you use, wipe the excess off within the window on the can and wipe with the grain. Stain left to dry on the surface does not get darker in a useful way. It gets sticky, cures badly, and interferes with the topcoat bonding. If you want more color, use a darker stain or a second application after the first has dried, not a thicker application.
The Dewaxed Shellac Barrier Coat
This is the single most useful trick in furniture finishing and almost no consumer guide mentions it.
Dewaxed shellac sticks to almost everything and almost everything sticks to it. A thin coat of dewaxed shellac over a stained surface does several jobs at once: it locks the stain down so a brushed topcoat cannot drag color around, it isolates any incompatible products from each other, it seals in oil or silicone contamination that would otherwise cause fisheye, and it blocks tannin and knot bleed on oak and pine.
Where it earns its keep most often: you want to put water-based polyurethane over an oil-based stain that is not fully cured, and the two do not get along. A shellac barrier coat between them solves it. Or you stripped an old piece and the topcoat keeps crawling into fisheyes because decades of silicone furniture polish soaked into the wood. Shellac seals it.
The word dewaxed is not optional. Standard shellac contains natural wax that prevents polyurethane from bonding, and a waxy shellac under poly is a guaranteed adhesion failure. Buy a product explicitly labeled dewaxed, or buy flakes labeled dewaxed and mix them with denatured alcohol yourself.
Apply it thin, let it dry for about an hour, scuff with 320 grit, and proceed. One coat is all you need for barrier purposes.
While we are here: sanding sealer is a related product that gets confused with this and does a different job. A sanding sealer is a fast-drying undercoat loaded with a soft lubricating solid, usually zinc stearate, that makes the first scuff sand powder off cleanly instead of gumming the paper. Its purpose is to stiffen the raised fibers on bare wood so one pass with fine paper leaves a glass-smooth base for the topcoat. That is useful, and it is not what a barrier coat does. The important caution is that the same stearate that makes sealer sand nicely also weakens adhesion and water resistance if you build several coats of it, so use one coat at most, and skip it entirely under a floor-grade or table-grade polyurethane where film integrity matters more than ease of sanding. Dewaxed shellac does the fiber-stiffening job nearly as well without the stearate, which is why it is what I reach for on most pieces.
Picking a Topcoat
The topcoat decides how the piece survives the next ten years, and the honest framework is durability against repairability, because you rarely get both.
Oil-based polyurethane is the most abrasion and water resistant finish a homeowner can apply without spray gear. It ambers with age, which flatters walnut, cherry, and oak and yellows maple and anything pale. Slow drying means more time for dust to land, and faster than that means it did not have time to level. Three to four thin coats for a table, two for a case piece that does not get wet.
Water-based polyurethane stays water clear, dries fast enough to get multiple coats in a day, and smells far less. It is genuinely softer than oil-based per coat, so build more coats. It raises grain on the first coat unless you pre-raised it, and it shows brush marks more readily because it sets quickly.
Wipe-on polyurethane is just thinned poly, and it is the most reliable way for a beginner to get a good-looking film. Each coat is thin enough that it cannot run, sag, or hold a brush mark, and dust has almost no wet time to land in. The cost is coat count: expect five or six wiped coats to equal three brushed ones.
Hardwax oil penetrates and sits close to the wood rather than building a plastic-looking film. The feel and the look are excellent, spot repairs are genuinely possible without stripping the whole surface, and water resistance is decent. Heat resistance is not, so it is a poor choice directly under a hot pan.
Shellac dries in minutes, sands beautifully, and repairs trivially because the next coat melts into the last one. It is also damaged by alcohol, water, and heat, which rules it out for dining tables and bathroom pieces and makes it excellent for bedroom and living-room furniture.
Lacquer is the factory finish for good reasons: fast, hard, repairable, and beautiful out of a gun. It is a spray-only product for practical purposes, and the aerosol versions are expensive per square foot and hard to lay down evenly on a large top.
Match the finish to the surface’s actual life. A dresser top and a dining table have entirely different requirements, and there is no reason to put the same product on both.
Brush, Wipe, or Spray
Brushing is fine on flat panels with a good natural-bristle brush for oil-based and a synthetic for water-based. The technique that matters most is loading the brush properly and then tipping off: after you have spread the finish, come back with an almost dry brush held nearly vertical and draw it once through the wet film with the grain, in long unbroken strokes, to level the brush marks.
Wiping with a lint-free cloth is the most forgiving approach and the one I recommend to anybody finishing their first piece. Thin the finish or buy a wipe-on product, apply a thin coat, wipe off the excess, repeat. It is nearly impossible to get a run, and the surface quality is usually better than a beginner’s brushwork.
Spraying gives the best result on complex shapes, spindles, and anything with detail that a brush cannot reach without pooling. An HVLP turbine or a good handheld sprayer changes what is possible on a chair or a dresser with a lot of profile, and our paint sprayer roundup covers which units actually atomize a finish-grade material rather than just moving thick paint. Spraying requires ventilation, a respirator rated for organic vapor, and a space where overspray is acceptable.
Whatever the method, thin coats beat thick coats every time. A thick coat sags, traps solvent, cures soft, and takes far longer to reach full hardness.
Between-Coat Sanding and Rubbing Out
Between coats, scuff with 320 or 400 grit, just enough to knock off the dust nibs and give mechanical tooth. You are not trying to remove the coat, and if you see bare wood you went too far. Vacuum and wipe with a tack cloth or a microfiber cloth after every scuff.
The last coat is where most people stop and where the difference between a good refinish and a great one sits. Let the final coat cure for at least a week, then rub it out. Level any dust nibs with 800 or 1000 grit wet sanding using mineral spirits or soapy water as a lubricant, then bring the sheen where you want it: gray synthetic pads or 0000 steel wool with paste wax gives a soft satin, automotive polishing compound gives a higher gloss.
This step is optional in the sense that skipping it leaves you with a normal, acceptable finish. Doing it is what makes people ask who did the work.
When Paint Is the Right Answer
Not every piece should be clear-finished. Furniture made from multiple species, pieces with visible plywood or MDF, anything with damage that will not hide under stain, and pieces where you actively want the color are all better painted, and painting is faster and more forgiving.
The prep is different in one important way: paint needs adhesion, not absorption, so you scuff and prime rather than sanding to bare wood. Clean the piece with a degreaser, scuff the existing finish to a uniform dull surface with 220 grit, and prime with a bonding primer or dewaxed shellac primer. Skipping the primer on a glossy old finish is why painted furniture chips off in sheets at the edges.
For the topcoat, use a hard-drying enamel rather than wall paint. Wall paint never reaches the hardness furniture needs and will stay slightly tacky under a lamp base for years. Our interior paint roundup covers which lines have a furniture-and-trim enamel, and if you are unsure which chemistry to use on a piece that will be handled constantly, the oil-based versus latex comparison walks through the durability and cure differences that matter here. The room-painting techniques in our guide to painting a room mostly transfer, with the exception that furniture rewards spraying much more than walls do.
Dry, Recoat, and Cure Are Three Different Things
Dry to the touch means the solvent has flashed off. Recoatable means the film is firm enough to accept another coat without lifting. Cured means the finish has reached its final hardness and chemical resistance. They are hours, hours to a day, and weeks, respectively, and almost every refinishing disappointment traces to treating the first as if it were the third.
Rough numbers: oil-based polyurethane is dry in a few hours, recoatable overnight, cured in about thirty days. Water-based polyurethane is dry in an hour, recoatable in two to four hours, cured in roughly two to four weeks. Hardwax oil is walk-on dry in a day and cured in one to two weeks. Shellac is effectively cured within hours.
Temperature and humidity move all of these. Below about sixty degrees, oil-based finishes slow down dramatically and water-based ones can fail to coalesce into a proper film at all. High humidity causes water-based finishes to dry slowly and can cause lacquer to blush into a cloudy haze. If you are finishing in a basement or a garage in a humid month, a dehumidifier running in the space is not fussiness, it is the difference between a clear film and a milky one.
During the cure window, treat the piece gently. No rubber-backed placemats, no heavy objects left in one spot, no adhesive-backed felt pads, no cleaning products. A dry cloth is all it should see for the first month.
Safety: Rags, Vapor, Dust, and Lead
Oily rags start fires. This is not a theoretical hazard. Rags soaked in linseed oil, tung oil, danish oil, hardwax oil, or any oil-based finish generate heat as they cure, and a wadded pile in a trash can holds that heat until it reaches ignition. Every year this burns down real garages. Spread used rags flat and separated on a non-combustible surface outdoors until they are stiff and dry, or submerge them in water in a sealed metal container. Never leave them balled up, and never put them in a bin with other trash.
Vapor. Strippers and solvent finishes need real ventilation and, for anything sprayed, a respirator rated for organic vapor. A dust mask does nothing for solvent vapor. Cross-ventilate with a fan pulling air away from you rather than blowing it at you.
Dust. Wood dust is a respiratory irritant and several hardwood species are sensitizers. Wear a fitted N95 at minimum while sanding, and use dust extraction at the tool.
Lead. Painted furniture manufactured before 1978 may carry lead paint. Do not dry sand it, do not heat-gun it, and do not sand it outdoors and assume the yard is fine. Test with a home lead swab kit first. If it is positive, chemical stripping with careful containment and disposal, or leaving the paint intact and painting over it, are both safer choices than creating lead dust.
Gloves and eyes. Chemical-resistant nitrile for strippers and solvents, safety glasses for everything. Stripper in an eye is an emergency room visit.
Common Mistakes That Ruin a Refinish
Nearly every failed refinish I have been asked to rescue came from this list.
Sanding too fine before staining. Finer is not better here. Past about 180 grit you are burnishing the surface and closing the pores, and the stain then sits on top and wipes off pale. The rule to remember: never go above 320 grit on wood you intend to stain, and on most species stop well short of that.
Skipping grits. Going straight from 80 or 100 to 220 does not remove the coarse scratches, it polishes them. They become invisible on bare wood and glaringly obvious the moment stain lands in them. Step through each grit.
Scraping the stripper too early. Modern stripper chemistry needs dwell time the old products did not. Half-removed finish is a dwell problem, not a product problem. Cover it with plastic and wait.
Putting a new topcoat over an unknown old one. Water-based finish over a not-fully-cured oil-based product is an adhesion failure waiting to happen. If you do not know what is underneath, a coat of dewaxed shellac between them solves it.
Power sanding veneer. This is the one that ends projects rather than just disappointing people. Check for veneer before any sander touches the piece.
Leaving stain on the surface to “get darker.” Stain that is not wiped off within the window on the can does not darken usefully. It cures sticky, stays soft, and prevents the topcoat from bonding. Use a darker product or a second application instead.
Applying thick coats. A heavy coat sags, traps solvent, cures soft, and can stay slightly tacky for weeks. Three thin coats beat one thick coat on every measure.
Skipping the test board. Species, age, and previous treatment all change how a piece takes color. Running your full schedule on scrap of the same species costs an evening and answers questions you do not want to answer on the finished top.
Treating dry as cured. Putting the piece back in service at the twenty-four hour mark is how you get a placemat permanently printed into a tabletop.
Reassembling too soon or too hard. Reinstall hardware only after the finish has had several days, and start the old screws by hand. Old furniture screws are soft, the threads in the wood are older still, and a driver set to full torque will strip a hole you then have to plug and redrill.
What I Would Do Differently on Your First Piece
Pick something small and solid. A nightstand, a small side table, a single chair. The techniques are identical on a dining table and the consequences of a mistake are not, and you will learn more from finishing three small pieces than from half-finishing one large one.
Buy or salvage a piece of the same species as scrap and run your entire schedule on it first: conditioner, stain, sealer, two coats of topcoat. It takes an extra evening and it answers every question you would otherwise be answering on the actual piece.
Spend the time on sanding and the raking light check, not on the topcoat. Almost every finish that looks bad looks bad because of what was under it.
Use a wipe-on finish for the first project. The result will be better than your brushwork would have been, and you will not spend the last hour of the job chasing runs.
If you are assembling a shop from scratch rather than just doing one piece, our essential tools for new homeowners and the beginner’s guide to power tools cover the base kit, and the scrapers, putty knives, and chisels in our hand tool set roundup are the specific items refinishing leans on hardest.
The piece that turns out well is almost always the one where somebody spent twenty minutes deciding what they were dealing with before they opened anything.
Frequently Asked Questions
Can you refinish furniture without stripping or sanding?
How do I tell if my furniture is veneer or solid wood before I start sanding?
Is it better to sand or strip old furniture?
What is the most durable finish for a dining table or another piece that gets hard use?
How long do I have to wait before using refinished furniture?
Related Articles
Oil-Based vs Latex Paint: Which One You Should Actually Be Using in 2026
painting-supplies
7 Best Paint Sprayers of 2026
painting-supplies
7 Best Interior Paints for Walls in 2026 (Tested by a Licensed Contractor)
painting-supplies
7 Best Shop Vacs of 2026
vacuums-floor-care
8 Best LED Shop Lights of 2026
lighting
About the Reviewer

Jake Morrison, Licensed General Contractor
B.S. Construction Management, Purdue University
Jake Morrison has spent 14 years in residential construction and home renovation before founding DIYRated in 2026. After helping hundreds of homeowners choose the right tools and materials for their projects, he started writing the product guides he wished existed when he was starting out. Jake tests every major product recommendation in his workshop in Indianapolis and focuses on real-world performance over spec-sheet marketing.