How to Use a Stud Finder (And How to Tell When It Is Lying to You)
By Jake Morrison, Licensed General Contractor Updated
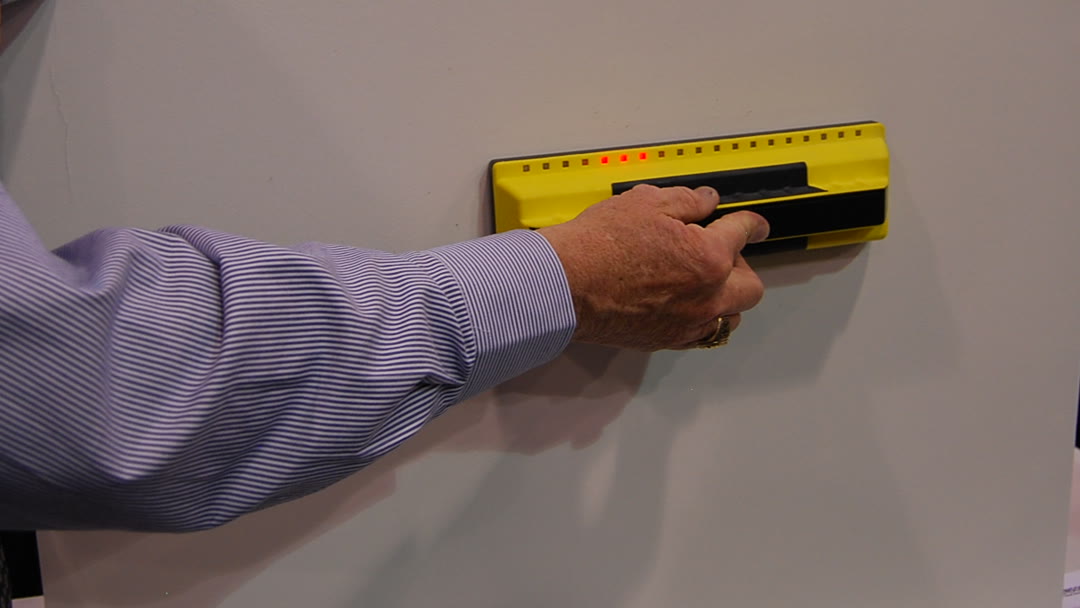
The wall that taught me to stop trusting the beep was a second-floor bathroom in a 1978 split-level. The stud finder lit up over a beautiful, clean, repeatable column. I drilled, and the bit went through a copper supply line about three quarters of an inch behind the drywall. The scan was not wrong about what it found. It was wrong about what I assumed it found, which is a different problem, and it is the problem this whole guide is about.
A stud finder does not find studs. Nothing in the tool knows what wood is. A capacitive stud finder detects a change in density behind the surface, and a magnetic one detects steel. Everything else is inference that you are doing, not the tool. Once you accept that, the technique that follows stops being a list of steps and starts being a short investigation with a verification step at the end.
What the Tool Is Actually Sensing
There are four detection technologies on the shelf and they fail in completely different ways, which is the real argument for owning two of them.
Capacitive edge-sensing is what most inexpensive electronic finders use. A plate in the tool measures the dielectric constant of whatever is in front of it and reports the moment that value changes. It reports the transition, not the object, which is exactly why an edge-finder gives you edges and makes you calculate the center yourself. This is the original design, patented by Robert Franklin in 1977 and manufactured by Zircon, which held the market alone until that patent expired in 1998.
Center-finding capacitive models use two offset plates and signal when both read the same, which happens over the middle of the object. Faster to use, same underlying physics, same vulnerabilities.
Multi-sensor arrays take a different approach. The Franklin Sensors ProSensor 710 carries 13 sensors reading roughly a seven-inch span at once, with a detection depth of 1.6 inches and no calibration pass at all. Because it reads the whole span simultaneously instead of integrating along your sweep, it displays the full width of the stud directly and removes your hand speed from the measurement. This is why the answer on every contractor forum is some version of “get a Franklin.”
Magnetic finders contain no electronics. A neodymium magnet locates the drywall screws and nails, and you infer the stud from the column of fasteners. Cheap, unbreakable, no batteries, and blind to anything non-ferrous.
Radar scanners are the fourth category, using ultra-wideband pulses instead of capacitance. They see through tile and thick material that stops everything else, and they cost accordingly.
| Type | What it detects | Typical depth | Fails on |
|---|---|---|---|
| Capacitive edge-finder | Density change at stud edges | 3/4 in normal, 1-1/2 in deep scan | Plaster, texture, damp walls, tile |
| Capacitive center-finder | Midpoint of a density change | Same as above | Same as above |
| Multi-sensor array | Full stud width, no sweep needed | About 1-1/2 in | Metal lath, very thick assemblies |
| Magnetic | Ferrous screws and nails only | Fastener depth only | Adhesive-set board, thick wallpaper |
| Radar / UWB | Objects behind dense material | Several inches | Price, and a learning curve |
Note what the depth column implies. Bosch publishes per-material depths for the GMS 120 that make the point better than any explanation: ferrous metal up to about four and three quarter inches, live wiring up to two inches, wood substructure up to about one and a half. The same tool sees steel three times deeper than it sees wood. A metal object at the back of a stud bay can shout louder than the wooden stud at the front of it.
Before You Switch It On
Sixty seconds of setup prevents most bad readings.
Put a fresh alkaline battery in it. A capacitive sensor drifts as voltage sags, and a half-dead battery produces readings that are wrong in a way that looks completely convincing. If the tool lives in a tool chest with everything else and only comes out twice a year, assume the battery is stale.
Take the picture off the wall and clear the area you plan to scan. Then think for a moment about what is behind it. Kitchens and bathrooms have plumbing in the walls. The wall behind a furnace or a water heater has ductwork. If you have an unfinished basement or a utility room, spend two minutes looking at where the pipes rise out of the floor and into the wall above. That single look tells you more than the next twenty minutes of scanning.
Run a strip of painter’s tape along the line you intend to scan and mark on the tape instead of the paint. It comes off clean and it lets you make ten marks without committing to any of them.
One habit almost nobody mentions: do not touch the wall with your free hand while you scan. Your hand has a dielectric constant too, and a capacitive sensor reads it just as happily as it reads a stud.
Last, if the wall was painted in the past few weeks, stop. Moisture in fresh paint and joint compound genuinely defeats these tools, and no amount of technique fixes it.
Calibration, and the Mistake That Ruins the Scan
Place the tool flat on the wall first, then press and hold the power button, then wait a second or two. That order matters. The tool takes a baseline reading of the wall right where it is sitting, and it compares everything afterwards against that baseline. Powering it on in the air and then setting it against the wall gives it the wrong reference.
Which raises the failure that catches everybody: what happens if you calibrate directly over a stud? The tool takes the stud as its idea of “normal wall,” and when you slide off the stud the density drops. Depending on the model you get one of two behaviours, and they look nothing alike.
A basic model flashes and beeps intermittently. Zircon calls this the over-the-stud indication and it is not a malfunction. Release the button, move the tool a few inches sideways, and calibrate again.
A better model recalibrates itself silently and then shows an arrow on the screen pointing back the direction you came from. That arrow is the tool telling you the stud is behind you.
Two other error causes worth knowing: pressing the button before the tool is flat on the wall, and sliding it too fast during the calibration hold. Both throw an error that reads like a hardware fault and is not.
The Two-Pass Scan
Here is the part that most guides get half right. An edge-finding sensor is physically wider than the transition it is trying to report, and it triggers when its running average crosses a threshold. On a single left-to-right pass it therefore lights up slightly before the true edge and stays lit slightly past it. Scan in one direction only and every reading is biased in that direction.
So scan twice, from opposite sides.
- Calibrate on a blank stretch of wall, several inches clear of any switch, outlet, or fixture.
- Slide slowly and steadily left to right, keeping the tool flat and using only the hand holding it. Stop at the first indication and mark the tape. That is the approximate left edge.
- Lift the tool off the wall, move six inches past the stud, and calibrate again.
- Slide right to left. Stop at the first indication and mark. That is the approximate right edge.
- Measure between your two marks. Center is three quarters of an inch in from either one.
Doing it this way takes maybe forty extra seconds and it converts a guess into a measurement.
What the Width of Your Reading Tells You
The gap between those two marks is not just a step in the procedure. It is a data point about the framing, and reading it is the single most useful skill in this whole article.
- About 1-1/2 inches. A normal 2x4 or 2x6 on edge. Actual dimensions are 1.5 by 3.5 and 1.5 by 5.5, and it is the narrow face pointing at you.
- About 1-1/4 inches. Probably a steel stud. The standard interior steel stud presents a 1-1/4 inch flange to the drywall, not a 1-1/2 inch wood face.
- About 3-1/2 inches. Likely a 2x4 laid flat. The code permits flat 2x4 framing in interior non-bearing walls that are not part of a braced wall line, and you find it in closets, furred-out walls, and plumbing chases.
- Three inches or more. A double or triple stud. Zircon uses roughly this threshold too: edges three or more inches apart, or a center reading over an inch wide.
That last case deserves its own paragraph, because it is where people put lag bolts and lose televisions.
Double Studs, and Why the Widest Reading Is Often the Worst Place to Drill
Doubled framing occurs at door and window openings and anywhere the wall needs extra support. At a rough opening you have a king stud running full height from plate to plate, with a jack stud nailed to its face carrying the header, plus cripples above the header and below a window sill. To a stud finder, two members nailed face to face read as one three-inch mass.
That is excellent framing to fasten into, right up until your screw lands in the seam between the two members and gets essentially no support from either. It looks and feels like a hit. It is not one.
Rules that hold up on site: within about four inches of any door or window casing, expect doubled framing. Drill three quarters of an inch in from whichever edge is further from the opening, which puts you in the middle of the king stud. Never place a heavy fastener at the visual center of a three-inch reading. And be aware that above header height you may be in cripples, which are short and may not be where the layout predicts.
Corners deserve the same skepticism. Everyone says there is always a stud at a corner, and there is always framing, but not always one stud in the place you expect. A traditional three-stud corner is a solid block. A California corner rotates the second stud ninety degrees to leave room for insulation. A two-stud corner uses drywall clips and has no stud at all where you would reach for one. The corner assembly also sits off the layout module, so measuring 16 inches from an inside corner is not the same as measuring 16 inches from the first layout stud. Establish the module from two confirmed studs out in the field of the wall, then project it toward the corner.
Verify Before You Drill
Every reading gets confirmed before anything permanent happens. There are two confirmations and they take about a minute together.
Vertical continuity. Scan the same column about a foot above and a foot below your mark. A stud runs floor to ceiling. A pipe elbow, a duct, an electrical box, or a piece of fire blocking does not. This one check catches most false positives on its own.
That said, a horizontal hit is not automatically junk. The IRC requires fireblocking in concealed stud spaces at intervals not exceeding ten feet, so a tall wall genuinely has horizontal lumber in it, and so does any wall with cabinet backing or blocking installed for a future mount. Horizontal is a reason to investigate, not a reason to panic.
The test hole. Drill a small pilot hole, an eighth of an inch or smaller, at least an inch deep. If you hit wood after the drywall and the bit starts producing pale shavings instead of white gypsum dust, you are in framing. If it drops into a cavity, you are not. A finish nail works the same way: it should stop after about half an inch of travel past the drywall. Keep a cordless drill with a small bit within reach for exactly this and the whole habit becomes painless.
Where you put that hole is the part nobody covers. Three placements leave no visible repair:
- Just above the baseboard, where a dab of paintable caulk hides it completely.
- Inside the footprint of the bracket or mounting plate you are about to install.
- Inside the electrical box opening with the cover plate off and the breaker off, which also gives you a direct look at the framing.
For anything heavy, pre-drill the actual fastener hole rather than driving straight in. It confirms the stud a second time, and it keeps a lag screw from splitting the edge of the framing. Then drive it with a cordless drill on a clutch setting rather than an impact driver, which will happily snap a lag bolt before you notice anything is wrong. Choose fasteners long enough to reach at least one inch into the stud, and remember to add the board thickness on top of that.
Reading the Layout Once You Have One Stud
Two confirmed studs establish the module. One does not.
Measure center to center between them. If the answer is 16, 24, or 19.2 inches, you have the layout and you can extrapolate in both directions and mark 16, 32, 48, 64 from your reference. The 19.2 figure surprises people: it comes from dividing a 96-inch sheet by five, and it shows up under engineered floor and roof systems. If you own a tape with black diamonds on the blade, that is what they mark, and our guide to reading a tape measure covers the rest of the markings on there.
The 48-inch mark is the one worth verifying first, because gypsum panels are 48 inches wide and code requires their edges to land on framing. A drywall seam is therefore always over a stud, and seams repeat every 48 inches. Kill the room lights, hold a work light almost flat against the wall, and the seams show up as faint ridges. It is the fastest independent confirmation of your module that exists.
Two warnings. Layout is anchored to where the wall started, not to your reference stud, and every wall has two ends. Whichever end the framer finished at will have an out-of-module stud where the remainder landed. And spacing changes near openings, so a run of predictions that works beautifully across the middle of a wall can fall apart three feet from a doorway.
Why Studs Vanish Near a Bathroom
This is the single most common “my stud finder is broken” scenario and it is almost always the wall, not the tool.
A wet wall carries drain, waste, and vent piping that does not fit inside a 2x4 bay, so it gets framed in 2x6, furred out, or built as a chase. Your 16-inch module can genuinely change partway along the wall. Worse, the code makes the confusion mandatory: the IRC permits boring a stud to 60 percent of its depth, but requires that any stud in an exterior wall or bearing partition bored more than 40 percent be doubled. A large pipe through a wall guarantees doubled studs at exactly the spot you are scanning. Where a plumber over-notched, a steel stud shoe was added to reinforce it, and steel at the stud face reads three times louder than the wood behind it.
Meanwhile copper lines full of water, cast-iron stacks, and PVC drains all run vertically, so they pass the continuity test that the rest of the internet offers as verification.
The working method for a wet wall: look at the pipe runs from the basement or utility side first. Scan in metal mode and map everything metallic before you scan for studs, then disqualify any stud reading that lands on a mapped pipe. For a grab bar in particular, where a failure is a genuine injury, Zircon’s own published advice is to bring in a professional rather than trust a scan, and I agree with them.
Metal Studs, and Telling Them From Wood
There is a clean published test. In normal or deep scan mode the tool indicates a stud whether it is wood or steel, without telling you which. Switch to metal mode and scan the same column top to bottom. Continuous metal indication from floor to ceiling means a steel stud. Intermittent indications mean fasteners in a wooden one.
The no-electronics version is just as good: drag a magnet up the wall. Over a wood stud it grabs at each screw and lets go between them. Over a steel stud it pulls the entire height with no gaps.
Two consequences follow. The 1-1/2 inch width check does not apply, since a steel stud presents a 1-1/4 inch flange. And ordinary wood screws are close to useless in steel framing, so plan on toggle bolts or self-drilling fasteners before you start.
Ceilings, Exterior Walls, and Walls With No Studs
Ceilings are covered in the FAQ below, and the short version is thicker board, texture, and seams that run the wrong way.
Exterior walls are the other reliably frustrating case, and Zircon says so themselves: exterior walls are thicker, and stucco, siding, brick, wire mesh, foil-faced insulation, and even lead paint all interfere with the sensor. Insulation in the cavity muddies the baseline further. The workaround is to find the studs from inside where you can, then transfer the measurements.
Then there are the walls with nothing to find. Drywall on a block or masonry house is fastened to furring strips, typically an inch by an inch and a half, which are shallow, non-structural, and useless as an anchor point. Basement walls furred over foam board are the same. In both cases the real anchor is a masonry fastener into the block. Garage separation walls and party walls run the opposite problem: two layers of five-eighths Type X board is an inch and a quarter of gypsum before you reach framing, which is precisely what deep scan mode exists for, and it means a screw needs to be at least two and a quarter inches long to get a proper inch of bite. Worth knowing before you hang garage storage loaded with paint cans.
What Live Wire Detection Does and Does Not See
Most mid-range finders include an AC detection feature, and it is genuinely worth having as long as you understand its limits. Zircon’s specification is typical: it detects live, unshielded AC wiring up to about two inches deep, and it flags presence within roughly a foot of the sensor rather than pinpointing anything.
That one-foot figure explains the complaint you see constantly, which is that the wire indicator lights up across half the wall. That is the feature working as designed, not a fault.
Here is what it cannot see, and this list is the reason it is a warning system rather than a safety system:
- Any wire deeper than about two inches. Code keeps cable an inch and a quarter back from the stud face where possible, which is already outside a normal scan.
- Wire in metal conduit, which shields the field entirely.
- Wire behind foil-faced insulation, a plywood shear wall, or any metallic covering.
- Any circuit that is switched off. It senses the 60 Hz field, not the copper, so a dead circuit is invisible.
And one inversion worth carrying around: where cable does pass close to a stud face, code requires a steel nail plate at least a sixteenth of an inch thick over it. That plate is a large flat piece of steel sitting right at the stud face, and it will read as a strong metal hit and can pass for a stud edge. The protection is far more detectable than the wire it protects.
Turn the breaker off before you drill anything deep. Every manufacturer says it, and they say it because the feature is not good enough to replace it.
No Stud Finder? Five Methods That Work
- A rare-earth magnet on a string. Drag it slowly across the wall and it will stick to a drywall screw. Two screws in a vertical line is a stud. This is the method most carpenters actually use, and it is genuinely more reliable than a cheap electronic finder.
- Raking light. Lights off, work light held nearly flat to the wall. Fastener dimples and drywall seams appear as shadows. Seams are on framing and repeat every 48 inches.
- The trim nails. Baseboard and casing are nailed into studs. Look along the top edge of the baseboard in raking light and the filled nail holes give you the layout for the entire wall.
- Knocking. Solid over a stud, hollow between. It works on ordinary drywall and it stops working entirely on walls with blown-in or spray foam insulation, which deadens the whole surface.
- An outlet box, with a caveat. Kill the breaker, pull the cover plate, and look through the gap with a screwdriver and a flashlight. A new-work box has a nailing flange against a stud face, so the stud is right there. But an old-work box, the kind used whenever an outlet is added or moved in an existing wall, has plastic wings that clamp against the back of the drywall and is attached to nothing structural at all. This is why the internet’s favourite tip fails so often, and telling the two boxes apart takes about five seconds once you know to look.
What I Actually Carry
Two tools, because they fail differently. A multi-sensor array for the first pass, because reading the full width at once takes my hand speed out of the measurement, and a magnet for confirmation, because a magnet has nothing to be confused by. When both agree, I drill. When they disagree, the wall is telling me something is back there and I find out what before making a hole.
If you are assembling a first kit, a stud finder belongs in the same tier as a level and a tape, not the tier you buy later. A basic hand tool set plus a decent finder covers most of what a house asks of you in the first year, and our new homeowner tool guide lays out the rest in priority order.
The Short Version
Calibrate flat on the wall, away from the stud. Scan from both directions and mark both edges. Read the width: an inch and a half is a stud, three inches is doubled framing, an inch and a quarter is steel. Confirm the hit runs vertically. Then drill a test hole somewhere the baseboard or the bracket will hide it.
That last step is the one people skip, and it is the only one that turns a reading into a fact. Everything else is evidence. A hole an eighth of an inch wide, in a spot nobody will ever see, is the cheapest insurance in home improvement, and it is what stands between a scan and a shelf that stays on the wall.
Cover photo by Charles and Hudson, via Wikimedia Commons, licensed CC BY-SA 2.0.
Frequently Asked Questions
How far apart are wall studs, and how do I use that spacing to find the next one?
Why does my stud finder say there is a stud where there is not one?
Do stud finders work on plaster and lath walls?
How do I find a ceiling joist, and is it different from finding a wall stud?
Can a phone app find a stud?
Related Articles
How to Hang a Shelf: A Contractor's Guide to Every Wall Type
power-tools-workshop
How to Read a Tape Measure (Without Guessing at the Little Lines)
power-tools-workshop
7 Best Cordless Drills of 2026
power-tools-workshop
7 Best Hand Tool Sets of 2026
power-tools-workshop
8 Best Impact Drivers of 2026
power-tools-workshop
About the Reviewer

Jake Morrison, Licensed General Contractor
B.S. Construction Management, Purdue University
Jake Morrison has spent 14 years in residential construction and home renovation before founding DIYRated in 2026. After helping hundreds of homeowners choose the right tools and materials for their projects, he started writing the product guides he wished existed when he was starting out. Jake builds each pick from spec sheets, manuals and verified buyer reviews, and weighs how tools hold up for real owners over marketing claims.