Spring Home Maintenance Checklist: A Contractor's Priority-Order Guide
A licensed GC's field-tested spring maintenance checklist — climate zone timing, sequence-and-priority logic, PSI-by-surface pressure washing, and failure-cost framing.
Updated
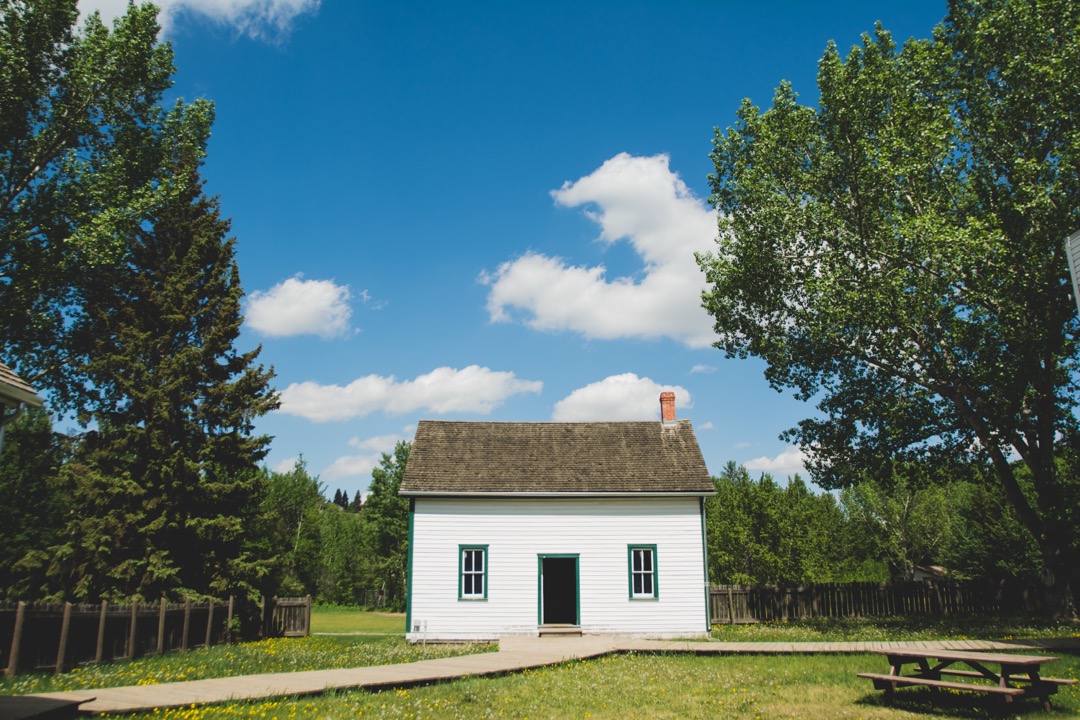
March is when I get the most calls from homeowners discovering what winter did to their house. Late March in the Ohio Valley means the first sustained run of 60-degree days finally lets people look at their property in daylight without a coat — and what they find is a downspout that froze and split, a foundation corner where the soil has shifted toward the house from frost heave, a deck board that flexes underfoot because the joist beneath it spent four months wet, ice dam stains on the upper bedroom ceiling that the homeowner did not notice in February, and a sump pump that has not been tested since last May. The damage was happening all winter, but spring is when it becomes visible. This is the pattern, every year, in every cold-weather zone.
This guide is the actual checklist I hand to clients in early spring — the same sequence I work through on my own house. It is not the sanitized twenty-bullet list you find on Bob Vila or your insurance carrier’s blog. It is a contractor’s prioritized framework: what to do, when to do it based on your climate zone, in what sequence (envelope before mechanical before cosmetic — and skipping the sequence is how homeowners create expensive problems), what is genuinely DIY versus what to hand to a pro with concrete thresholds, and which spring maintenance tasks competitor articles consistently ignore (pressure-washing PSI by surface, soil temperature thresholds for lawn startup, the failure-cost math on deferred grading work). If you follow this end to end, your house will weather the wet season cleanly and run cooler through summer — and the late-summer callbacks I get from people who skipped it will not include yours. This is the spring counterpart to my how to winterize your home guide; together they cover the two pivot points where most expensive home damage either gets prevented or accumulates unnoticed.
When to Start: Climate Zone Timing
The first decision is timing, and timing is climate-dependent. Using the calendar to drive your spring maintenance schedule is how you end up pressure-washing a deck in late March when the wood is still in freeze-thaw cycles, or how you wait until May for an HVAC tune-up and discover every HVAC tech in town is booked through July.
Here is the timing framework I use, anchored to USDA hardiness zones because they correlate well with last-hard-freeze dates and the soil-and-air conditions that determine when spring work can actually proceed:
Zones 3-4 (northern tier — Minnesota, North Dakota, upstate New York, northern New England, Wyoming, Montana, eastern Washington): Real spring maintenance unlocks late April to mid-May, when overnight lows are reliably above 40°F for a full week and the soil has thawed enough to evaluate grading. Before that trigger, you can do interior tasks (attic inspection, detector batteries, air filter swap, dryer vent cleaning), but exterior work — caulk, paint, deck stain, pressure washing, plumbing re-pressurization — needs to wait. The cure chemistry on caulks and stains assumes 50°F minimum surface temperatures, and pressure-washing wood in freeze-thaw conditions drives water into fibers that then expand on the next overnight freeze and split the boards. Schedule HVAC tune-ups in late April; sprinkler startup happens after the last hard freeze date for your specific county.
Zones 5-6 (Midwest, Ohio Valley, mid-Atlantic, lower Great Lakes, southern New England, Pacific Northwest east of the Cascades): Exterior tasks unlock late March to mid-April in most years. You typically get a warm week in mid-March that lets you do the envelope inspection and interior catch-up, then real exterior work proceeds from the first week of April. HVAC tune-up in March or early April — schedule it before the first 75-degree day, after which every HVAC company in town is running a three-day backlog because every homeowner just discovered their AC does not start.
Zones 7-8 (Carolinas, Tennessee Valley, lower mid-Atlantic, Pacific Northwest west of the Cascades, northern California): Most exterior work is realistic early to mid-March. Lawn startup begins as soon as soil temperatures hit the 50-55°F range (cool-season grasses) or 65°F (warm-season grasses), which usually means mid-March to early April. HVAC tune-up by mid-March, because the air conditioning season starts noticeably earlier here than in northern zones.
Zones 9-10 (Gulf Coast, Florida, southern California, Arizona deserts, southern Texas): Your spring maintenance is really late-winter maintenance — February is when you do the property walk and schedule pro service calls. By April you are already in pre-summer cooling-season prep and the heat is closing in. HVAC service calls should be booked by mid-February. Lawn startup for warm-season grasses (St. Augustine, Bermuda, Zoysia) begins as soon as soil temperatures pass 65°F consistently, which can be February in coastal Florida and March in inland Texas.
The pattern most homeowners follow — “I’ll do my spring maintenance the weekend the daffodils bloom” — works in Zone 6 and is too late in Zone 9 and too early in Zone 4. Match your timeline to your zone, set a calendar reminder for the appropriate trigger week, and treat the property walk as the first item that triggers everything else.
Do This Before the First Spring Rain (Week 1)
The week-one tier is the envelope: roof, gutters, foundation grading, downspouts. These are the items with the highest failure-cost per hour of work, and they need to be done before the first heavy spring rain or you discover their failures the hard way.
Walk the property and do the roof inspection from the ground. Grab binoculars and walk the perimeter on a clear day. Look for the six specific failure indicators: missing or lifted shingles (particularly at eaves and ridges where winter wind events lift the corners), shingle granule loss showing as black patches on the roof or excess grit accumulating in gutters and downspouts, cracked or missing flashing around chimneys and plumbing vent stacks, ice dam damage from the winter just past (ceiling stains directly inside the exterior wall on upper floors are the interior tell), sagging anywhere in the roof plane, and the condition of roof valleys (where two planes meet — valleys handle the most water and fail first). If you see any of these, get a roofer out in April or May while the schedule is open. Roof repairs cost three to five times more during peak storm season later in summer when every roofer is double-booked.
Clean the gutters — properly, not the half-job version. Winter accumulates leaves, shingle grit, and ice-dam debris in gutters, and the first heavy spring rain pours all of it through the downspouts in one slug if you do not clean first. The proper cleanout is to scoop debris out by hand (with gloves), then run a hose at full volume through every downspout to confirm flow. Any downspout that backs up needs to be snaked or disassembled at the elbow joint. Check for loose hangers, sagging sections, separated seams, and rusted spike-and-ferrule attachments — fix them now or budget for replacement gutters. While you have leaf blower equipment out for spring yard cleanup, our best cordless leaf blowers roundup covers the homeowner-grade units that handle both leaf cleanup and the gutter debris you scoop out.
Inspect and fix foundation grading. This is the single highest-ROI spring task and the one homeowners consistently skip because it is invisible and unsexy. Walk the perimeter of the foundation. The soil should slope away from the foundation at roughly a quarter-inch per foot for the first six feet — meaning the soil six feet out should be one and a half inches lower than the soil right against the foundation. In practice, every house settles over time and many sections of foundation soil settle toward the house instead of away, creating a reverse-grade condition that funnels water into the basement or crawl space. Fix any reverse-grade section by adding fill soil (one yard of soil costs $30-$60 from a landscape supplier and re-grades the worst section of most homes). Tamp the soil firmly. Avoid mulching directly against the foundation — mulch holds moisture and accelerates exactly the problem you are trying to prevent.
Extend every downspout four to six feet from the foundation. This pairs with the grading work. A downspout that ends at the foundation dumps roof water — which is enormous volume during heavy rain — directly into the soil where you do not want it. Rigid downspout extensions cost $15-$30 each and clip onto existing downspouts in seconds. Flex hose extensions are acceptable as a stopgap but they collapse and disconnect; rigid is the permanent fix. For homes where the downspout discharges onto a sloped lawn or hardscape, splash blocks alone are not sufficient — the water needs to be carried mechanically away from the foundation, either through a buried solid PVC drain extension or through above-ground rigid extensions that empty onto downhill grading.
Look for foundation cracks and evaluate them. Walk the foundation interior (basement or crawl space access) and exterior, and document any cracks you see. Hairline cracks (thinner than a credit card edge) are usually cosmetic and stable — note their location, mark them with a pencil line, and check them next spring to see if they have widened. Cracks wider than an eighth of an inch, horizontal cracks of any width, or stair-step cracks that follow the mortar joints in block foundations are structural concerns and warrant a structural engineer assessment ($300-$600 for a written report) before any repair. Repair work on confirmed-stable cracks runs $400-$1,200 for professional epoxy or polyurethane injection; structural issues run $5,000-$25,000+ for pier or wall anchor systems.
Skipping this section costs: Foundation drainage failure leading to basement seepage and waterproofing ($5,000-$15,000), mold remediation if moisture sits long enough ($3,000-$25,000), unrepaired roof flashing leak through next heavy rain ($2,000-$15,000), structural foundation work delayed five years until a crack becomes a settlement event ($15,000-$50,000+).
Mechanical Systems: HVAC, Plumbing, Electrical
The mechanical tier comes second in the spring sequence — after the envelope is buttoned up but before the cosmetic work begins. These systems have high failure-cost but a slightly longer time-to-damage horizon than the envelope items, which is why they get weeks two and three of the spring schedule.
Schedule the HVAC tune-up before the first 75-degree day. This is the line-item I tell homeowners not to DIY. A licensed HVAC tech checks refrigerant pressures, inspects the condenser and evaporator coils for dirt and damage, tests electrical connections and contactors (which are the most common failure point on residential AC), checks the condensate drain (a clogged condensate drain floods the air handler and ruins ceiling drywall in basement-air-handler installations), and verifies the safety controls. Cost is $150-$300. The reason for the timing urgency: the first warm week of spring is when every homeowner discovers their AC does not start, and the HVAC company schedule fills up immediately. Tune-ups booked in early spring get scheduled in two weeks; the same call after the first heat wave gets scheduled for three weeks out, and meanwhile your house is uncomfortable. Pair the tune-up with a furnace filter swap and stock six replacement filters for the cooling season — our best air filters for the home roundup covers the MERV ratings worth using and the ones that restrict airflow enough to damage the equipment. If you have a smart thermostat program from winter, update it for cooling season schedules; if you do not have one yet, our best smart thermostats roundup covers the units that pay for themselves in the first cooling season through learned setbacks.
Hose bib re-pressurization and pressure-leak test. If you shut off your outdoor spigots at the interior valve last fall (and you should have), turning them back on in spring is a two-step process that catches a freeze-damaged line before it floods the wall cavity. First, walk outside and confirm the spigot handle is in the open position (left over from your fall winterization, where you opened the spigot to let residual water drain). Then walk to the interior shutoff valve and open it slowly — listen for the sound of water rushing into the line and then stopping. Walk back to the spigot. If water flows out smoothly when you crank it on, you are good. If water sprays inside the wall (you will hear it, or see water emerging from the siding or sill plate area), you have a freeze-damaged supply line and need to shut the interior valve off again immediately and call a plumber. Catching this on a sunny April morning when a plumber can come tomorrow is the entire point — discovering the same damage later, after the spigot has been running for an hour, means six inches of water in the basement.
Test the sump pump on a dry day, before you need it. This is the easiest spring test and the most-skipped. Walk to the sump pit, pour a five-gallon bucket of water in, and confirm the pump kicks on, evacuates the water, and shuts off cleanly. If it does not start, the pump is dead and needs replacement (a typical residential sump pump runs $200-$500 plus $200-$400 installation). If it runs but does not evacuate water, the check valve has failed. If it cycles on and off rapidly, the float switch is hung up. If you have a finished basement and a sump pump older than seven years, also install a battery backup — primary pumps fail during the exact storm events that cause power outages, and a $300-$600 battery backup pump is what stands between a clean basement and $30,000 in flooding damage when the power goes out during a four-inch rain.
Walk the electrical panel and outdoor receptacles. Spring storms put strain on outdoor electrical, and winter snow load can damage service mast connections. Open the main electrical panel cover and look for any signs of moisture intrusion, rust on breakers, or burned discoloration around terminals — any of these warrant an electrician call before they become a fire risk. Test every outdoor GFCI receptacle by pressing the test button (the breaker should trip) and reset button (power should return). GFCIs older than ten years should be replaced regardless — the protection circuit degrades with age. Inspect the weatherproof in-use covers on outdoor receptacles for cracks; if a cover lets water reach the receptacle face, that is a shock hazard and a $20 replacement cover fixes it permanently.
Check the water heater. Spring is when most homeowners notice mineral buildup symptoms (longer recovery time, rumbling sounds during heating) but the right time to flush a water heater is annually regardless. Connect a hose to the drain valve at the base of the tank, run it to a floor drain or outside, shut off the water supply to the heater, open the drain, and flush until water runs clear. If the drain valve will not close cleanly after the flush (common on water heaters over five years old), shut off cold water and replace the drain valve with a quality brass replacement before it leaks. Also check the temperature/pressure relief valve discharge tube — it should not show any signs of weeping water, which would indicate a failing T/P valve and an active safety risk.
Skipping this section costs: Compressor failure during first heat wave ($1,500-$3,500 plus a week without cooling), freeze-damaged supply line discovered the hard way ($5,000-$30,000 in interior damage), sump pump failure during spring storm in a finished basement ($15,000-$50,000), water heater catastrophic failure from undetected T/P valve issue (insurance event with $5,000-$20,000 in damage).
Exterior Surfaces — Sequence Matters
The cosmetic and exterior surface tier is weeks two and three of the spring schedule, after the envelope and mechanical work is done. The sequence within this tier matters: top-down, then bottom-up, and surface-appropriate technique for each material.
Pressure washing — the surface-by-surface protocol. I covered the PSI ranges in the buyer’s guide, but the sequence on a typical house is: gutters and fascia first (top-down), then siding, then walkways and driveways, then deck last. Working top-down means debris and runoff flows onto surfaces you have not cleaned yet, which is the right order. Working bottom-up means you re-deposit grit on already-clean lower surfaces. The other sequence rule: pressure-wash before you stain or paint anything, allow at least 48 hours of dry weather for surfaces to fully dry before sealing them. The most common destruction patterns I see: vinyl siding seam intrusion from pointing the wand upward at horizontal seams (always angle slightly downward); deck fiber lift from too-high PSI or too-close standoff distance; mortar joint erosion on brick from direct-hit PSI on the mortar instead of the brick faces; and painted siding stripped of paint from PSI that would have been fine on bare wood but is wrong for finish-coated surfaces. For multi-story homes, walking a ladder while operating a pressure wand is a fall hazard that warrants either a pro or telescoping wand attachments rated for the extension you need.
Deck inspection and refinishing. Walk every board and check every joist with a flathead screwdriver — push the tip into the wood at the ledger board (the board attaching the deck to the house), at any joist hanger contact points, and at every post base. Wood that the screwdriver pushes into with light pressure is rotting and needs replacement. Pay particular attention to the ledger board attachment — a failing ledger is the cause of catastrophic deck collapses, and the warning signs (rusted lag bolts, separating ledger flashing, soft wood at the bolt holes) are visible if you look for them. If the deck passes the structural check, the surface work is straightforward: clean (pressure wash at 500-1,200 PSI per the surface guide), allow 48 hours of dry weather, sand any raised fibers, and apply either stain or sealer per your product chemistry. For deck-staining projects on larger decks, our best paint sprayers roundup covers the units that handle stain viscosities — manual brush-and-roller work on a 400-square-foot deck is an eight-to-twelve-hour job, while a sprayer plus back-brushing cuts it to three to four hours and lays product more uniformly.
Siding inspection and exterior caulk touch-up. Walk the perimeter of the house and inspect the siding for damage: cracked or missing pieces, gaps in lap or panel joints, separated caulk lines at trim corners, and any peeling paint on painted surfaces. Replace failed caulk with high-grade polyurethane (15-20 year service life) rather than the bargain siliconized acrylic that fails in two summers. Pay attention to the joints where dissimilar materials meet — siding to trim, trim to window jamb, siding to foundation, around exterior penetrations (hose bibs, dryer vents, electrical conduit) — these are the failure points where water finds its way into the wall cavity. If you have peeling paint on any section, scrape it back to the sound surface, prime, and repaint — leaving peeling paint to spread doubles the repair scope by next year. For larger painting projects, our best interior paint roundup covers product chemistry that translates to exterior decisions (the binders that perform on interior trim are the same families that perform on exterior surfaces with the right additives).
Weatherstripping replacement. Walk to every exterior door, close it, and run a hand around the perimeter looking for air movement. Replace any compressed, cracked, or missing weatherstripping. The door sweep at the bottom is the most commonly failed component — replace with a new sweep ($15-$30) rather than bending the old one back to shape. For sliding doors and casement windows, the weatherstrip lives in tracks and gaskets that wear differently than door perimeter strips — replace where you see compression set or daylight.
Skipping this section costs: Vinyl siding seam intrusion leading to wall cavity mildew ($3,000-$10,000 in remediation), deck collapse from undetected ledger rot ($3,000-$15,000 deck rebuild plus medical liability), exterior caulk failure leading to water entry at penetrations ($2,000-$8,000 in interior damage and wood rot), peeling paint that spreads ($2,000-$5,000 in expanded repaint scope).
Lawn and Landscape Startup
Lawn and landscape work is the most timing-sensitive category in the spring checklist, and the timing trigger is soil temperature — not air temperature, not the calendar, not when your neighbor starts mowing.
Soil temperature thresholds drive everything. Cool-season grasses (Kentucky bluegrass, perennial ryegrass, tall fescue, fine fescues) wake up and benefit from fertilization and overseeding when soil temperatures hit 50-55°F at four-inch depth. Warm-season grasses (Bermuda, Zoysia, St. Augustine, Centipede, Bahia) wake up at 65°F soil temperature minimum. Buy a soil thermometer ($10-$20) and check soil temperature at four-inch depth on the north side of your property (the slowest-warming spot). Acting too early — fertilizing a cool-season lawn when soil is 40°F — wastes nitrogen that the grass cannot uptake, runs off into local watersheds, and contributes to algae blooms downstream. Acting too late means weeds (which germinate at lower soil temperatures than turfgrass) get established before your grass can compete.
Sharpen the mower blade before the first cut. A dull mower blade tears grass instead of cutting it, which leaves frayed brown blade tips and creates entry points for fungal diseases. Sharpening a blade is a fifteen-minute job with a bench grinder or angle grinder — remove the blade, grind to a 30-degree edge angle, balance the blade on a nail before reinstalling. If you do not have grinding equipment, drop the blade at a hardware store sharpening service for $5-$15. For homeowners running cordless electric mowers, the same blade sharpening applies — see our best lawn mowers roundup for the cordless models that simplify spring startup (no carburetor cleaning, no fuel stabilizer concerns, no oil change). For gas mowers, the spring startup is more involved: drain last fall’s stale fuel if you did not use stabilizer, change the oil, replace the spark plug if the engine is hard to start, replace the air filter, and check the deck for caked grass from last season.
Tree assessment after winter. Walk every tree on the property and look for: broken or hanging limbs from winter storm damage (widow-makers — limbs that broke but are still hung up in the canopy), splits or cracks in major branches or the trunk, leaning or tilted trees that were upright last fall (suggesting root failure from saturated winter soil), and damage from rodents or deer at the trunk base (girdling damage can kill a tree). Any limb hanging over the house, garage, or service drop that, if it fell wrong, could hit the structure or wires is a tree-service job — do not climb a ladder with a chainsaw to handle widow-makers. Tree service for limb removal runs $300-$1,500 depending on size and access; the alternative (limb falls and breaches your roof) is $8,000-$50,000.
Garden bed prep and mulch. Cut back perennials, remove dead annual debris, and lightly turn the top inch of soil to break the winter crust. Apply two to three inches of mulch to garden beds — but pull it back two to three inches from foundation walls, plant stems, and tree trunks. Mulch piled against the foundation accelerates moisture problems (the exact thing your spring grading work is trying to solve), and mulch piled against tree trunks creates rot pockets that kill the tree slowly. The bagged hardwood mulch from big-box stores is fine for most applications; the dyed black or red mulch is purely cosmetic and the dye washes out within one growing season.
Irrigation system startup if applicable. If you have an in-ground sprinkler system that was professionally blown out last fall, the spring startup is straightforward: turn on the main supply slowly (slowly is the key word — fast pressurization shocks the system and damages valves), then walk through each zone manually and watch for broken heads, leaks, or non-functioning zones. Replace any damaged sprinkler heads ($5-$20 each) and check the controller battery backup. The professional irrigation startup service runs $75-$200 and is reasonable insurance if your system is complex or if you do not want to babysit the slow pressurization.
Skipping this section costs: Tree limb failure event ($8,000-$50,000 if a major limb hits the house), turfgrass disease from dull mower blade ($300-$1,500 in lawn rehabilitation), early-season fertilizer runoff (regulatory and environmental cost, plus wasted product), root rot on plants mulched directly against trunks (replacement of mature landscape plants at $200-$2,000 each).
Interior Quick-Wins
The interior tier in spring maintenance is short but high-value — most of the items take minutes individually but compound into real safety and efficiency benefits.
Attic inspection — winter’s tell-all. Walk into the attic with a flashlight and look for: rodent and insect evidence (droppings, gnawed insulation, chewed wire sheathing, nests), water staining on the roof deck underside (which indicates a roof leak you may not have noticed), ice dam staining showing as discoloration along the eaves on the roof deck interior, and any compressed or displaced insulation. Rodent activity in the attic warrants a pest control call ($150-$400) and entry-point sealing — mice that wintered in your attic will return next year unless the entry holes are closed with hardware cloth and sealant. Roof deck water staining warrants the same call to a roofer that the ground-level roof inspection might have generated; finding the interior tell while the exterior shows no obvious damage means a small slow leak that is still cheap to fix.
Dryer vent cleaning. Disconnect the dryer vent from the back of the dryer and from the exterior wall cap, and clean lint from both the dryer transition hose and the rigid duct that runs through the wall. Use a dryer vent brush kit ($15-$30) for the rigid duct sections. A clogged dryer vent is the leading cause of dryer-related house fires (about 15,000 per year) and also kills dryer efficiency — clothes that take two cycles to dry are a clogged-vent symptom. While the dryer is pulled out, vacuum the area behind and beneath it; lint accumulates back there too.
Detector battery rotation and test. Walk to every smoke and CO detector. Press the test button. Replace any battery on a battery-powered unit. Replace any detector older than seven years (smoke) or ten years (CO) regardless of whether it still tests — sensors degrade silently. This is the spring counterpart to the fall battery change at daylight-saving — twice a year on detectors is the right cadence.
Air filter swap and bathroom fan check. Replace the HVAC filter (which the HVAC tech may have done during the tune-up, but if not, do it now) and stock six spares for the cooling season. While you are thinking about indoor air, also test every bathroom exhaust fan — run it for a few minutes and verify it pulls air (hold a tissue near the grille — it should be pulled toward the fan, not just flutter). Bath fans that no longer pull air are usually disconnected from the duct (a common attic problem where the duct popped off the fan housing), and disconnected bath fans dump moist air into the attic instead of outside, which causes mold and rot.
Run every faucet and check every drain. Walk the house and run cold and hot water at every faucet — verify pressure, look for slow drains, listen for hammering in the pipes. Slow drains caught now are a $5 bottle of enzymatic drain cleaner; left to fully clog, they become a plumber service call. Hammering pipes (water hammer) on faucet shutoff is a sign of failing air chambers or pressure-reducing valve issues and warrants a plumber assessment.
Reverse ceiling fans to counterclockwise (medium-high speed). Looking up, the blades should rotate counterclockwise in spring and summer, which pulls cool air down into the room. The reverse switch is on the fan motor housing — flip it from winter (clockwise) to summer (counterclockwise) position. Free, takes thirty seconds, makes rooms feel several degrees cooler at the same thermostat setting.
Skipping this section costs: Dryer vent fire ($50,000-$200,000+ structural loss potential), undetected attic rodent damage to wiring (electrical fire risk, replacement insulation $1,500-$5,000), unaddressed roof leak compounding through summer ($3,000-$15,000 in interior damage), failed detector during an actual fire or CO event (medical and structural cost).
DIY vs. Call a Pro: Quick Reference
The right division of labor depends on the cost-of-failure for each task, not on which is cheaper to delegate.
DIY confidently — failure costs nothing meaningful:
- Property walk and ground-level roof inspection with binoculars
- Gutter cleaning on single-story homes with a stable ladder
- Downspout extension installation
- Foundation grading touch-up with bags of fill soil
- Hose bib pressure test and slow re-pressurization
- Sump pump bucket test
- Mower blade sharpening and basic mower spring service
- Detector battery rotation and air filter swap
- Bathroom exhaust fan check
- Ceiling fan reversal
- Soil temperature measurement and timing-based lawn startup
- Garden bed prep and mulching
- Exterior caulk touch-up below ground-floor window height
DIY situationally — depends on your experience:
- Pressure washing (PSI-by-surface knowledge is mandatory; vinyl seam intrusion and deck fiber lift are the common failures)
- Deck inspection and refinishing (structural assessment requires knowing what to look for at the ledger)
- Attic inspection (pest evidence recognition takes some learning)
- Exterior painting on multi-story sections
- Sprinkler system startup if you have a simple system and the patience for slow pressurization
- Foundation crack documentation (DIY) and minor crack injection (DIY-able on stable hairline cracks; pro on anything wider than an eighth of an inch)
- Water heater flush (DIY) but drain valve replacement (situational based on plumbing experience)
Always pro — failure costs are unacceptable:
- Roof work above the first story (fall risk plus shingle work expertise)
- Roof pitch over 6:12 regardless of story height
- HVAC tune-up and refrigerant work
- Foundation cracks wider than an eighth of an inch, or any horizontal or stair-step cracks
- Structural deck rebuild or ledger replacement
- Tree limb work above twenty-five feet or near power lines
- Sprinkler system repair on complex systems with multiple zones or backflow preventer issues
- Sump pump replacement if your basement is finished
- Battery-backup sump pump installation (requires GFCI circuit work)
- Electrical panel work or sub-panel troubleshooting
- Chimney work of any kind
- Gas line inspection at hose bibs, grills, or pool heaters
- Pest remediation involving wildlife (raccoons, squirrels, bats) requires licensed wildlife operators in most states
The financial logic: pay $150-$300 for an HVAC tune-up to avoid a missed condensate drain clog that floods the air handler; pay $400-$800 for foundation crack injection by a pro to avoid $15,000 in basement waterproofing two years later; pay $300-$1,500 for tree limb removal to avoid the $8,000-$50,000 cost of the limb breaching the roof. The math always favors paying the pro for high-failure-cost tasks.
Final Walk-Through Checklist
The weekend you consider spring maintenance done, walk the property with this list. If any item is unchecked, fix it before the spring storm season peaks.
Envelope (Week 1):
- Roof inspected from ground; any flagged issues scheduled with a roofer
- Gutters cleaned; downspouts flowing freely
- Foundation grading checked; reverse-grade sections corrected
- Every downspout extended four to six feet from foundation
- Foundation cracks documented; any over an eighth of an inch scheduled with a pro
- Attic inspected for winter pest evidence and ice dam staining
Mechanical (Weeks 2-3):
- HVAC tune-up complete (scheduled before first warm week)
- HVAC filter replaced; six spares stocked
- Hose bib re-pressurized with slow open at interior valve; no leaks at spigot
- Sump pump tested with five-gallon bucket; primary and battery backup both functional
- Outdoor GFCI receptacles tested; weatherproof covers inspected
- Electrical panel inspected for moisture, rust, or burned discoloration
- Water heater flushed; T/P valve discharge tube checked
- Smart thermostat cooling schedule programmed
Exterior surfaces (Weeks 2-3):
- Pressure washing done top-down with correct PSI by surface
- Deck structurally inspected (ledger, joists, posts); refinishing complete if needed
- Exterior caulk touched up at all dissimilar-material joints and penetrations
- Peeling paint scraped, primed, and repainted on any failed sections
- Door weatherstripping inspected; sweeps replaced where compressed
Lawn and landscape (Week 3):
- Soil temperature measured at four-inch depth
- Mower blade sharpened or replaced
- Gas mower serviced or cordless mower battery cycled
- Every tree assessed for storm damage and widow-makers
- Garden beds prepped; mulch applied with proper standoff from foundation, trunks, and stems
- Irrigation system started slowly (if applicable); every zone tested
Interior:
- Dryer vent cleaned (transition hose and rigid duct)
- Every smoke and CO detector tested; batteries replaced; units within service life
- Every bathroom exhaust fan tested with tissue
- Every faucet and drain run for pressure, drainage, and water hammer
- Ceiling fans reversed to counterclockwise for summer
Pro service calls completed:
- HVAC tune-up
- Sprinkler startup if complex system
- Roofer for any flagged issues
- Chimney sweep if you burned wood last winter
- Structural engineer for any concerning foundation cracks
If every box is checked, your house is genuinely spring-ready and prepared for the storm-and-heat-and-storm cycle that defines summer in most U.S. climate zones. The recurring annual list shrinks every year if you also chip away at the one-time improvements (rigid downspout extensions, permanent foundation grade correction, gutter guards, high-grade polyurethane caulk replacement, battery-backup sump pump, smart thermostat, sealed-driveway maintenance), and after about three to five years of doing it right, spring maintenance becomes a two-weekend task instead of a four-weekend ordeal.
The homes that develop expensive deferred-maintenance lists are not the ones that got hit by bad luck — they are the ones whose owners skipped the envelope-first sequence, used the calendar instead of climate zone timing, pressure-washed at wrong PSI for the surface, and treated foundation grading as something to deal with later. The homes that age well are the ones whose owners worked through this list deliberately every spring, made the one-time investments where they had the highest payback, paid the pro for high-failure-cost tasks, and treated the recurring annual list as non-negotiable. Spend the three weekends in spring. The math works out every time — and the September callbacks I get from homeowners who skipped these steps will not include yours.
Frequently Asked Questions
When should I start spring home maintenance?
What spring maintenance task has the highest return on investment?
Should I pressure wash my house myself or hire someone?
What should I look for during my spring roof inspection?
How long does spring home maintenance actually take?
Related Articles
About the Reviewer

Jake Morrison, Licensed General Contractor
B.S. Construction Management, Purdue University
Jake Morrison has spent 14 years in residential construction and home renovation before founding DIYRated in 2026. After helping hundreds of homeowners choose the right tools and materials for their projects, he started writing the product guides he wished existed when he was starting out. Jake tests every major product recommendation in his workshop in Indianapolis and focuses on real-world performance over spec-sheet marketing.